.jpg)
 KTM 450 EXC Second Rebuild

So 2011 ended on a high with me getting 15th in the Hafren Rally capped off by my first overall win in the CHEC hare & hound race series which in itself secured me 2nd overall in the series. It was this last race that took its toll on my bike, with a lot of damage inflicted on the bike with bits getting bent or broken. It was this wear and tear that prompted me to go for the full restoration re-build that I never quite achieved fully the last time I tarted up the exc.
The Stripdown
(noting damage + wear n tear)
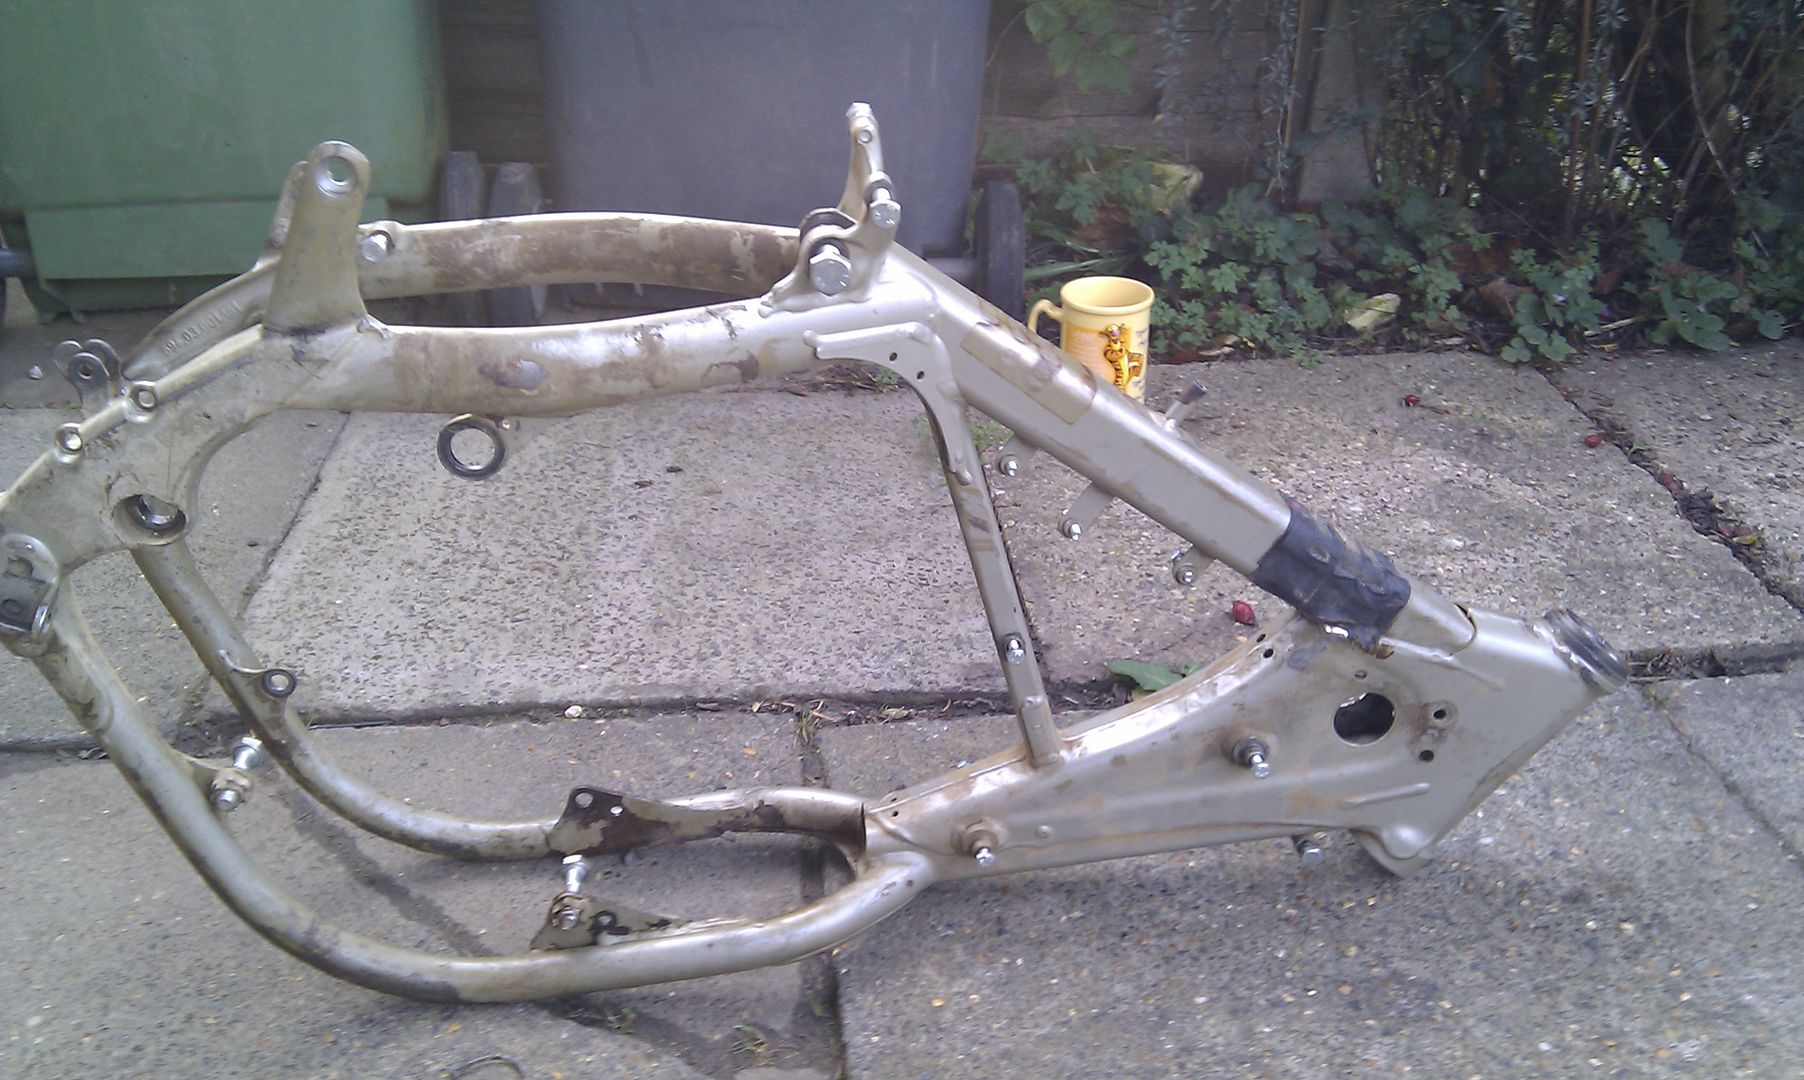
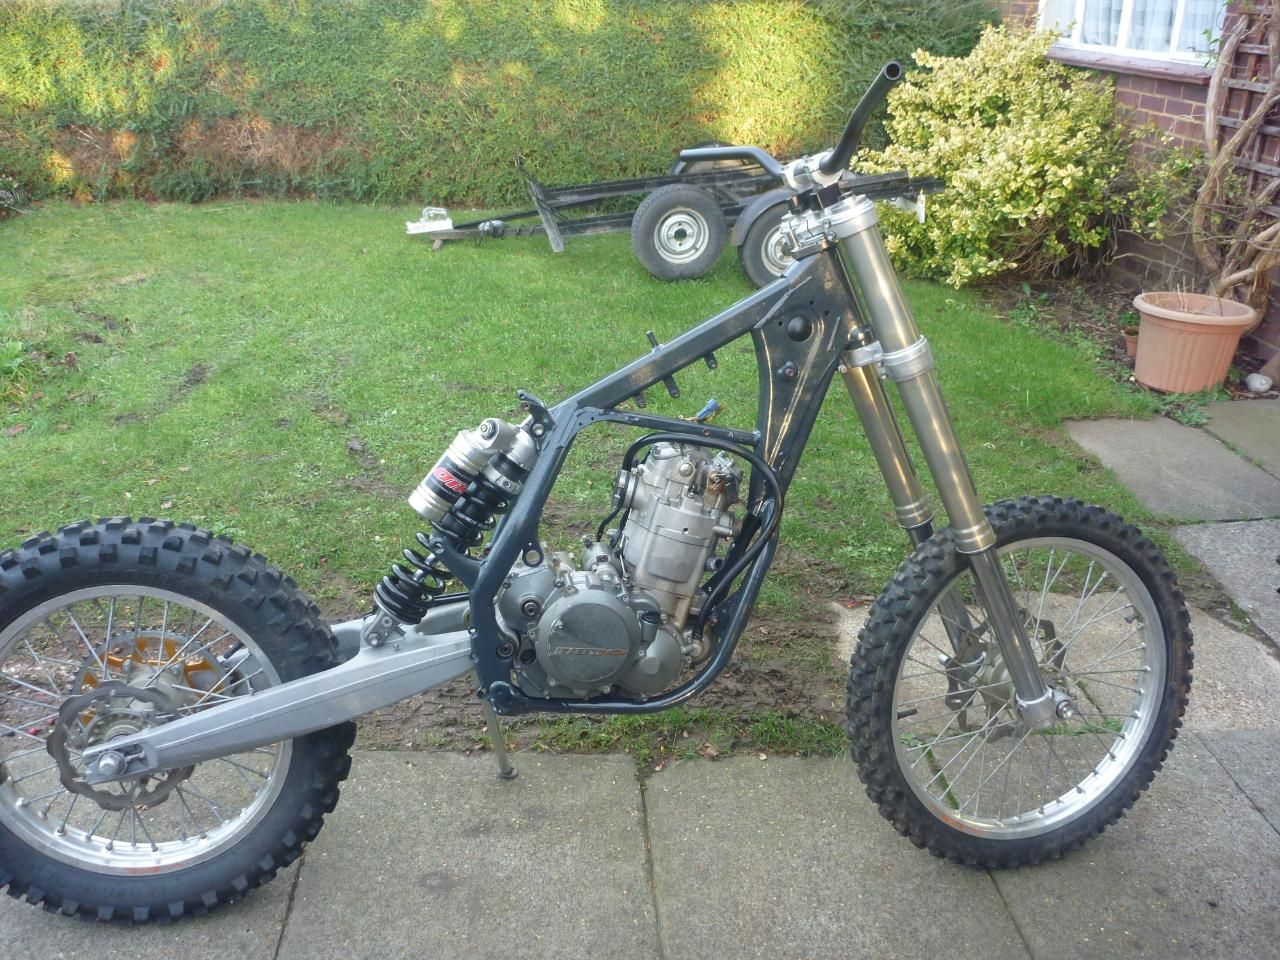
the sorry state of the frame
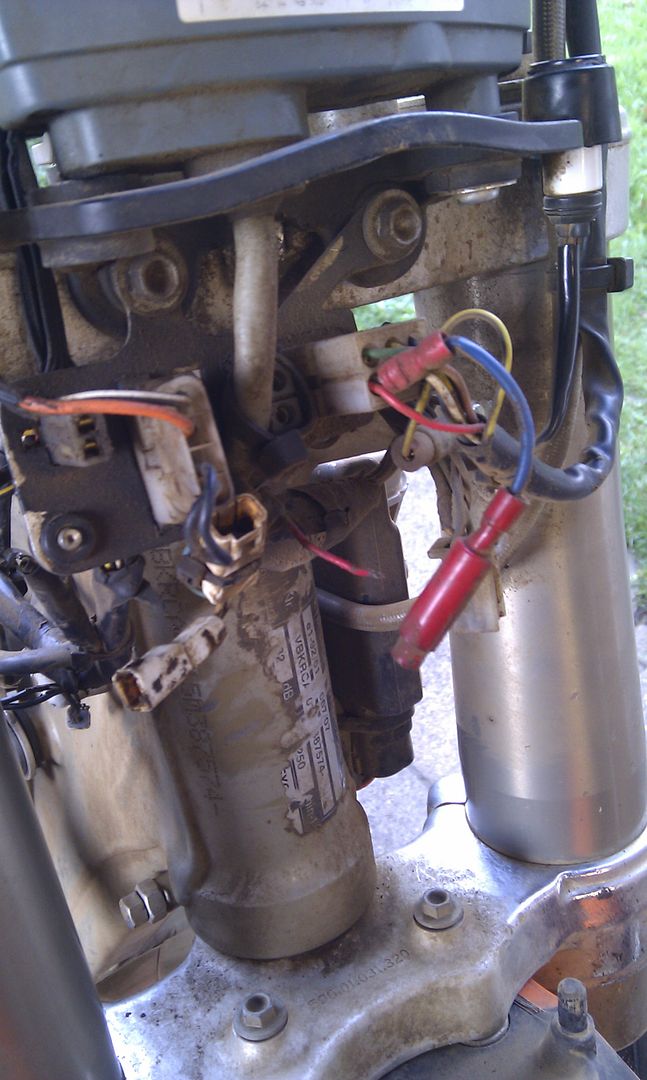
wiring is also a poor state...... after several broken wires and repairs it's looking crap!
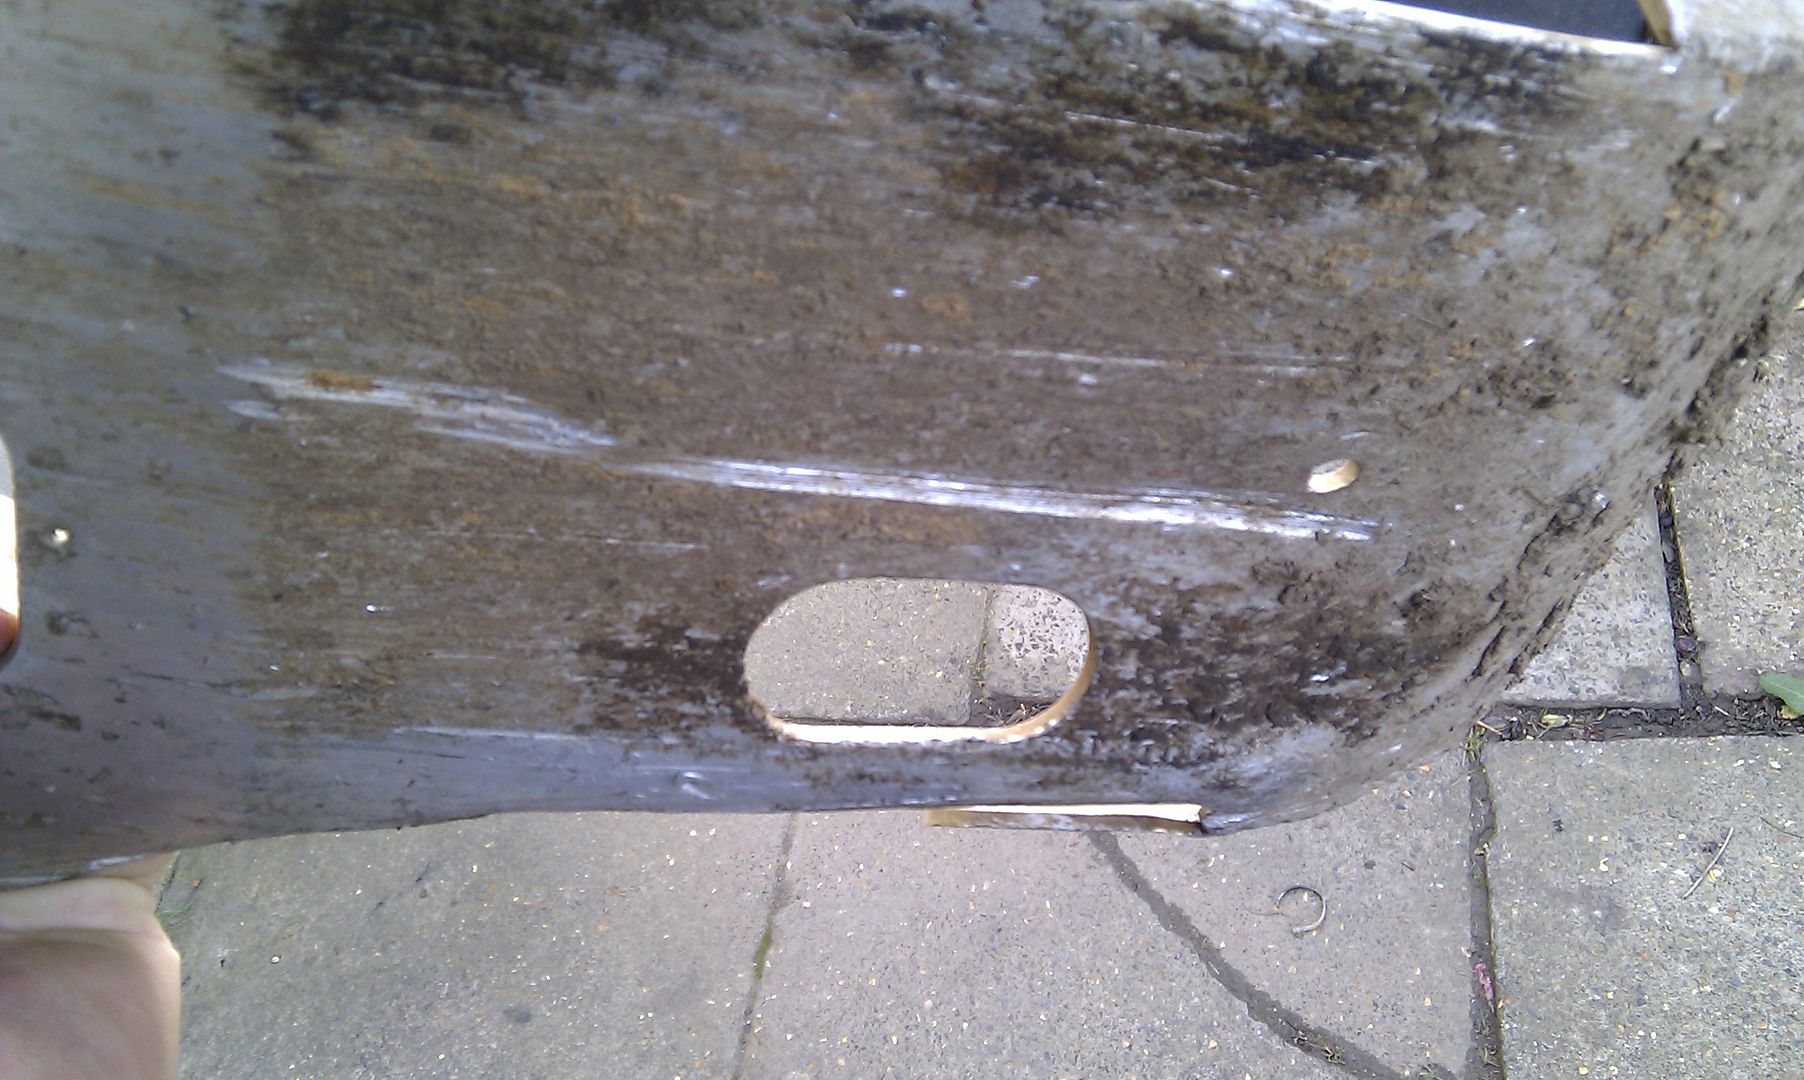
last race scars. you can't see it in this photo but the whole skid plate was bent inwards by about 1cm
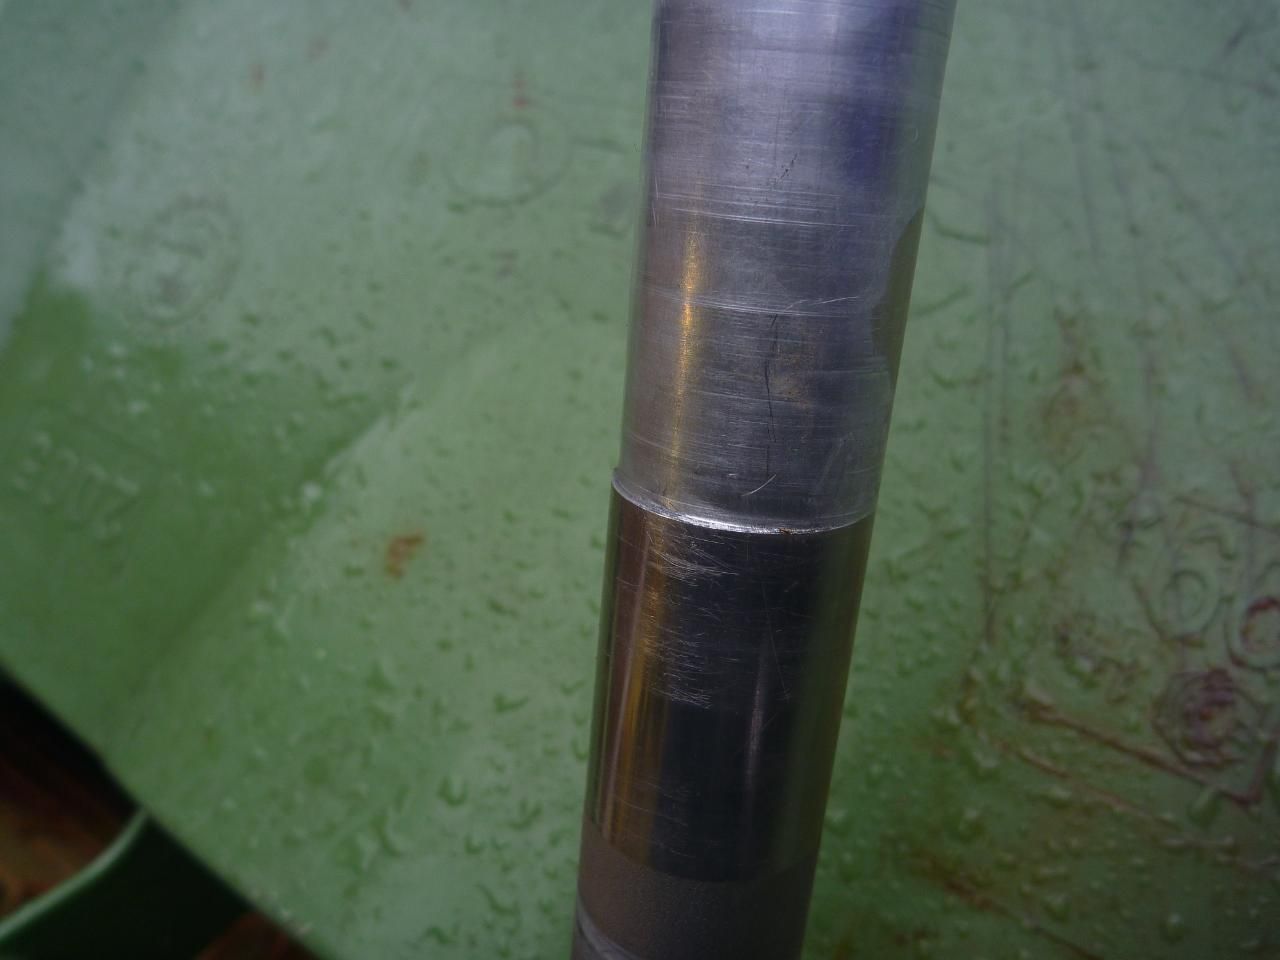
handlebars badly worn by the throttle twist grip
So first of all I had to strip
the bike down to get the frame powder coated. This is a fairly easy job
to do as it’s just a case off undoing everything and chucking it
into a heap in the corner of the garage. But seeing as I want to be able
to find things again, I opted for the slightly slower but much more organised
option of putting different parts into little plastic bags and parts bins.
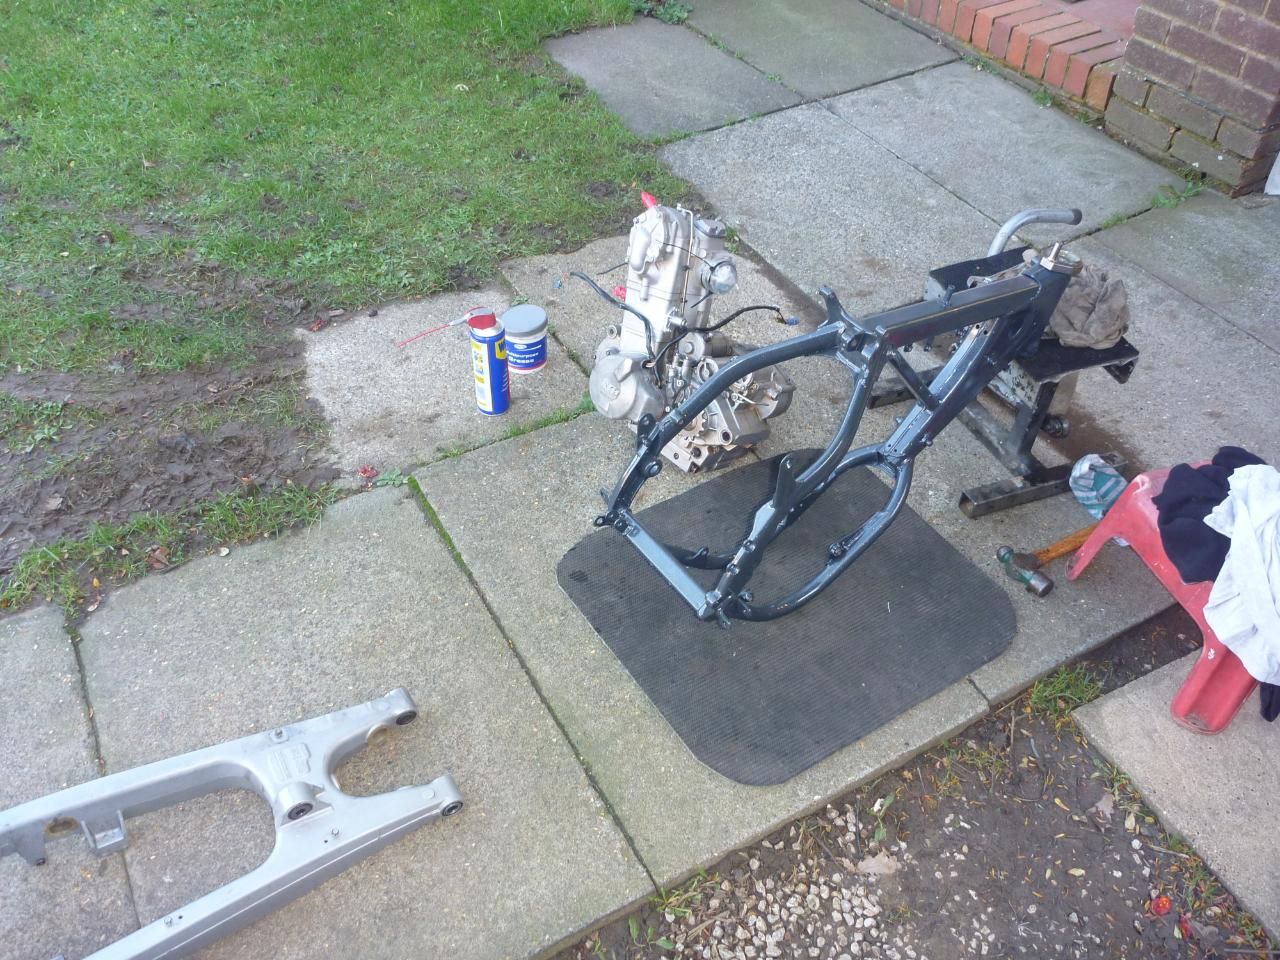
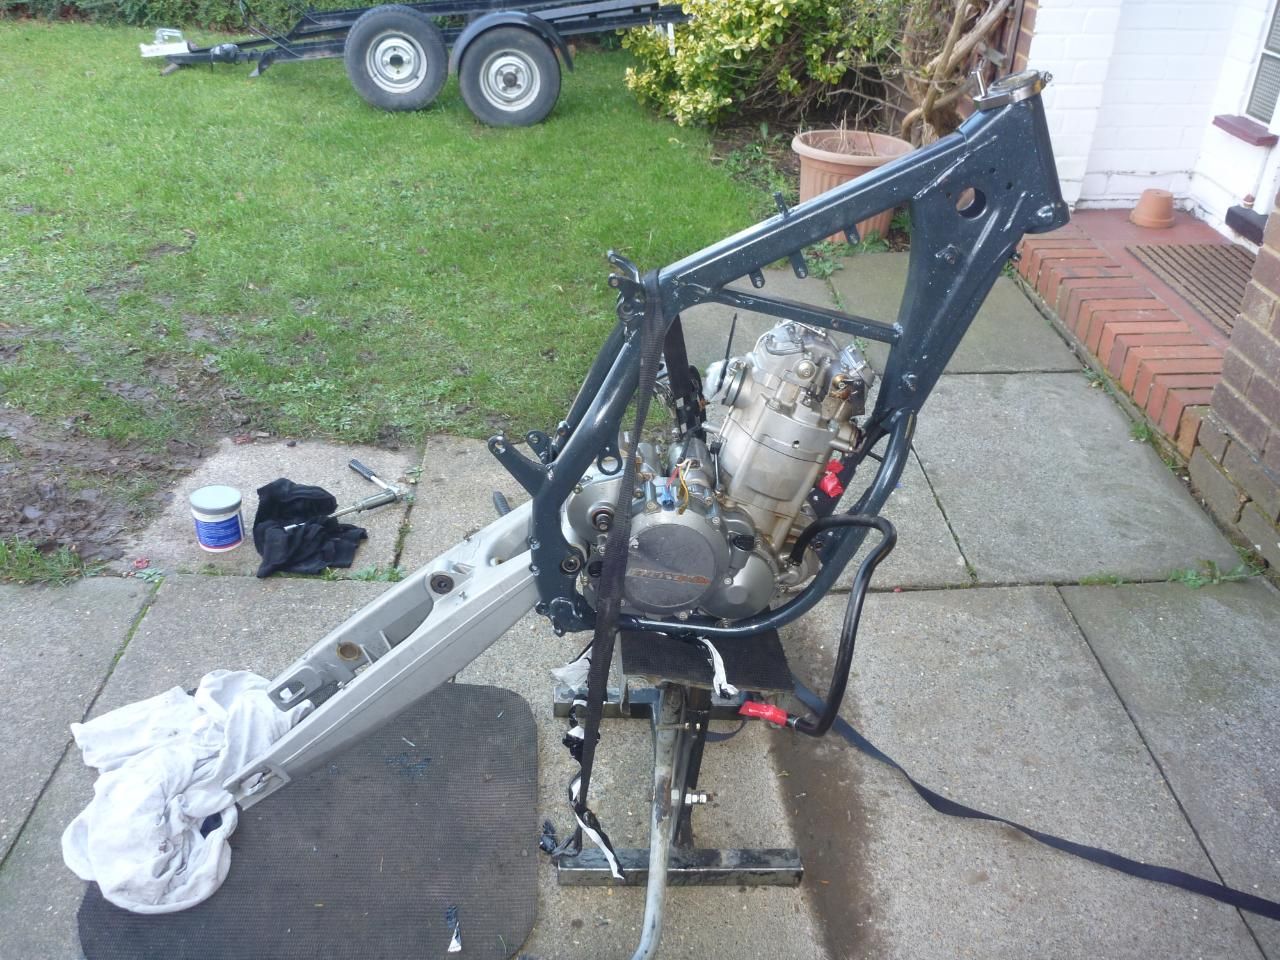
The plan was to strip down the whole bike, bodywork and sub-frame, then
to pull the engine out leaving just the frame and front/rear ends - but
KTM decided to scupper that idea by running the swingarm mounting bolt
through the engine case. This meant I had to take off the swingarm first.
Trying to do that without taking the front end off the bike would have
made it very unstable, so in the end I had just the engine and the frame
left on the garage floor. The engine was a little tricky to get out with
the frame not being held down by anything, and I could have done with
and extra pair of hands.

many thanks to the KTM centre in Hemel for their help
So now I had to decide what colour to have the frame coated. Most popular
is the current trend of going orange as per the latest models. I was going
to opt for the ktm orange look, until I noticed just how much the dirt
shows up in the nooks and crannies. Orange was out of the running, so
I considered black, but that is kind of a boring colour, so in the end
I decided on a dark gray, but with a twist. While I was surfing the net
I found a pic of a mtb frame done in gray with a clear coat blown over
the top with some fleck in it. This gave the powder coat a metallic effect
that looked simply fantastic. My mind was made up, I was going to see
if I could get the same effect. I prepped the frame by fitting a non ktm
industrial bolt into every thread on the frame. I left the headrace bearing
cups in place as I was going to replace them anyway and it would protect
the bearing surface.
Powder coating
![]()
A bit of searching on the net for companies I found a place in Berkhamstead
that looked like it could do it judging from its website. After a chat
on the phone I loaded the car with the frame and paid them a visit. Once
there I picked out a colour from the chart and discussed the effect I
was after with the clear coat and fleck. I left the frame there and I
was given a lead time of one week for completion. When discussing the
colour I said that I was after a gray so dark that it would look near
black but would glint gray in the sunlight with the clear coat and fleck.
The next day I started getting worried I’d picked out too dark a
colour. For a while I considered calling the company up but in the end
I left it and hoped for the best. Picking the frame up in a week or so
I was relieved to see that the colour turned out to be just right. Whether
he used the same one I’d picked out or the nearest thing in the
store room I don’t know, but it was a lot lighter than the colour
swatch I’d looked at. I can only assume the clear coat and fleck
lightened the colour somewhat, so by a happy accident I ended up with
what I wanted and I’m sure (for now) it’s the only KTM with
metallic gray frame with 70’s bling! Unfortunately xmas and cold
damp weather put a stop to any quick re-build plans I had, but at least
it gave the coating a nice long time to harden off in a warm dry house.
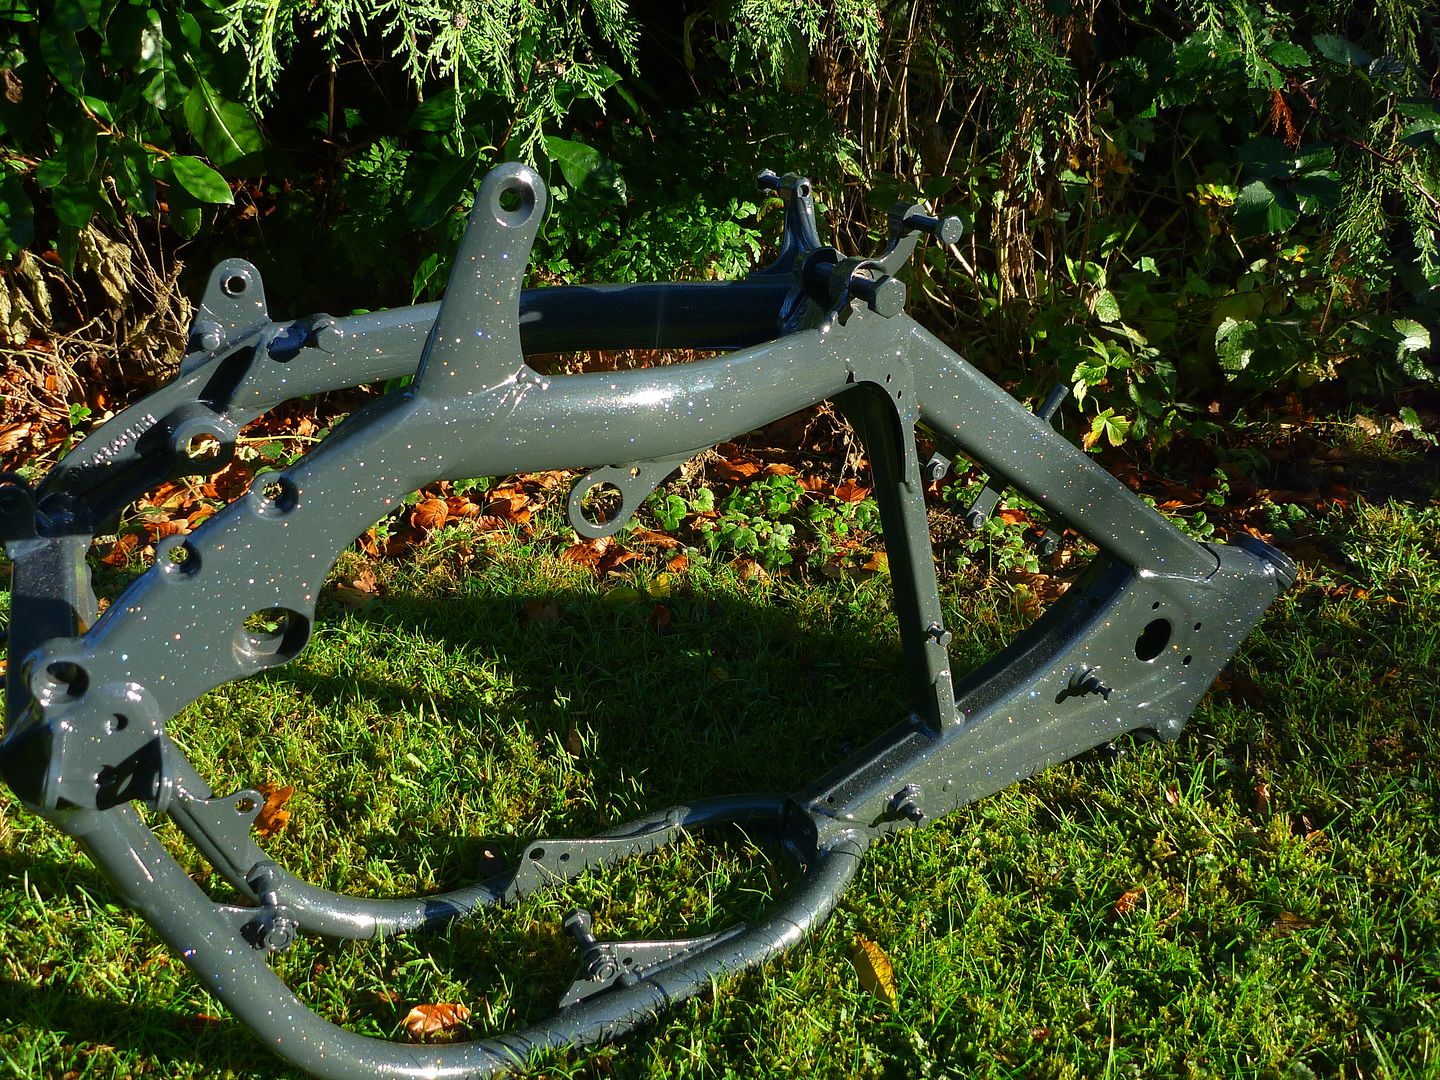
bling bling!
The shopping List Grows!
While stripping the bike down I’d made note of the things that should
really be replaced and some others that would be ‘nice to do’.
So apart from new plastics all round I had an ever growing list of parts
to buy. Obviously I needed a new rear brake disc as that was bent first
time out at the Tring race. New hand guard plastics as well for the same
reason.
I’d been patching up the ktm’s wiring loam for a while and
I thought it would be good to replace that as it would be tragic if one
small broken wire stopped a race. I also noted that the handlebars were
quite worn by the throttle grip. The plastic had worn about a quarter
of the thickness of the bars so a new set of rentals were added to the
list too. I’m no lightweight and the thought of having a bar snap
after a heavy handing didn’t fill me with confidence to carry on
using them. I’d also pock marked the bars where the acerbis hand
guard brackets clamped on, as they were forever moving, but as I was now
using Cycra guards they clamped on in a much better way, so the old pockmarks
looked crap.
During the strip down and clean up I noticed a very small amount of rear
brake seal sticking out so one of those was added to the list, as well
as a new brake piston and new wear plates too. Obviously the new bodywork
would be going on but I never liked the look of the 2005 headlight sitting
a little odd on the 2009 front mudguard I had fitted. So the order was
increased to include a new headlight and surround from a 2009 model bike.
While I was at it I also added a new number plate hanger as they are less
than a tener and the mounting holes on mine had opened up massively.
During a trip to the dirt bike show I picked up some orange silicon hoses
for the bike. One, as they look good and two, because one of the standard
hoses was starting to split. While I was on the orange bling run I bought
some orange carb breath hose as well so I was all ready to start the re-build.
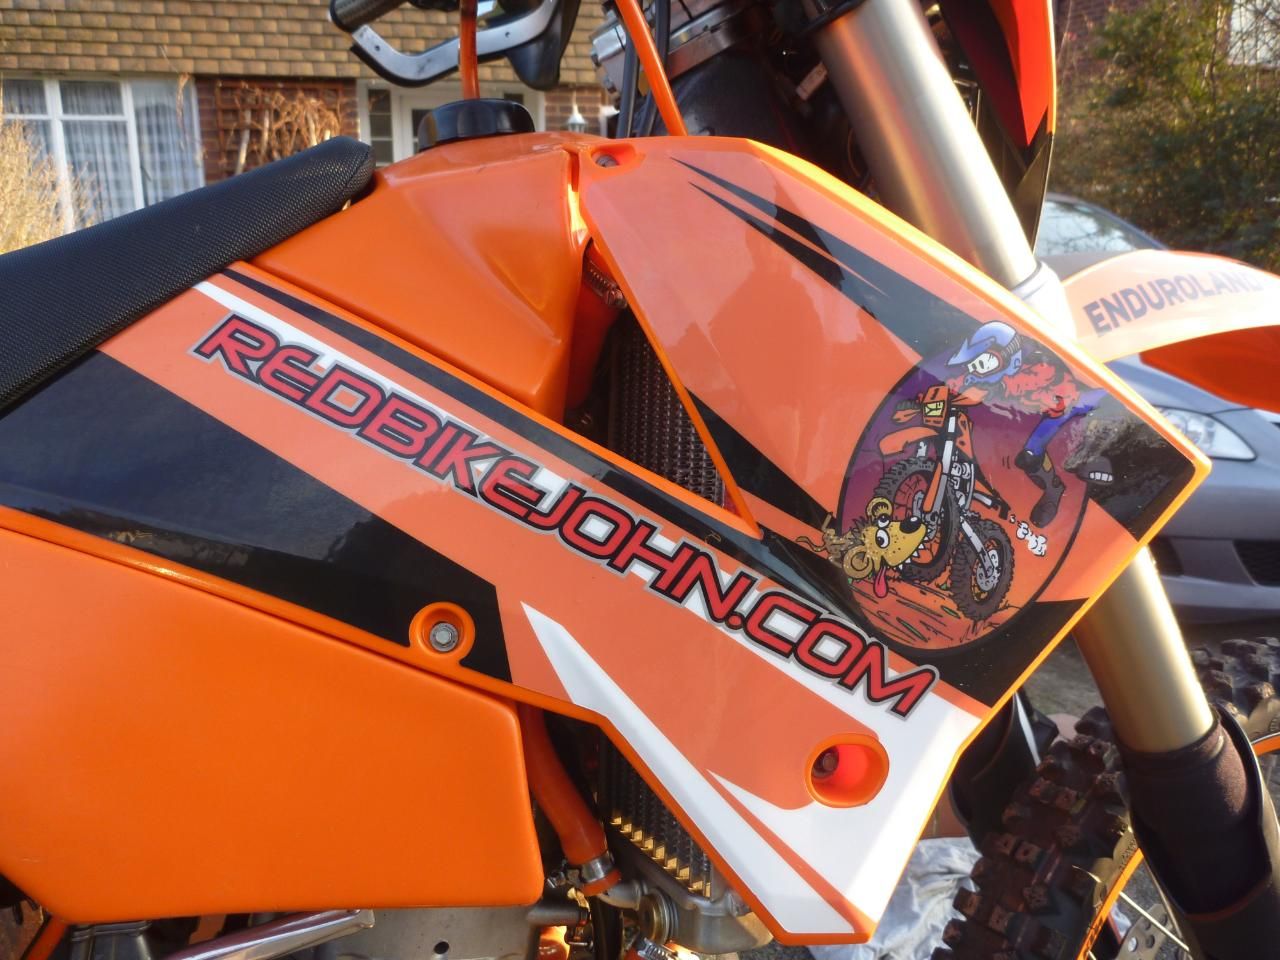
Then I began to think down the lines of new graphics for the bodywork.
If I was going to have some done up this would be an ideal opportunity
to approach some potential sponsors for the 2012 race season. Now I knew
getting money wasn’t going to be easy, but products and good discounts
might be a viable option. I did my research on how many hits the website
(www.redbikejohn.com) had been getting and what I could offer them. Using
this information I managed to convince several companies to help out.
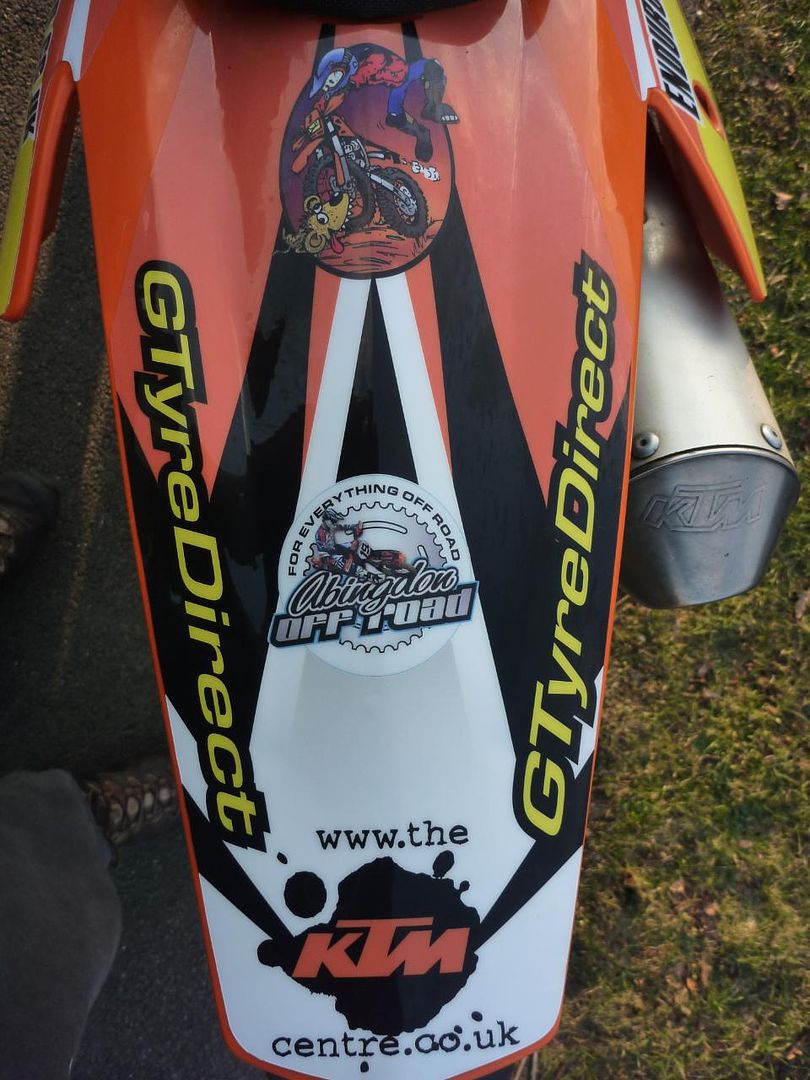
I’m very thankful that to the following companies who have decided
to help me in the forthcoming year. ‘Enduroland’ who are helping
with new riding gear, ‘Golden Tyres Direct’ have offered some
of their excellent enduro tyres and ‘The KTM Centre’ who is
doing me a good discount on parts and the most recent addition is Abingdon
Off Road who is also offering a modest discount on parts.
Before Re-build Preparation
time for some jet washing!
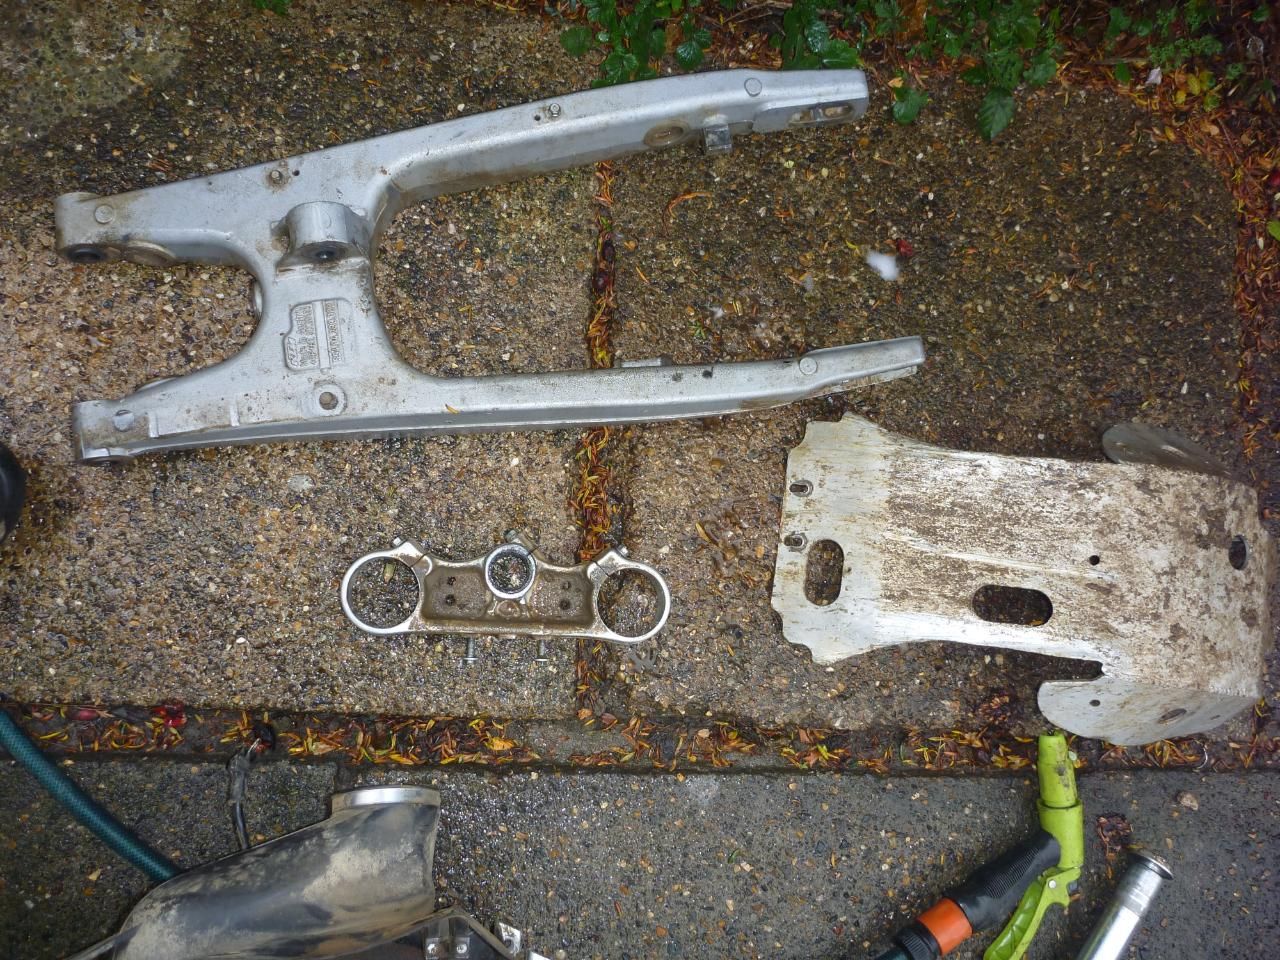
rear subframe comes off real easy
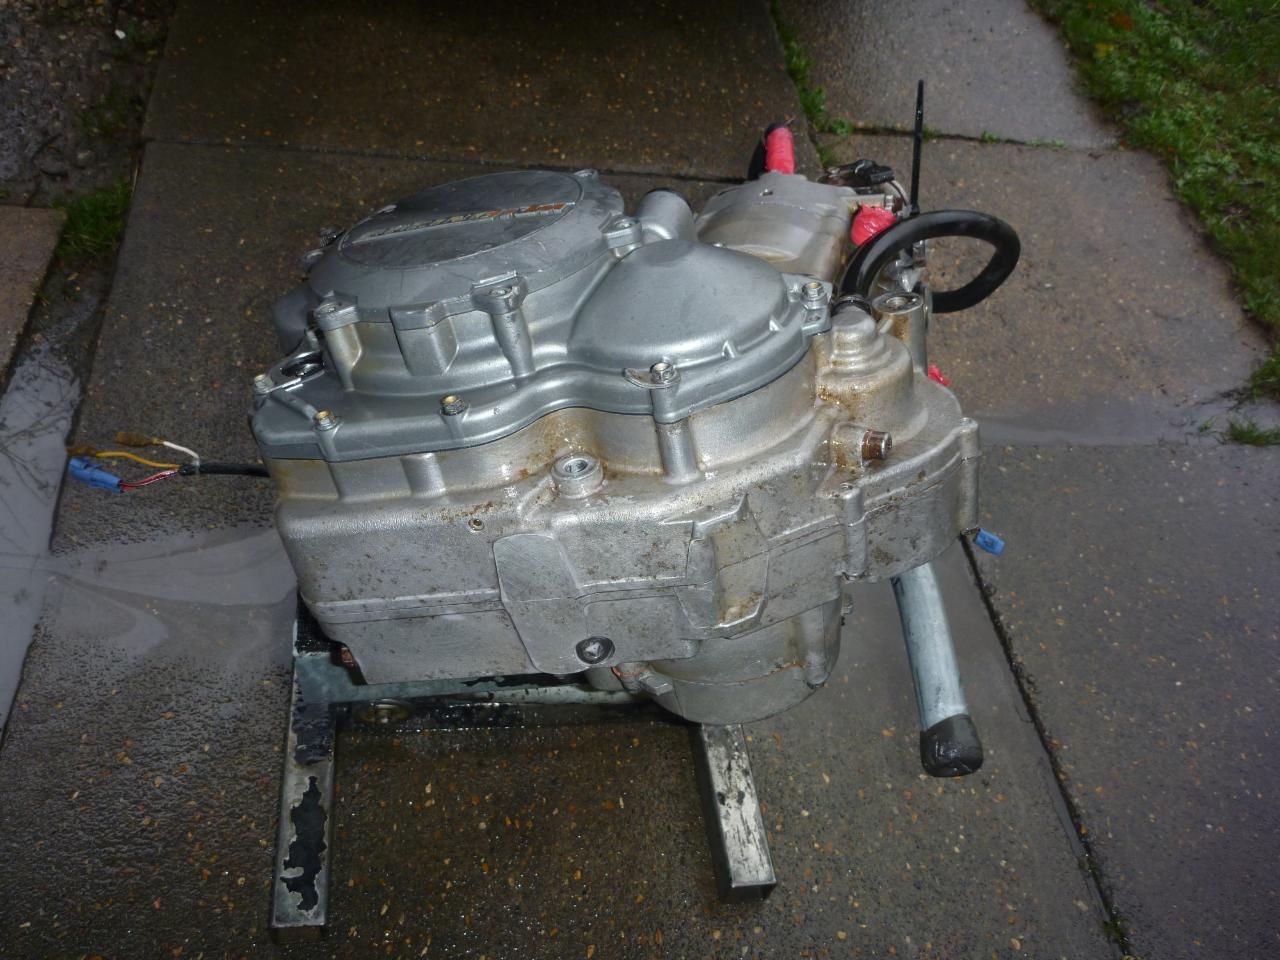
engine needed a good scrub with a wire brush underneath
Before the re-build could
start I had to clean up some of the parts, like the engine, forks, engine
guard and side stand. The Engine had some ugly marks underneath so I gave
it a good brushing with a brass wire brush. The sub frame was subjected
to a good pressure wash, as was the yokes etc.
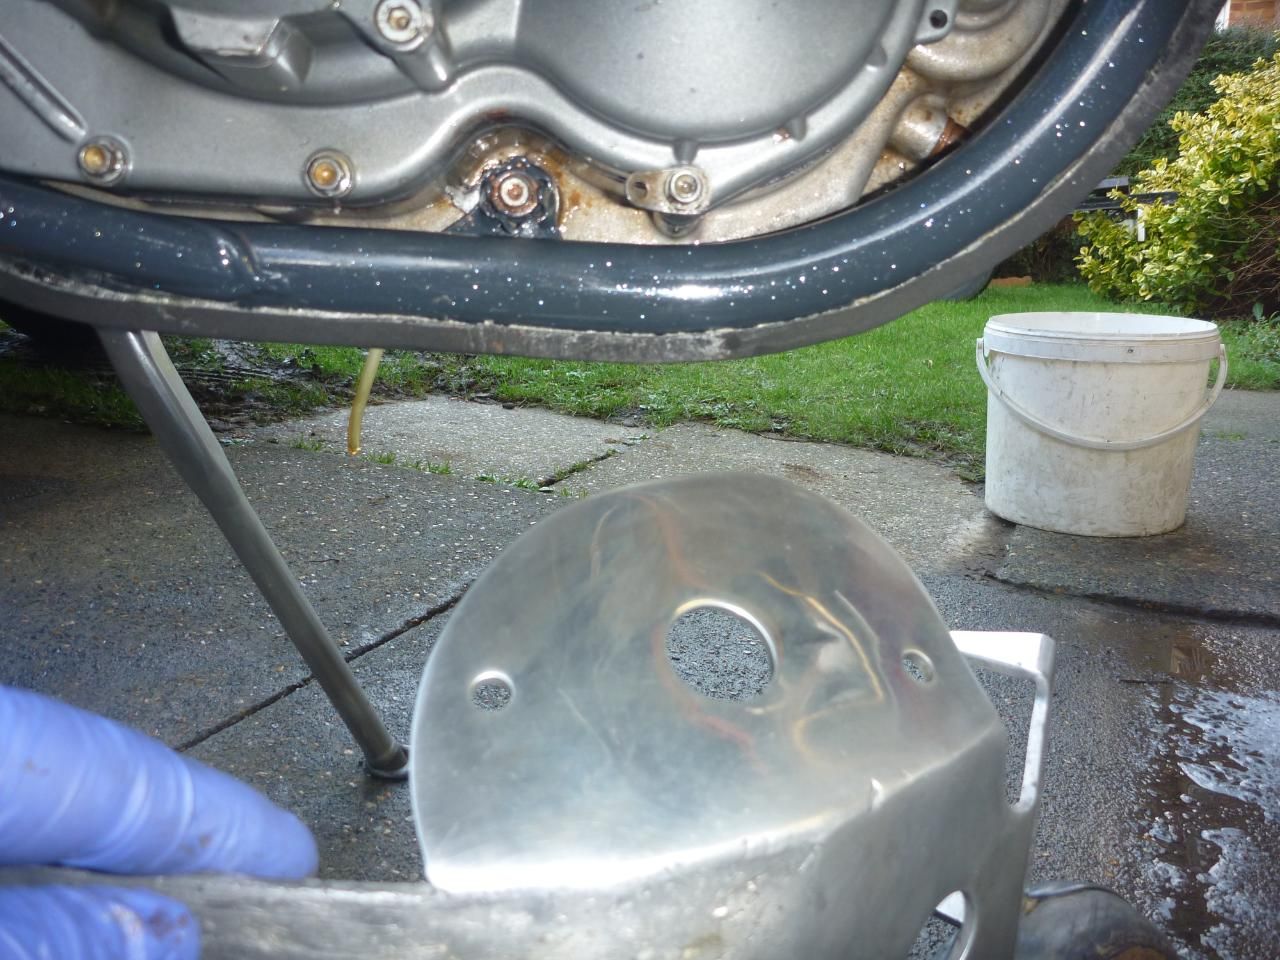
The engine guard had taken a right battering recently and I can only assume
it was at the Tring event as the dent/scratch looked relatively new. It
must have been a hell of an impact as it dented in the whole of the underneath!
The lower parts were so badly scratched there was just too much work to
do to get that nice and who sees it? I opted to just sand down and polish
the front and sides. The side stand also got a polish, as did the rear
chain guide, which looked really scratched to hell but came up nice enough.
My mops are getting a bit worn out so I couldn’t do a mirror finish,
I just wanted something better than the ‘bashed to hell’ look
that I started out with.
The Re-build
time to start getting serious!
First i need to fit
the headrace bearings into the frame.....
you can see i've used the old bearing to drive it 'home'
new bearing is flush
when it 'rings' when the driving bearing is hit with the hammer.
if its a dull knock then its not home yet...and don't be mean with the
grease!
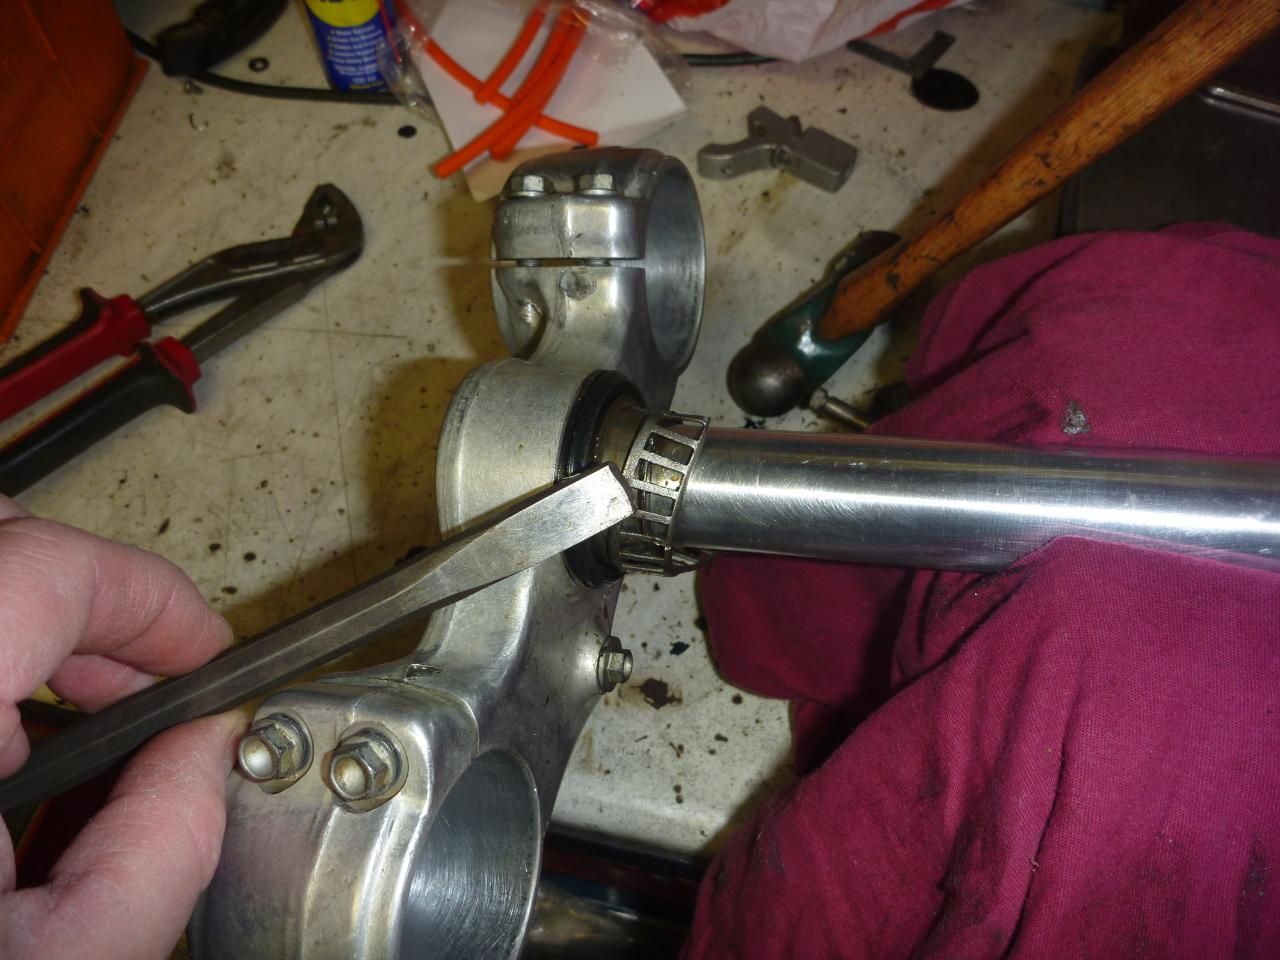
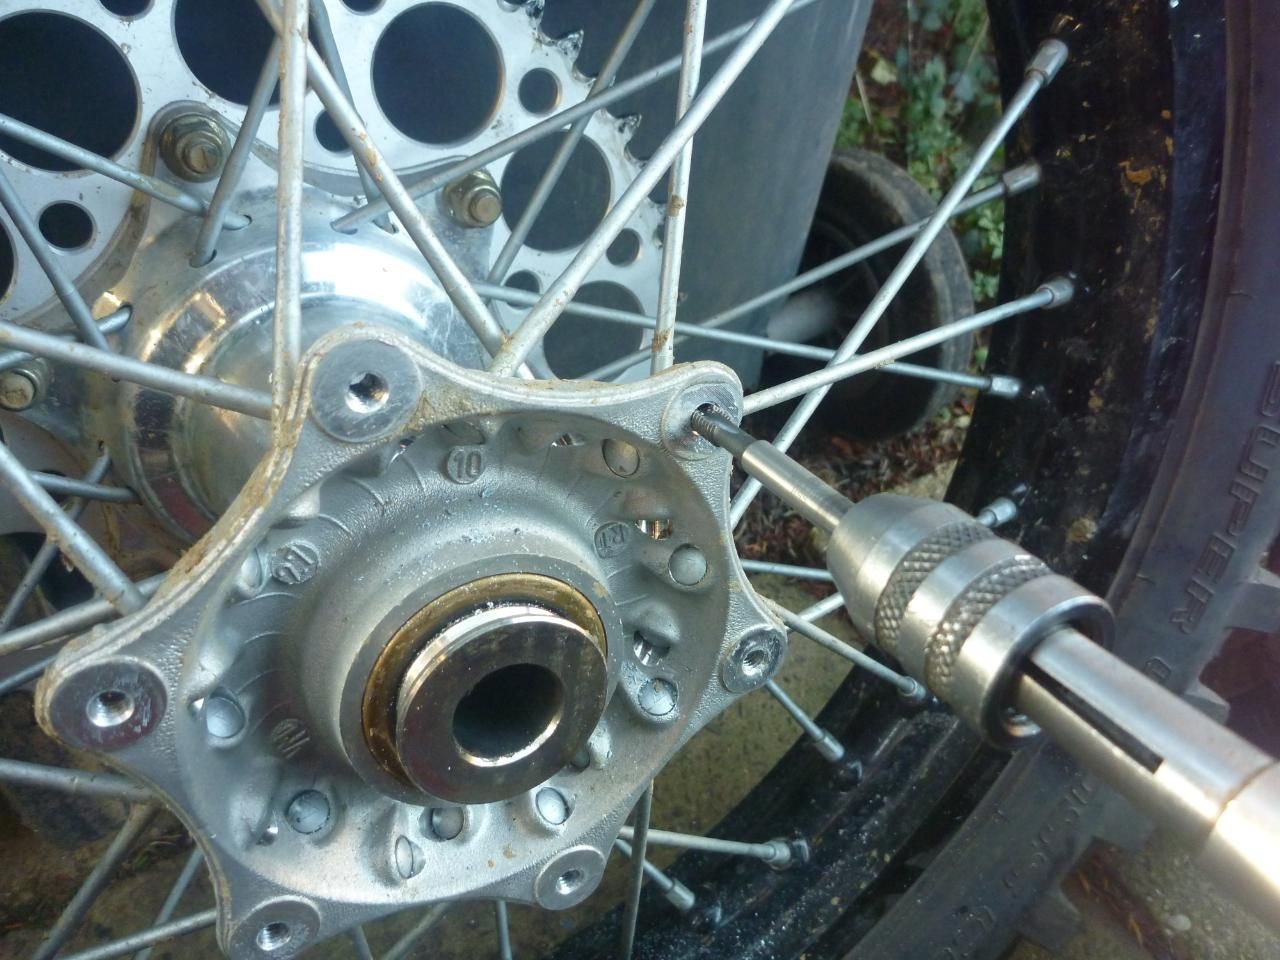
time to clean up the
yoke and fit the new inner race of the bearing
first get the old bearing roller cage off with a chisel
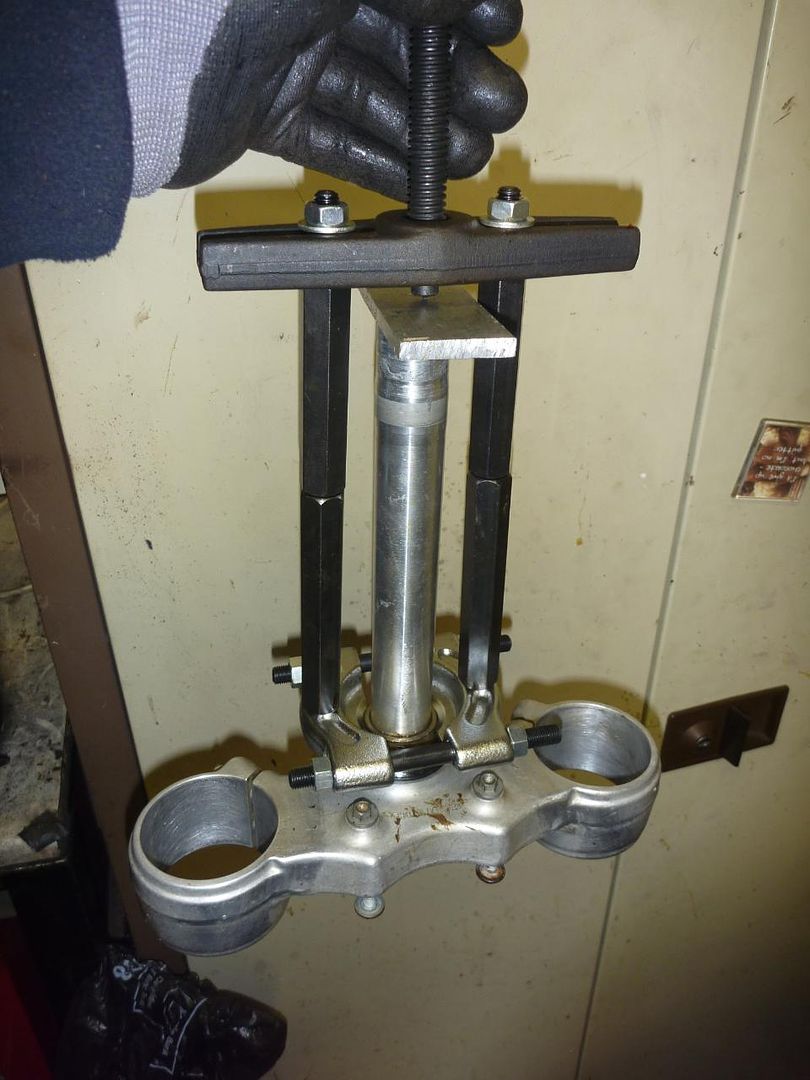
now use a bearing puller
(if you have one) to remove the old inner race
when fitting the near bearing use an old bit of pipe to press (knock)
it home with hammer until it rings
All of a sudden the time had
flown by. I’d eaten myself in a stupor over xmas and suddenly I
was running out of time. Due to the short days there wasn’t a lot
of daylight left to work on the bike. I only had one weekend and the remaining
week to get the bike ready for a shakedown test up at Enduroland in mid
January.
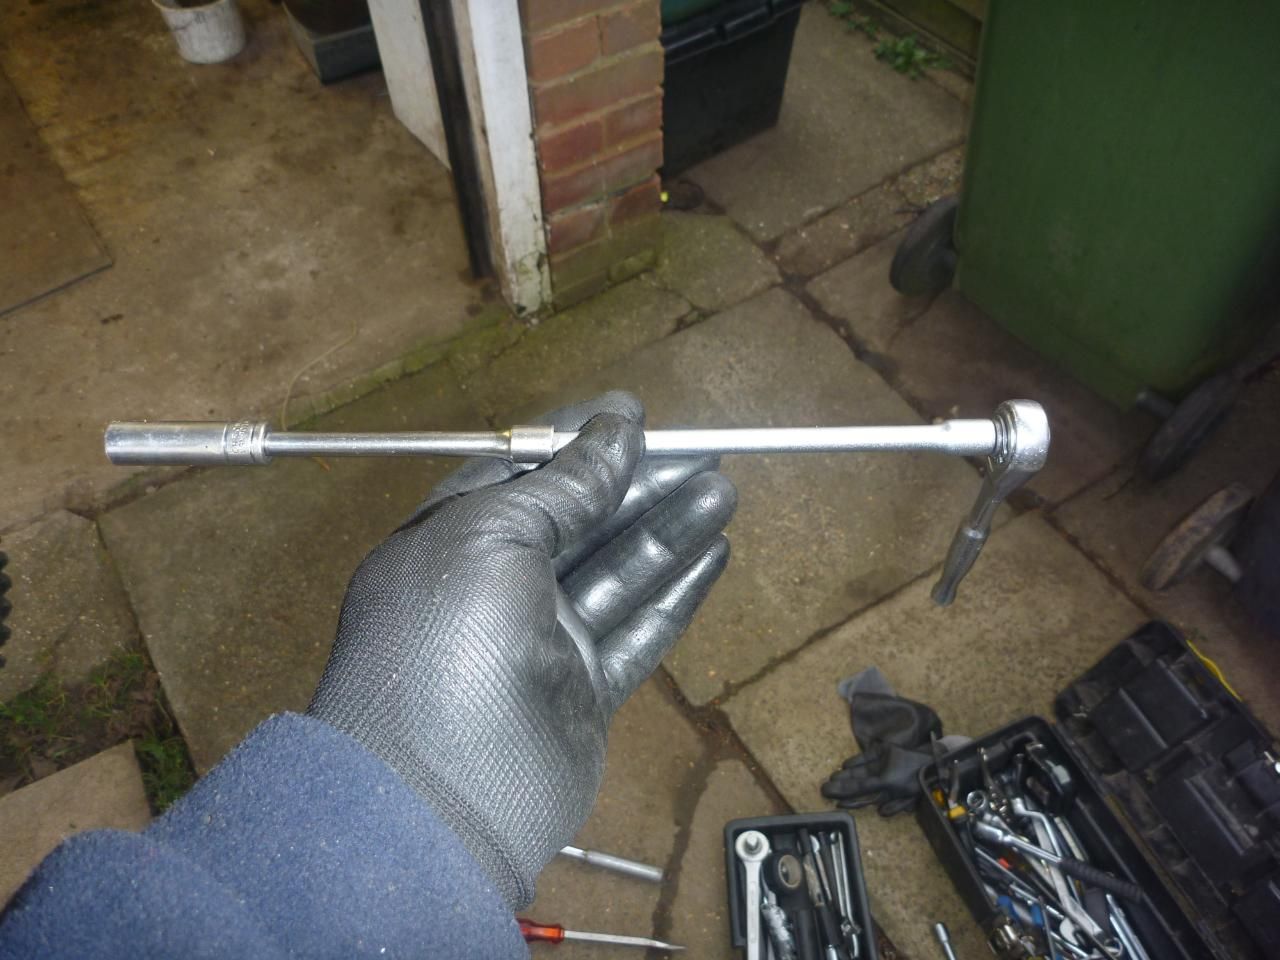
First thing first was to get the front end into the bike. Of course I’d
not prepped this bit yet so I had to get the old bearings off the steering
stem first. To do this I used a small chisel to remove the outer race
of the lower bearing and then used a bearing puller that I’d bought
years before and only ever used once. I must say it’s the easiest
I’ve ever pulled a bearing off a stem before. Usually I have to
resort to cutting into the inner racer to get it off but the puller just
popped it off.
Then I knocked out the inner bearing races from the frame by using a long
rod and a hammer to dislodge them, again a very easy job. The new race
was tapped in with a soft faced hammer until nearly seated, then I used
the old race (inverted) and a proper hammer to drive the new race home.
You can tell when its ‘home’ as the tone of the hammer hitting
the race changes and it ‘rings’ when its metal on metal without
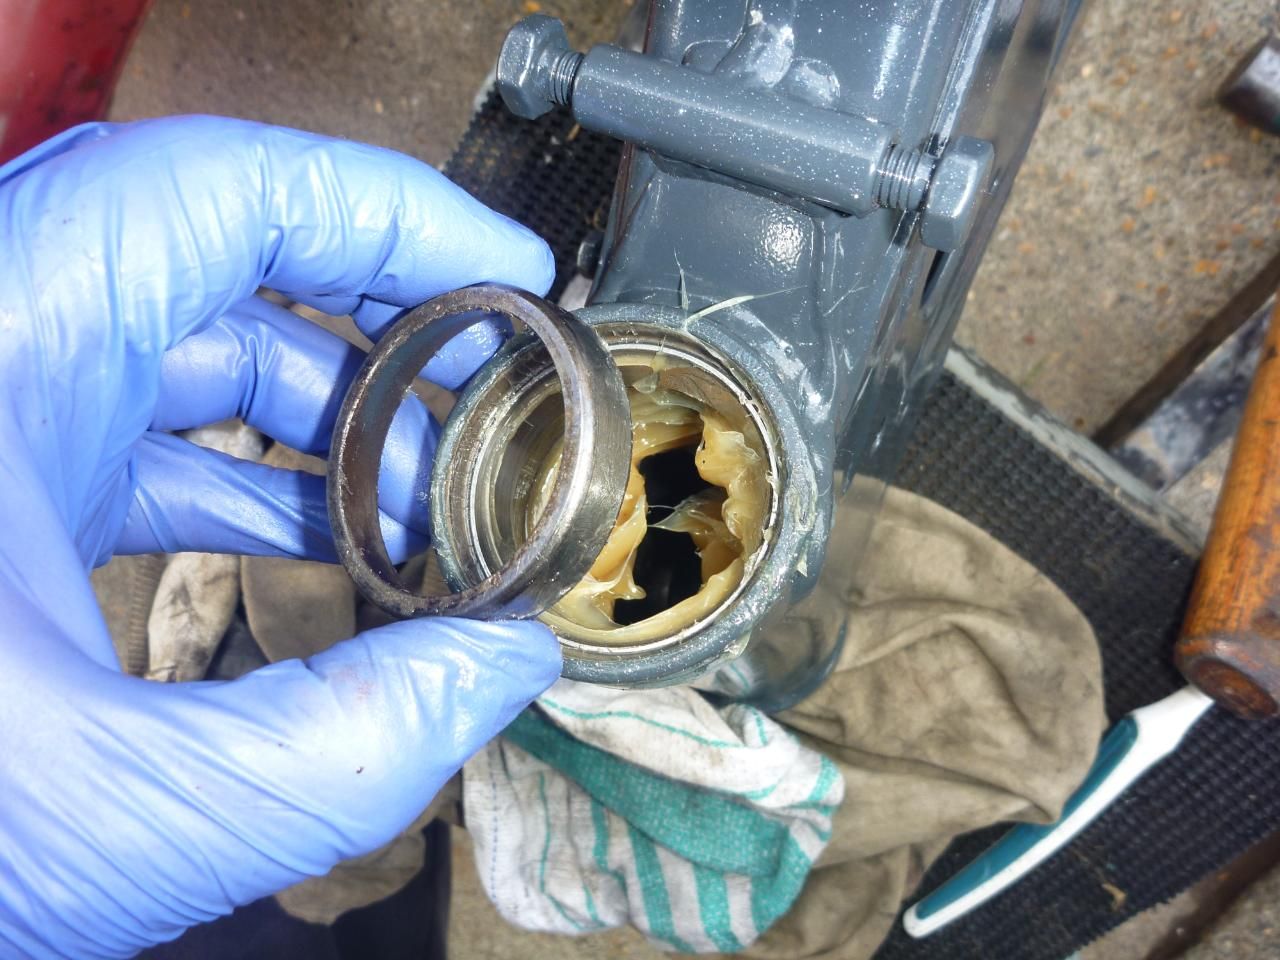
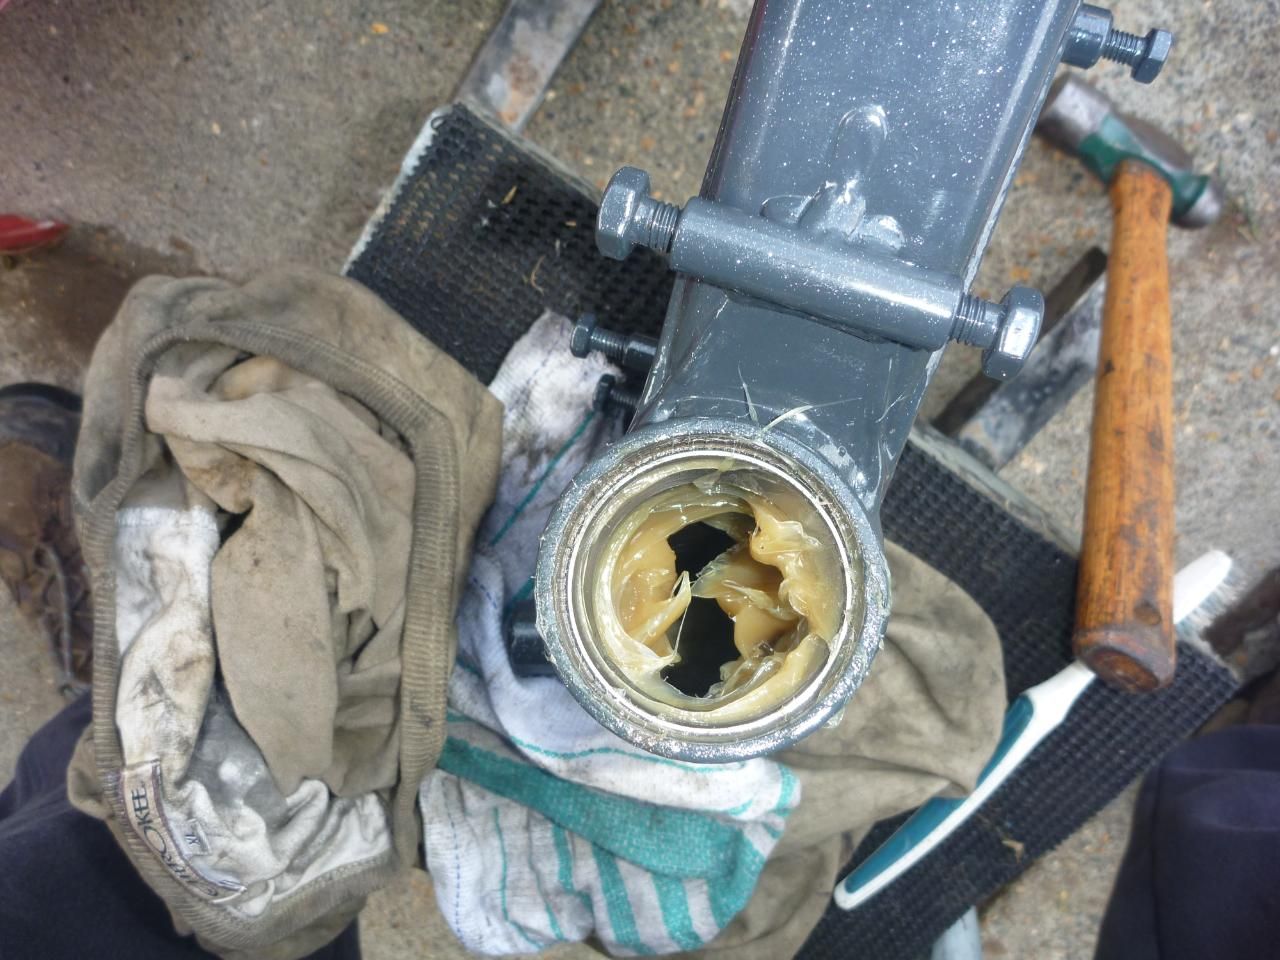
any ‘give’. Once both races are installed I tend to use a
lot of grease, too much even. I like the idea of the grease sitting in
the lower tube in a lump as it’ll work its way into the bearing
as and when it’s needed. It’s always the lower one that gets
rusty so don’t be shy with the grease.
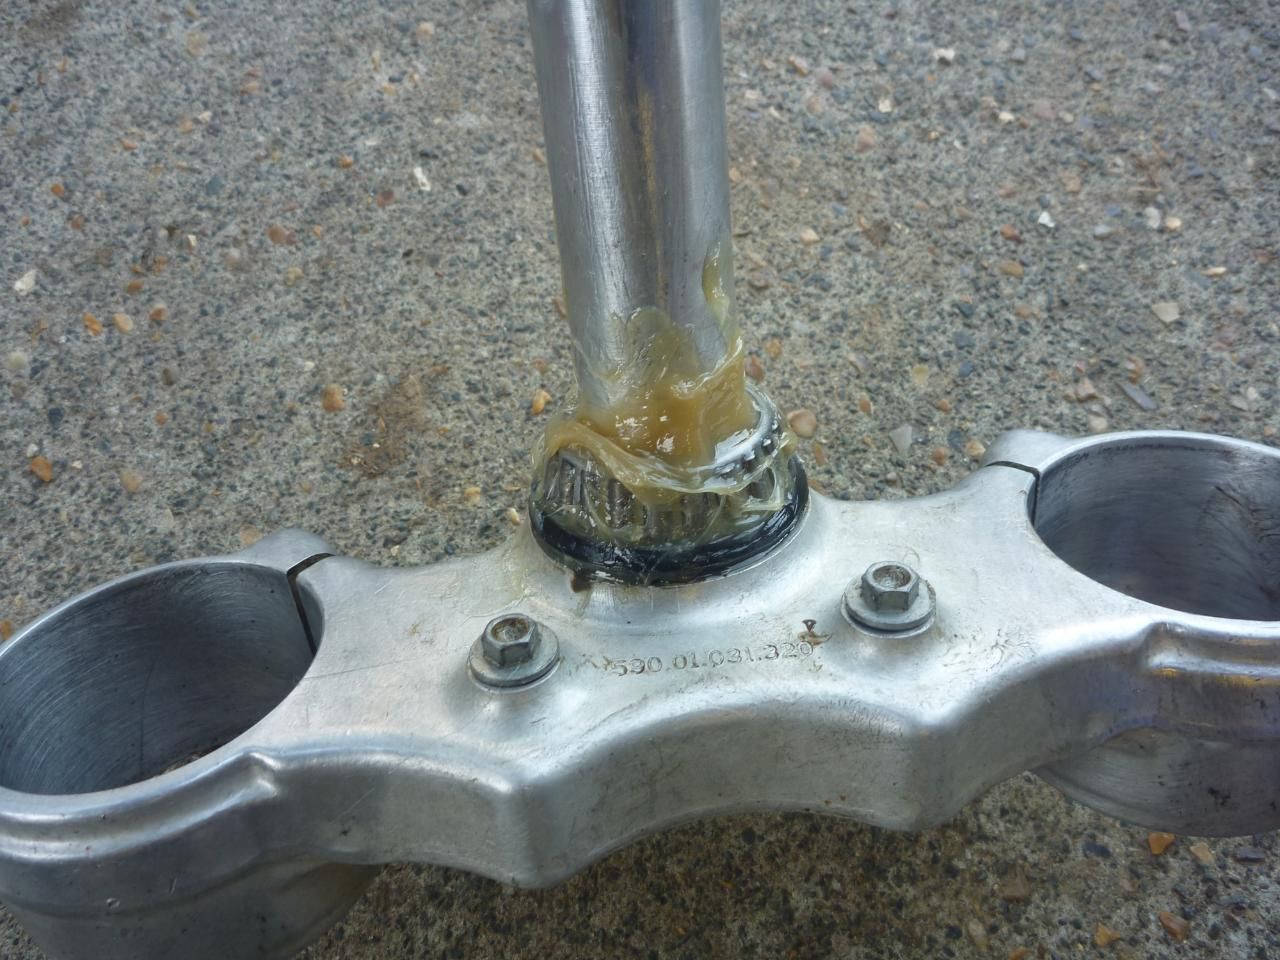
slap that grease on
I then lifted the frame up onto a stand and used a ratchet strap to secure
it in place. I thought it would be easier to fit the engine with the frame
a little higher off the ground to save the old back. I needed to have
the engine in place before fitting the swingarm so I protected the frame
with duct tape and carefully lifted the engine into place. It went in
easy enough thankfully but the duct tape was a bad idea as it got stuck
on the frame lugs and I struggled to remove it.
The swingarm was then fitted which is a fairly straight forward job but
getting the whole lot to line up was a little tricky. The triple clamps
were then pushed into the frame and the top nut tightened so that there
was no play but the clamps could still move side to side easily. I gave
the inside of the triple clamps a quick wipe with some wet and dry to
clean them off nicely and to remove all the old residue. The forks were
cleaned up and treated to some new neoprene gaiters as the old ones had
grown some holes. I slide the forks home but only nipped up the bottom
clamps for now as I wanted to get the front end bedded in a little first,
before finally torque’ing down.
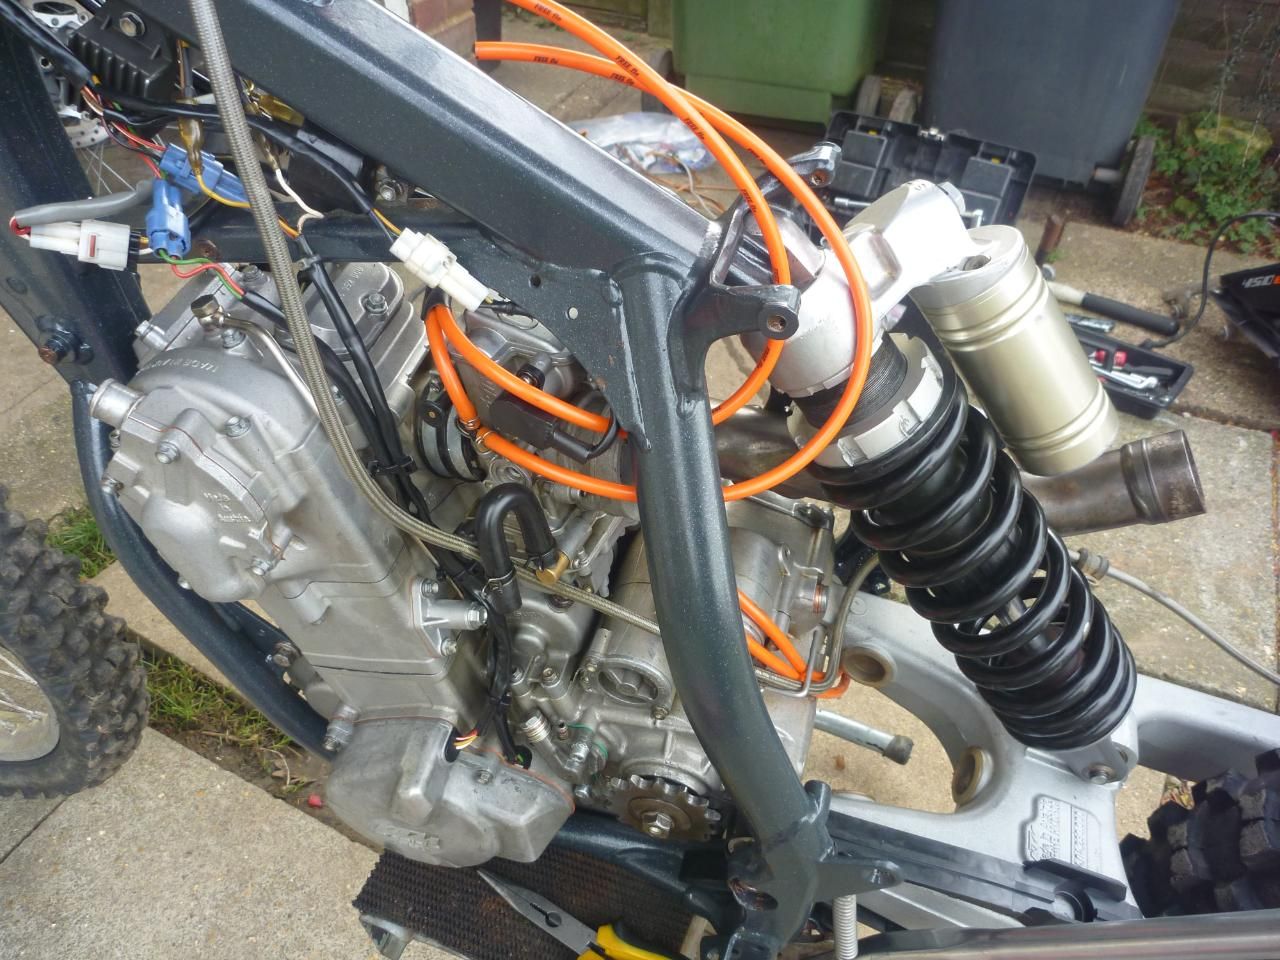
swingarm and engine in place
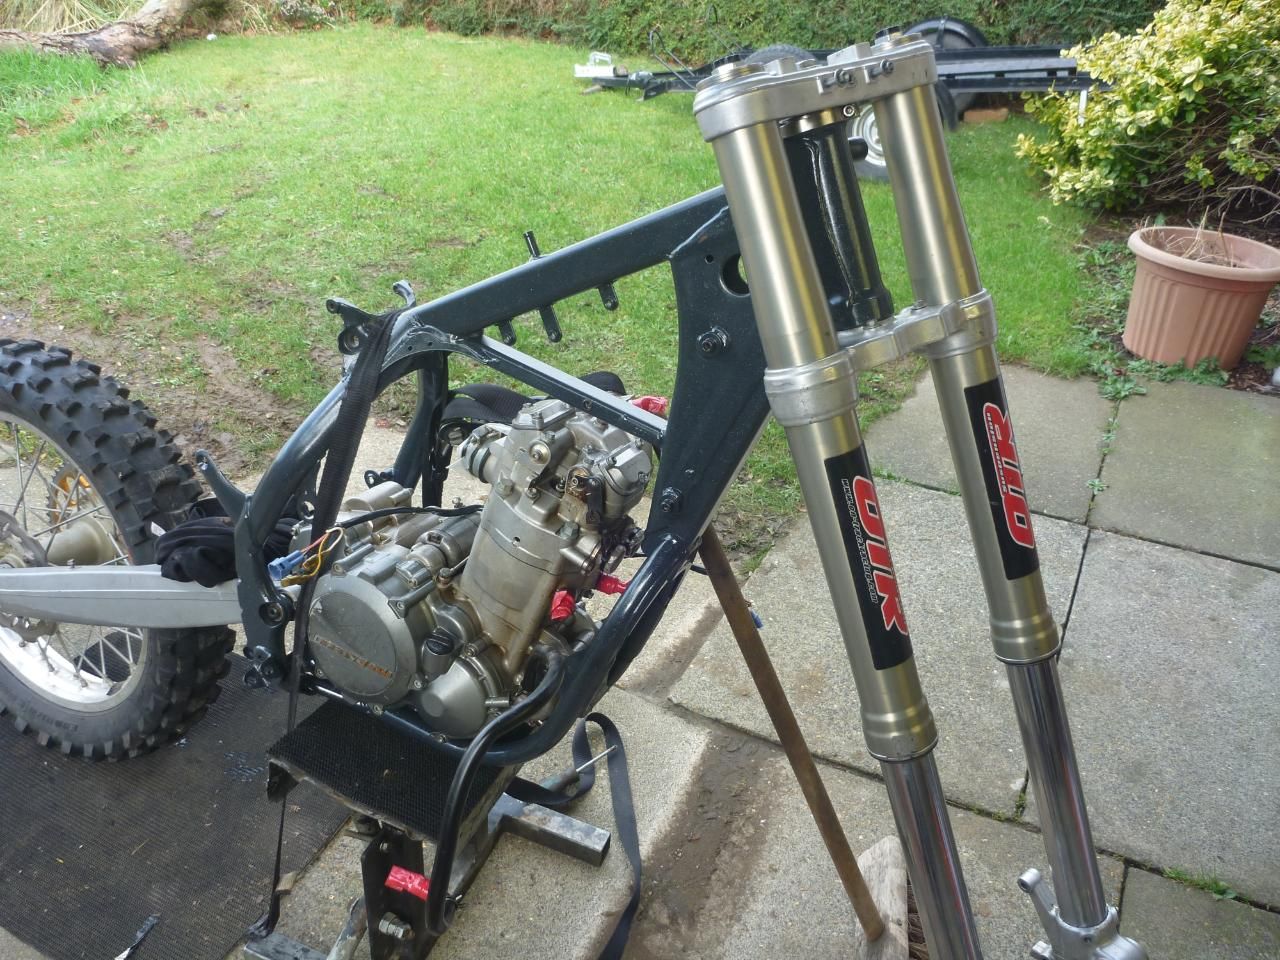
it's taking shape now
ahhh - at last i can move it around. temp wheels fitted and new rental bars in place.
Exhaust – ouch!
I needed to get the front pipe in place before fitting the rear shock, so I broke out the grinder with the wire wheel brush fitted to give it a good clean up, and to get rid of the baked on rusty residue stuck to the front bend. Of course I was wearing gloves when using a power tool like a grinder, only they were the wrong kind of gloves! I’ve been using a nice coated glove for general use with an elasticated cuff, and it was this cuff that caused the problem. The wire brush tends to bounce a bit when used and on one of these bounces it grabbed hold of the elasticated cuff and wound itself into my wrist! It happened so fast I didn’t even have time to register. I was holding on tight with my right hand and the grinder was jammed into my wrist and trying to turn but the glove had wound around it and stopped it when it dug into my wrist. For a moment of two I could hear the motor buzzing as it tried to turn but then I came to my senses and flicked it off with my thumb. Un-raveling the whole mess I anxiously looked at my wrist as there are so many veins and tendons there I was worried I’d ground them away. Blood was starting to ooze out quite worryingly, but at least nothing was spurting so I got the first aid kit out the back of the car and wrapped a dressing/bandage around it and went to have a cup of tea to chill for a bit as both hands were hurting from fighting the torque of the motor.
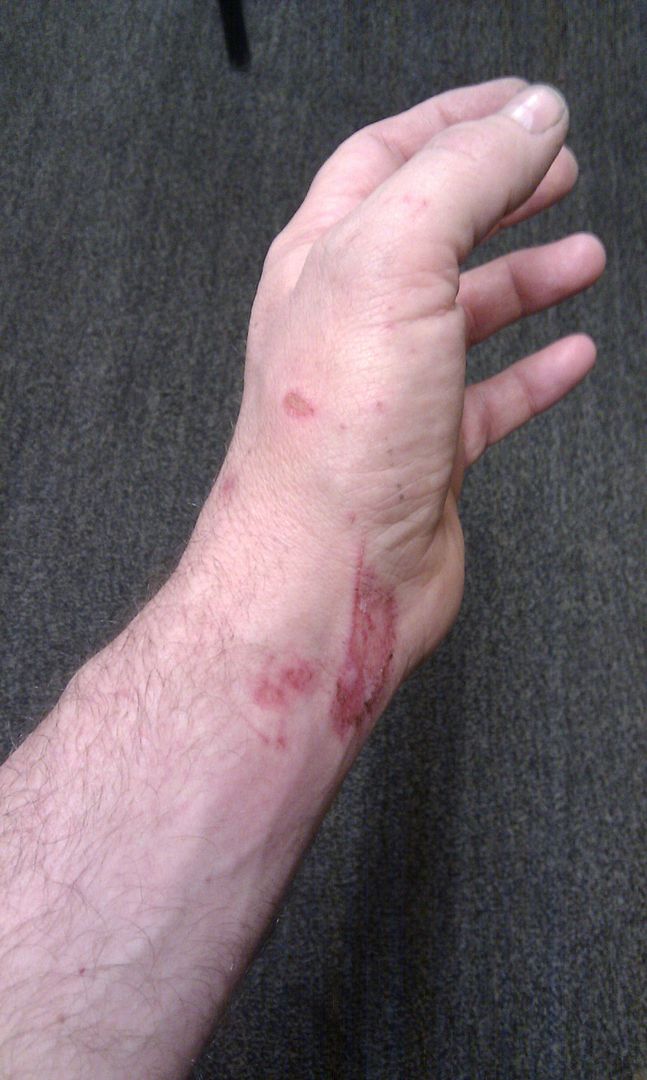
"if you're ganna be stupid you gotta be tuff"
After tea I fitted the exhaust into place and then I could get the rear
shock into the frame too. That just left the wheel and bars and I could
move it around the garage/garden a lot easier. Fitting the bars was straight
forward enough, but however easy it is, there is a lot of cleaning to
do for each of the ‘easy steps’.
I didn’t want to put anything back together that hadn’t been
cleaned and brushed, as well as all the treads cleaned up ready for new
copper grease or loc tight– depending on the application. Each thread
was cleaned up using a wire brush and all old grease/dirt was dislodged
with a dose of wd40 and a toothbrush then blasted with more wd40 and an
airline. Threads to be loctightend had the threads cleaned with electrical
de-greaser and then blasted with an airline.
Tony came round, took one look at the bike and asked if I was going to
use the Tenere or the MTB at Enduroland on the weekend - cheeky bugger!
Oh yea of little faith. Once he was finished drinking tea and mooching
whatever he was after he went away, and once more I could knuckle down
to some serious re-building work. I fitted my spare set of wheels as I
needed to fit the new rear disc to the black set I picked up last year
and I also fancied some bling bling rim tape, which I still needed t buy.
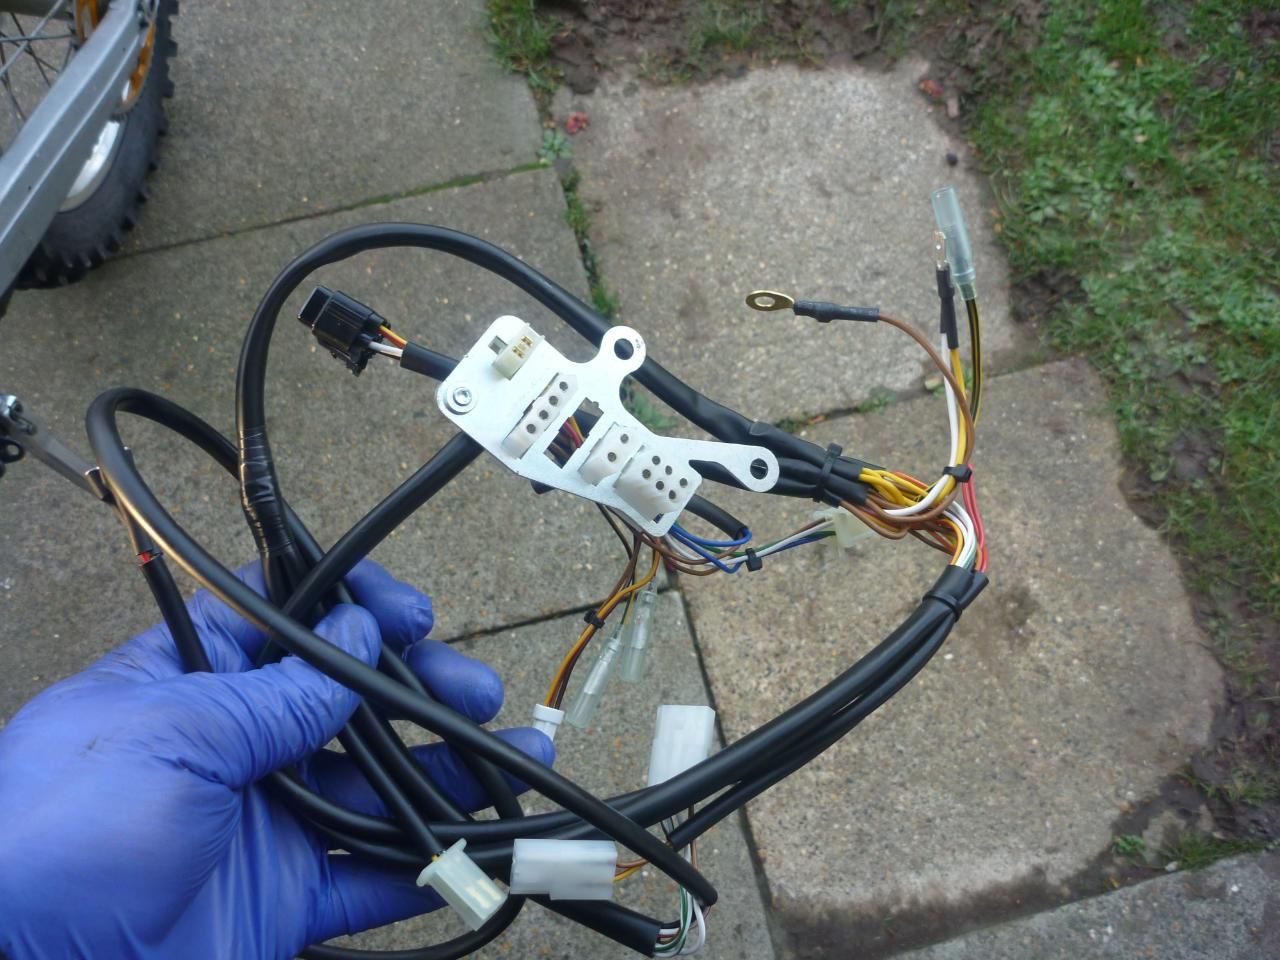
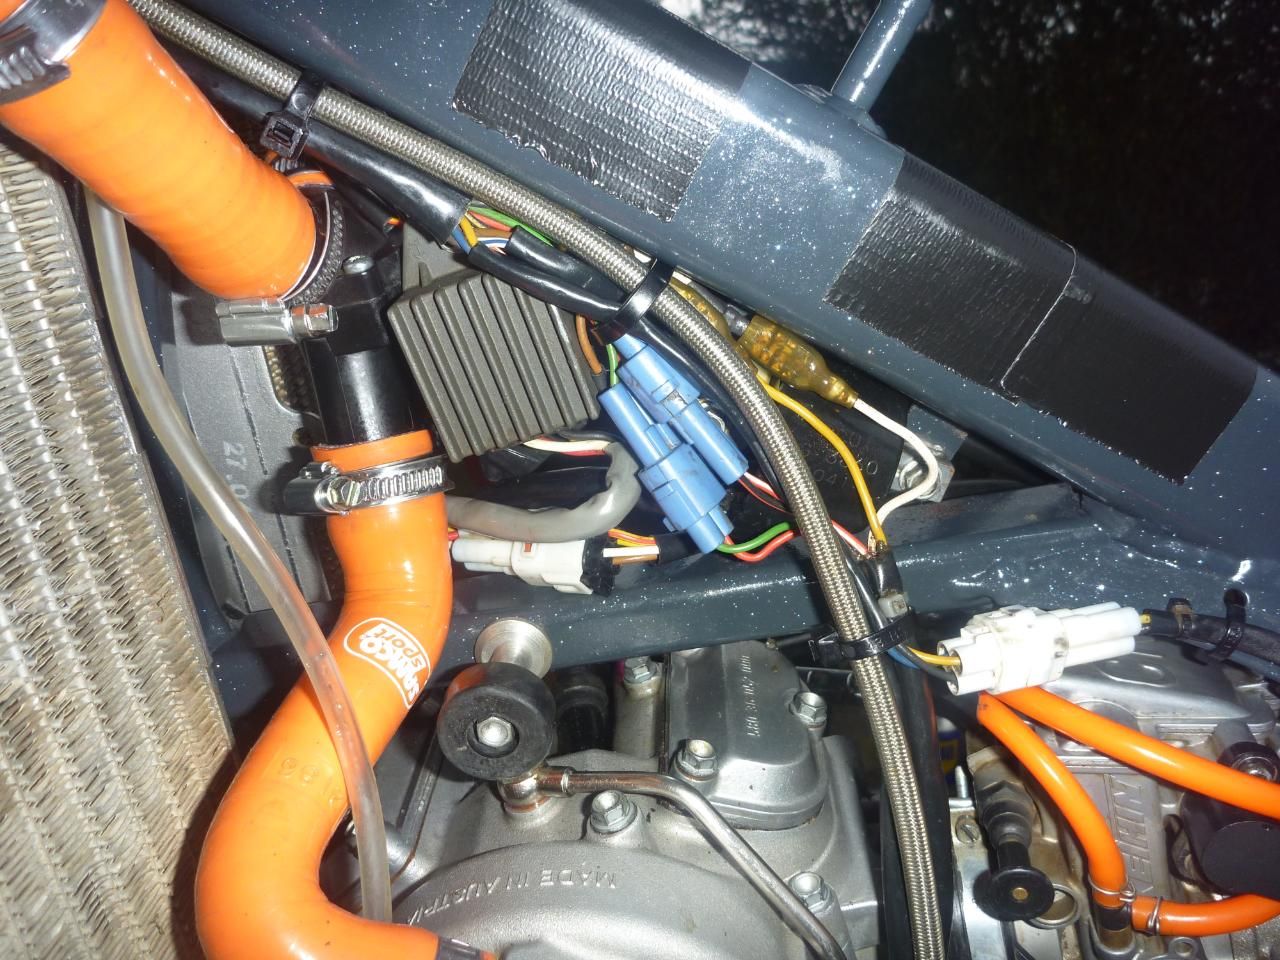
nice new wiring loom
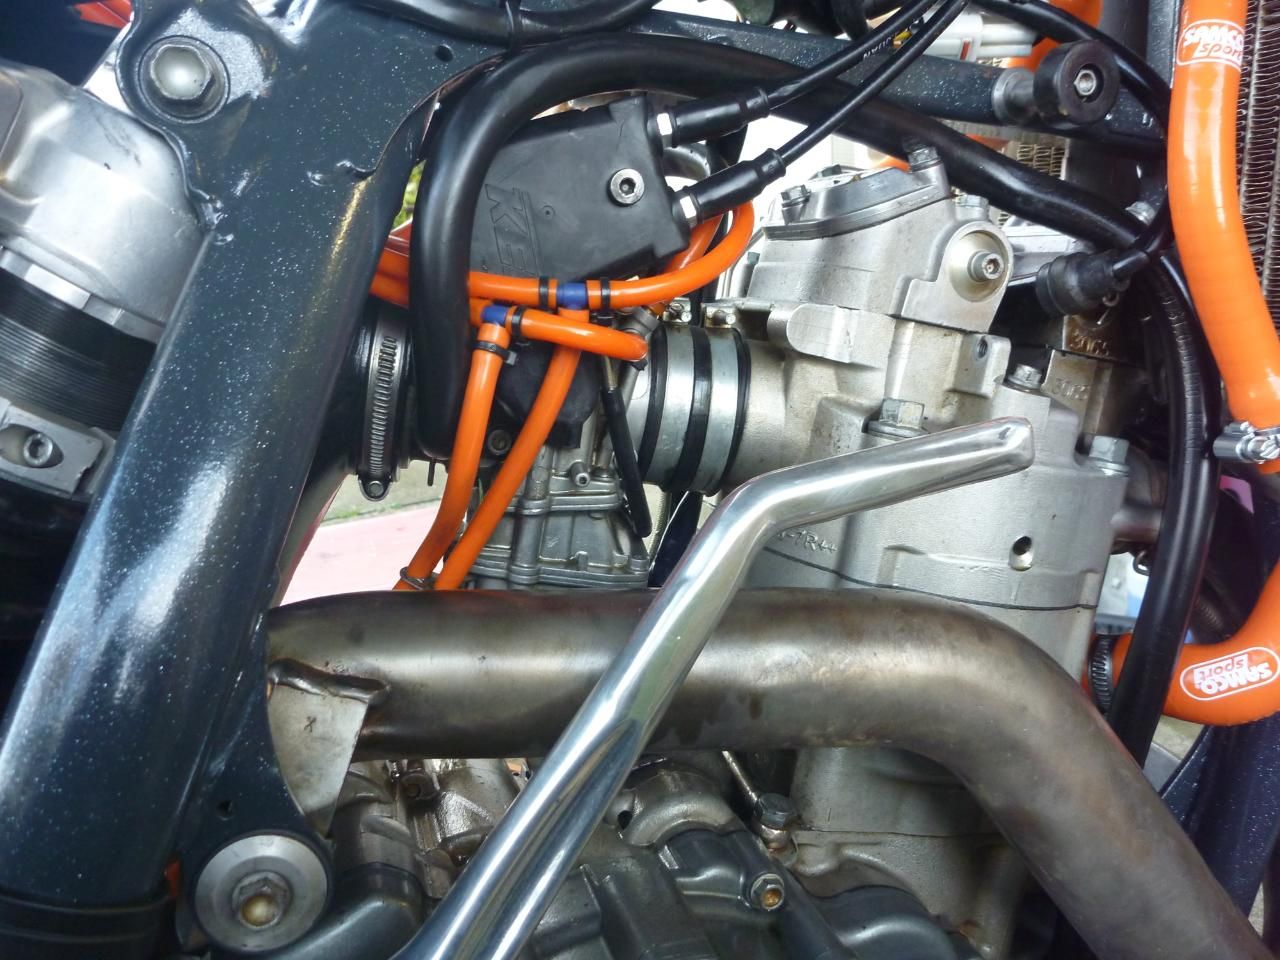
some more bling. carb all fitted
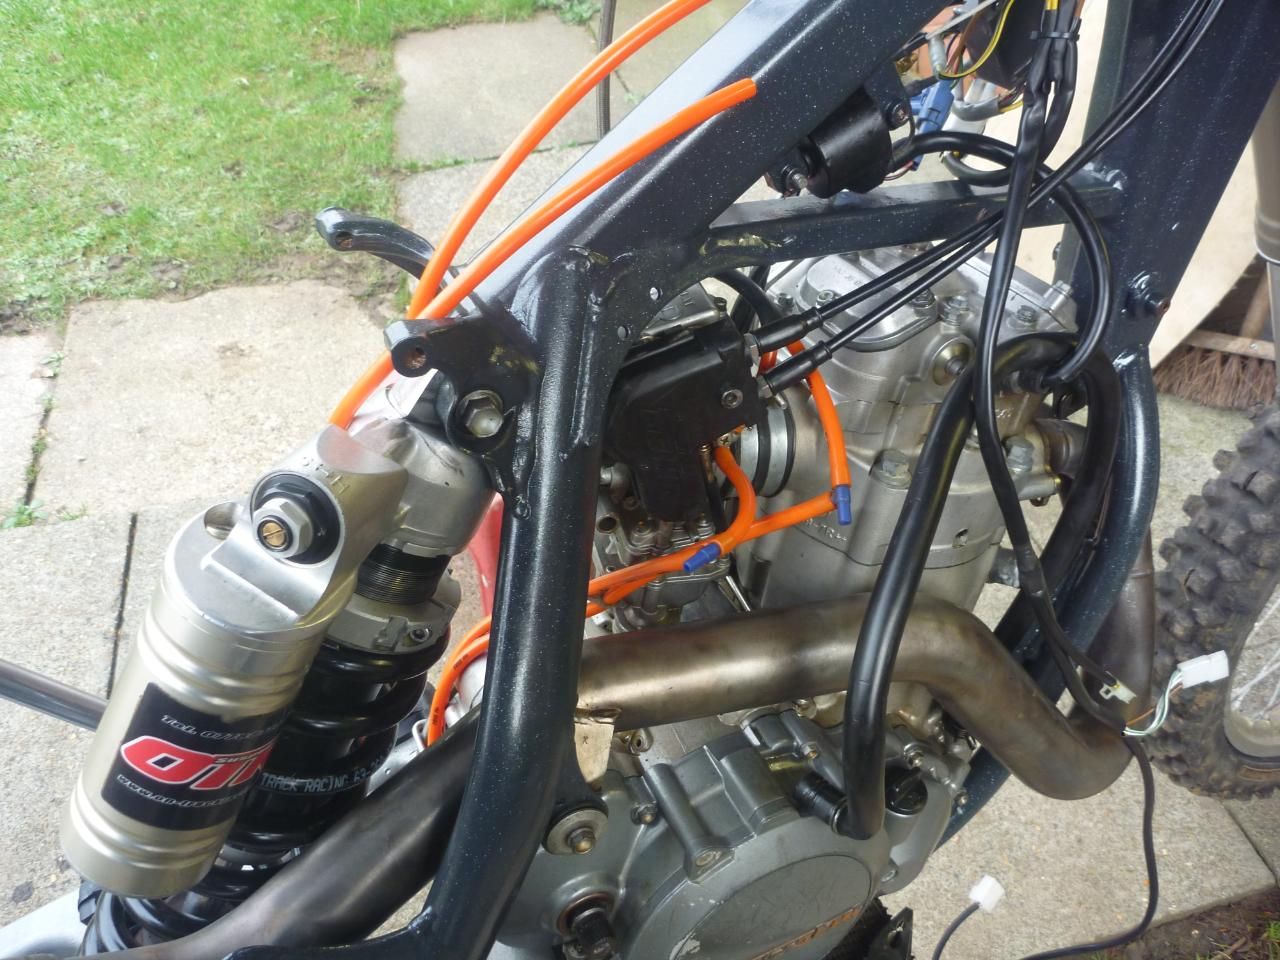
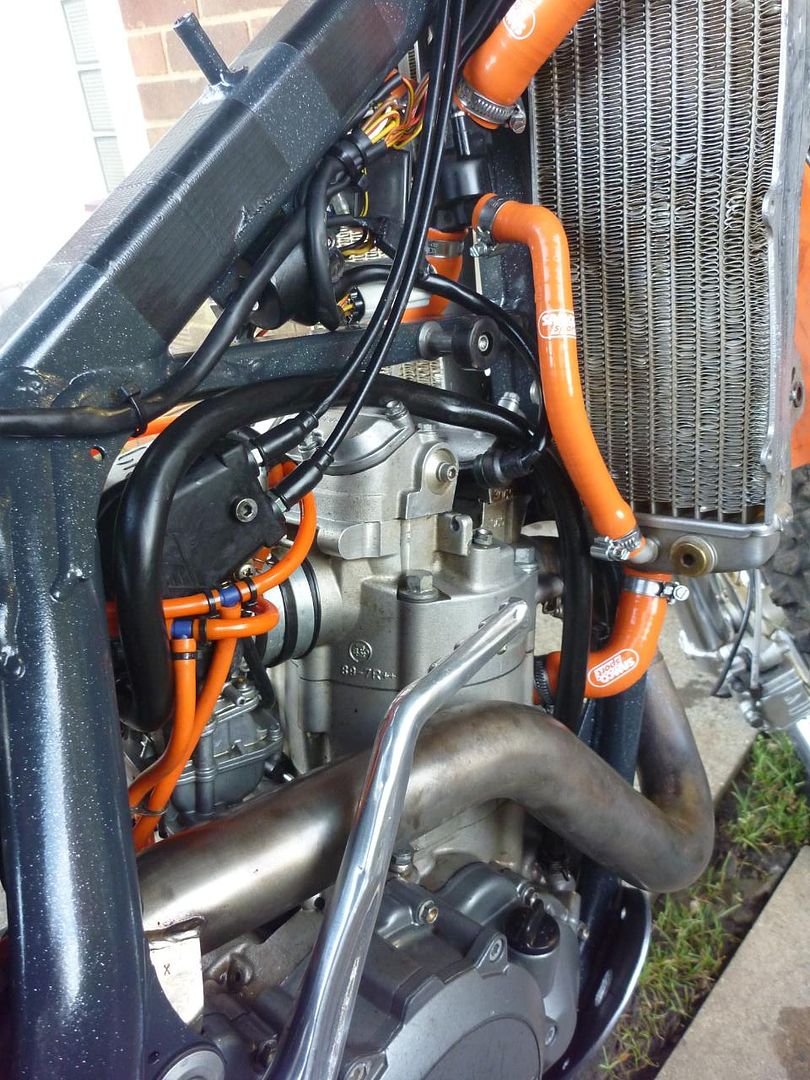
and now time for some orange!
Next up was the carb, followed by the new wiring loom, coils and rectifier
and then to cap it off the rear sub-frame. Once they were all in place
I started on the carb breather pipes but as I’ve re-routed some
of them, I ran out of pipe. I then swapped out the radiator hoses for
the new bling silicon ones. The old clamps had to be cut off as they are
crimped on at the thermostat housing. I had to fiddle about a bit to get
all the clamps in the right sort of orientation i.e. to clear the tank
and other bits and pieces.
time for some more bling
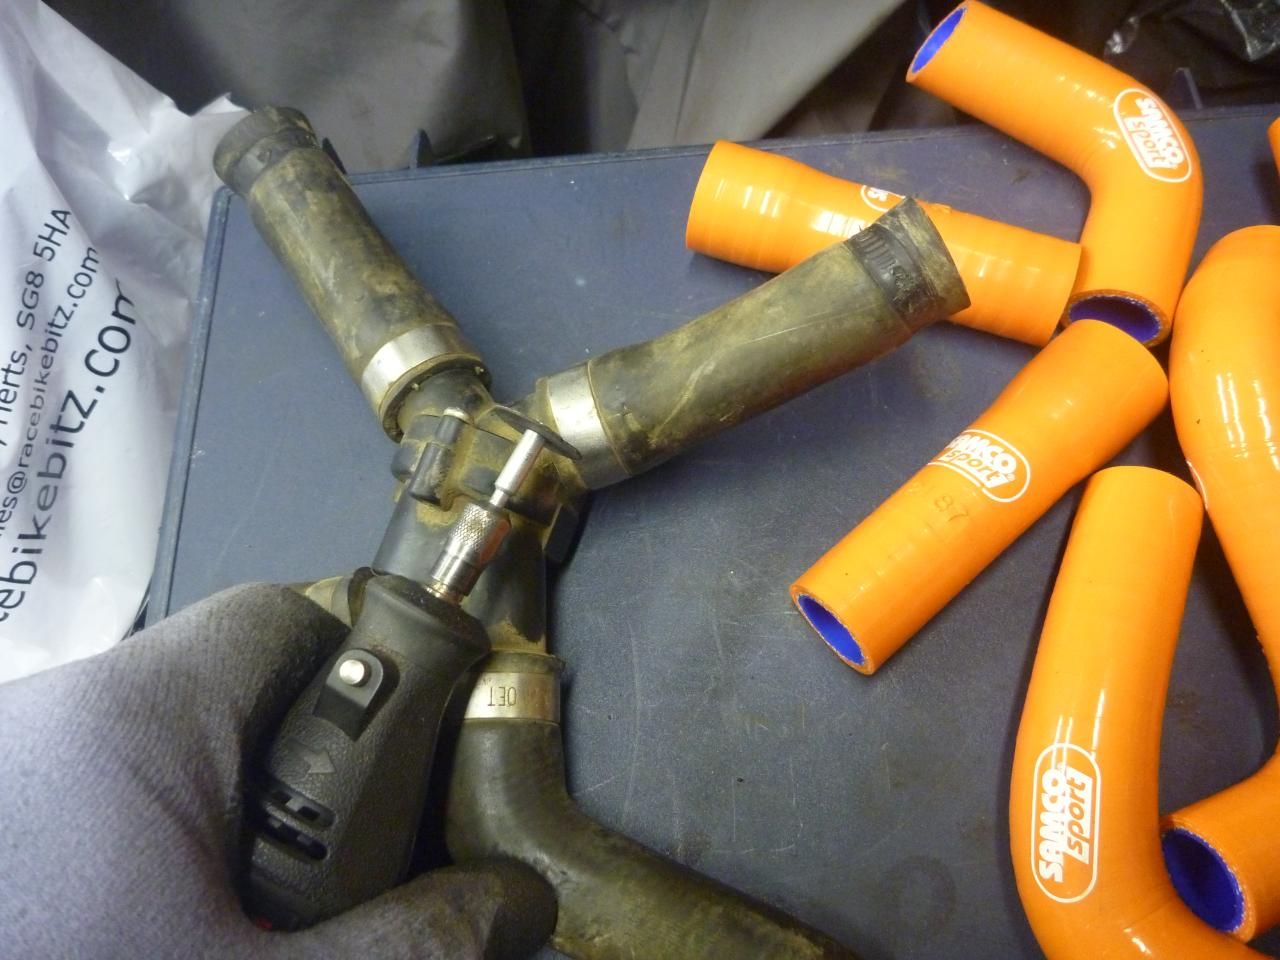
i used a dremel to get the old clips off.
before
and after
The next day it was the third trip to The KTM Centre to pick up yet more
parts including some extra carb pipes in orange. The ktm one is very much
different to the freeflow one, in so much as it’s very soft and
flexible, like soft silicon. This allowed the drain pipes to hang under
the engine a lot nicer.
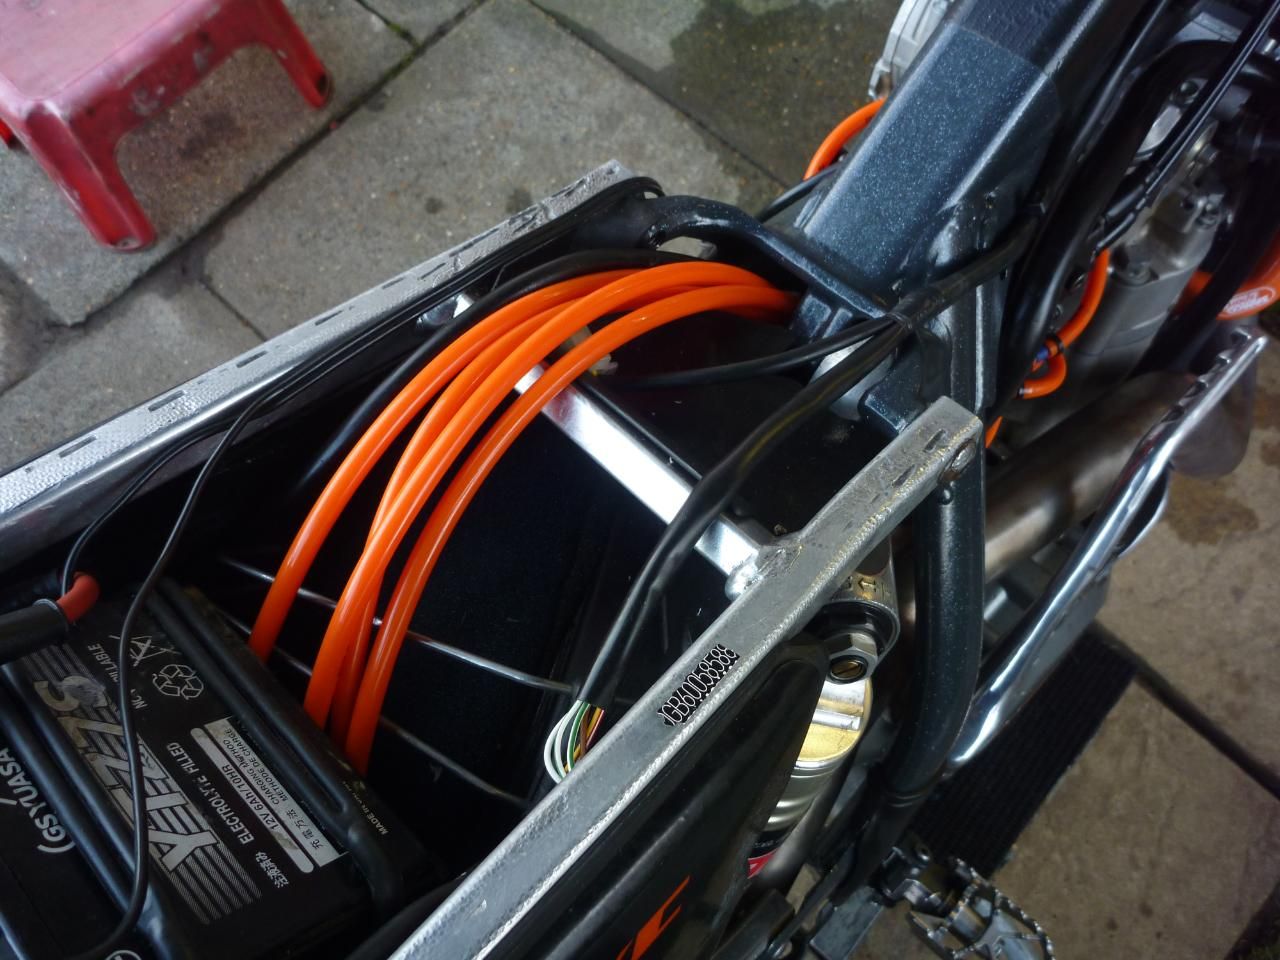
The wiring and plugs that sit under the tank had to be redone as I had
them bunched up a bit, and they really need to be no wider than the frame
itself to work properly. I only found this out when I tried to fit the
tank later on. I had a new bit of sticky protection film for under the
tank too, but I needed more than one, so in the meantime I put some duct
tape in place to protect the frame from the tank. In the meantime I’d
been doing a little polishing and the few aluminium parts that needed
cleaning up were looking good. The last set of spares had included the
new rear disc, so the rear hub was prepped for it by tapping out the mounting
bolt holes and a general brush down. The new disc was attached using loctight
on the bolts.
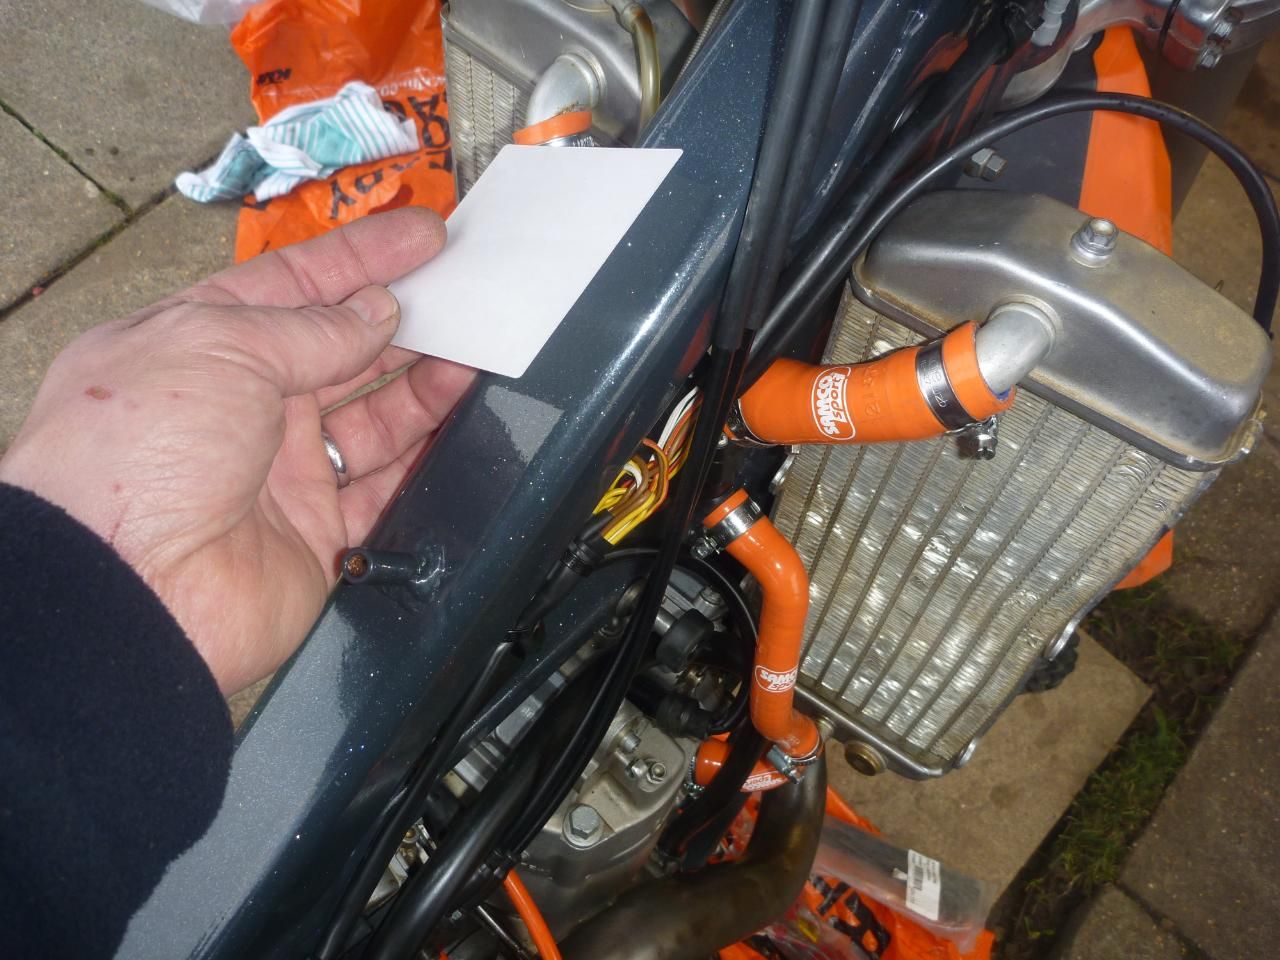
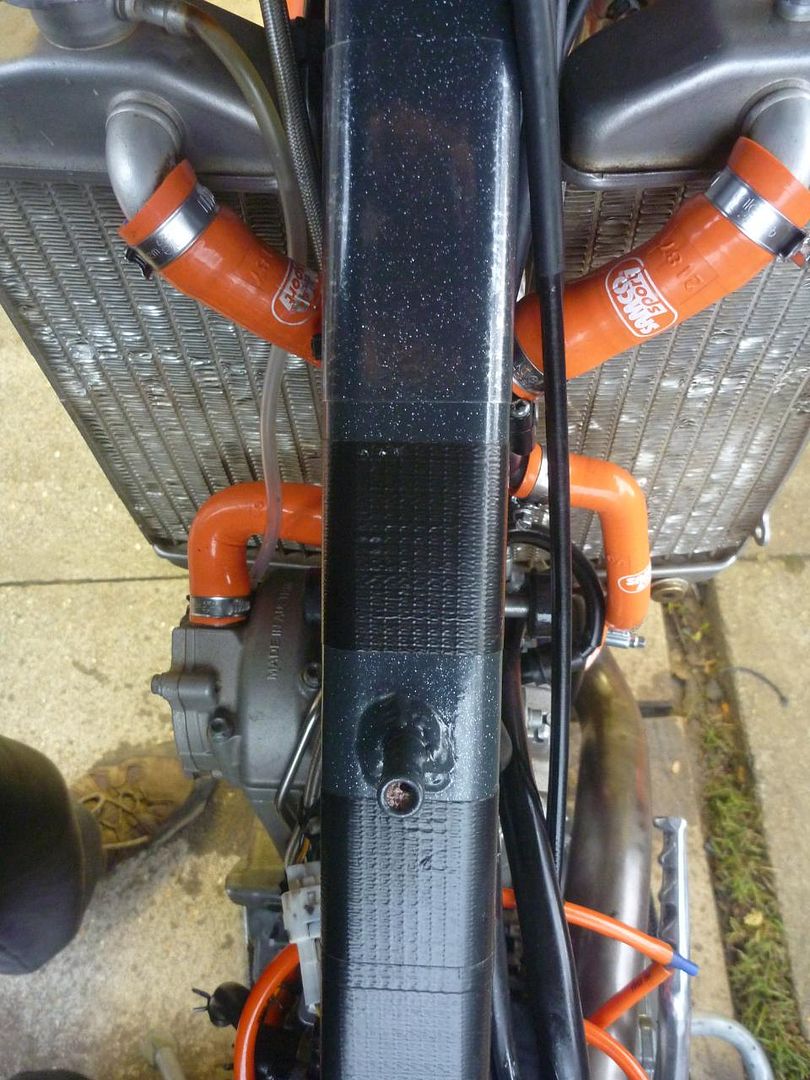
new ktm plastic cover for the frame
the cable and bits
and pieces need to be tucked away so the tank can slide on nice and easy
the white connector still to be moved
from the side. i needed to use a bit of tap on the frame as i only ordered one plastic frame protector
The frame needed protecting from the engine guard and I had some high
density foam strips which I glued to the frame’s down tubes &
lower tubes. This was held in place with the engine guard to dry or ‘cure’
the glue, while the guard itself was pressed firmly home by mounting the
bike on the stand for the night.
I’d had the brakes stripped off the bike and hanging up by the master
cylinder since the strip down so that had really sorted any air trapped
inside. I had also clamped the master cylinder onto a bar and put pressure
onto the lever by using a bungee. This, coupled with the vertical hanging,
sorted the brakes out. I did have to drop the LHS front fork out again
though, as the master cylinder wouldn’t fit through the gap between
the fork and the frame.
Final job before the shakedown run at Enduroland was to fit the bling
wheel rim stickers. Even though they are nearly new, there are some big
scratches on the sides of the rims already from stones, so I wish I’d
thought of fitting them sooner to be honest. They are simple to fit and
set off the black rims nicely. The final final job was to trim the rear
tyre with a hot knife as I didn’t want to fit a new tyre for a practice
day – not that I had any mind.
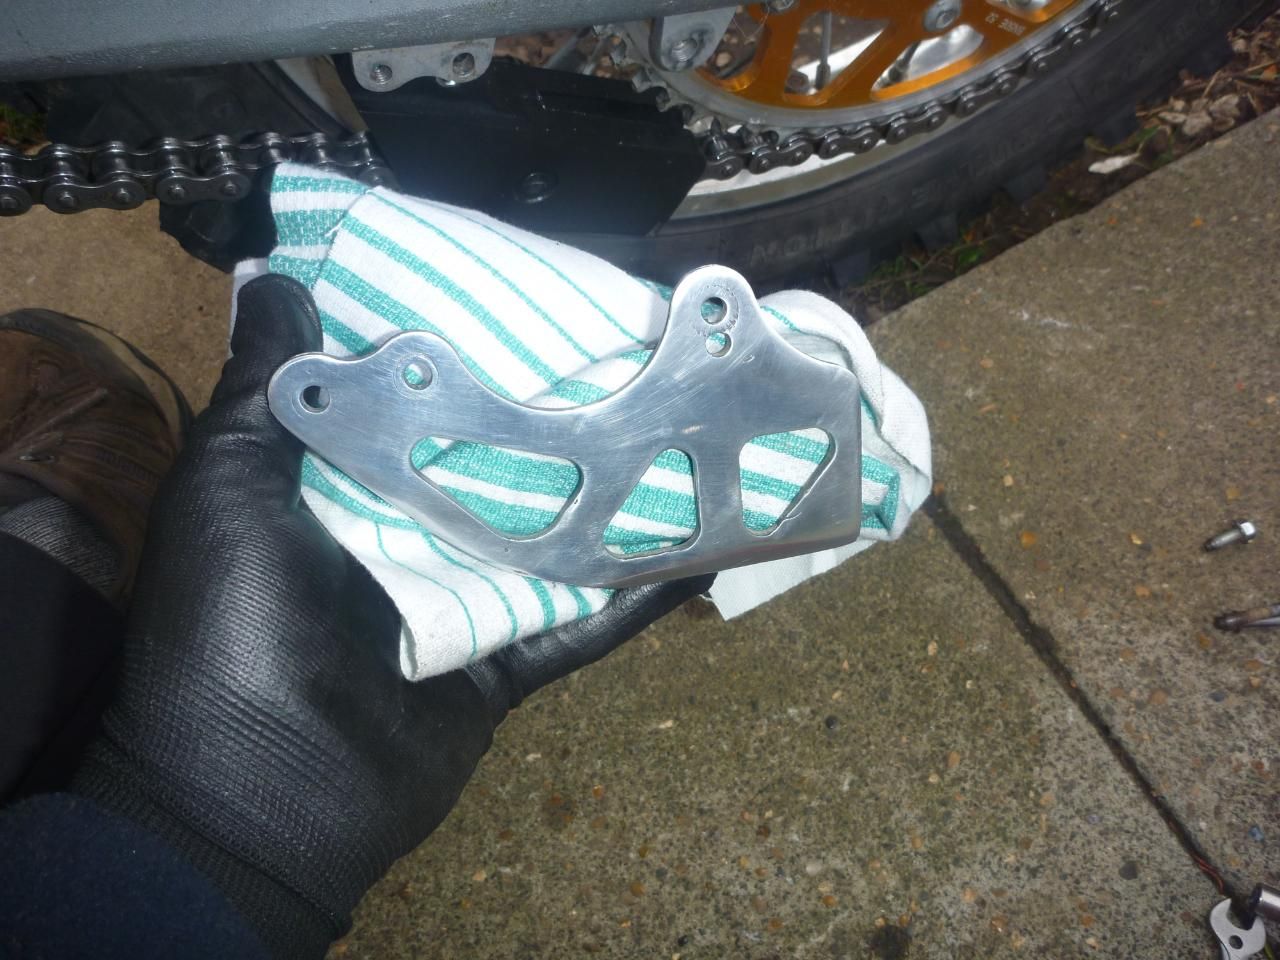
rear chain guide holder
was trashed even though it was replaced during the last re-build
a bit of quick polishing made it look presentable
i did the same for
the engine guard too.....but only on the bits you can see!
you can also see the foam that i glued
to the frame to protect it from the engine guard
chain guide was well knackered too. not anymore
i also replaced the
top roller guide and bearings as they were getting notchy
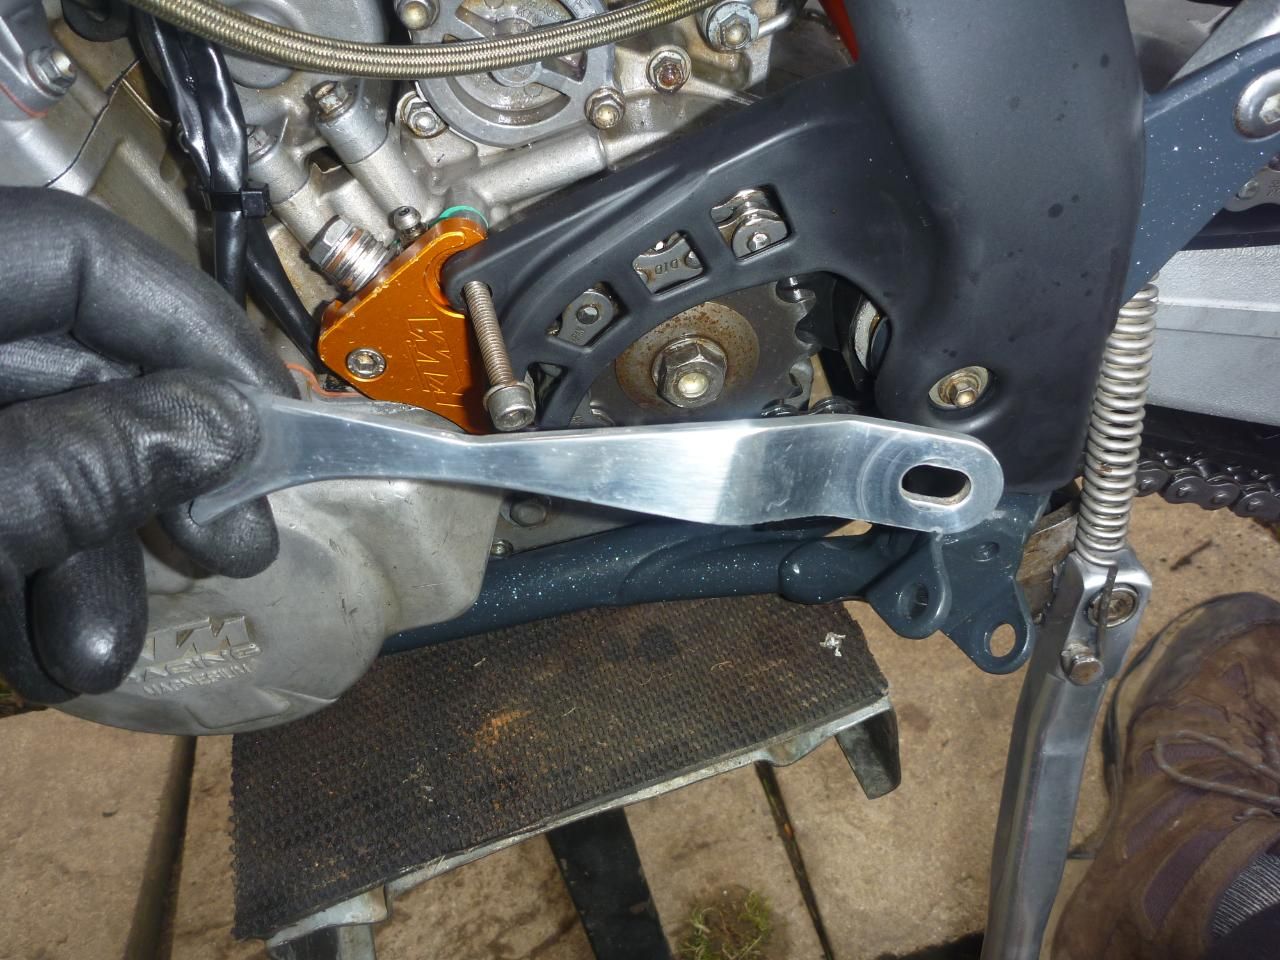
i found it was difficult doing up the bolt so accessed it from the other
side
all the carb hoses finished now
from the side.... note polished kickstart
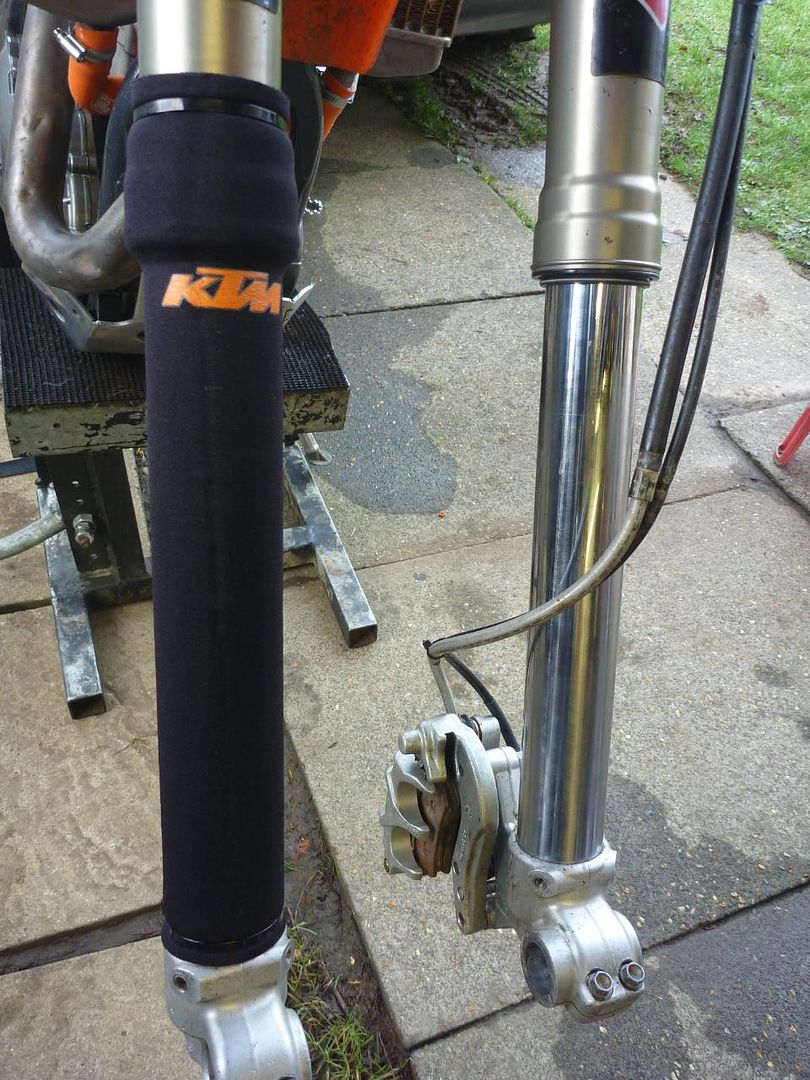
New fork gaiters too
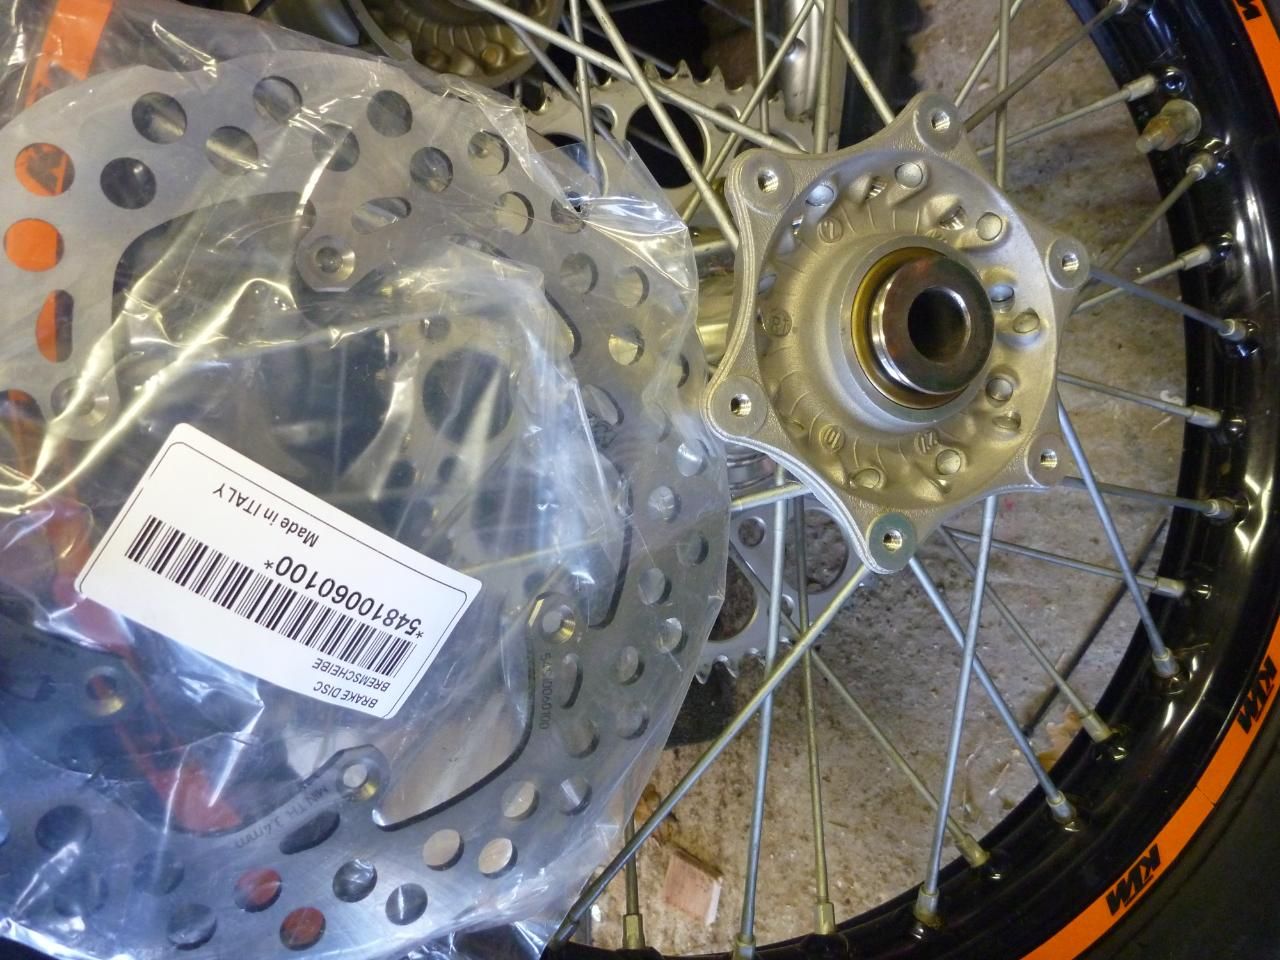
New disc going on
but first i tape out the hole to get rid of all the old loctight and to keep the thread in tiptop condition
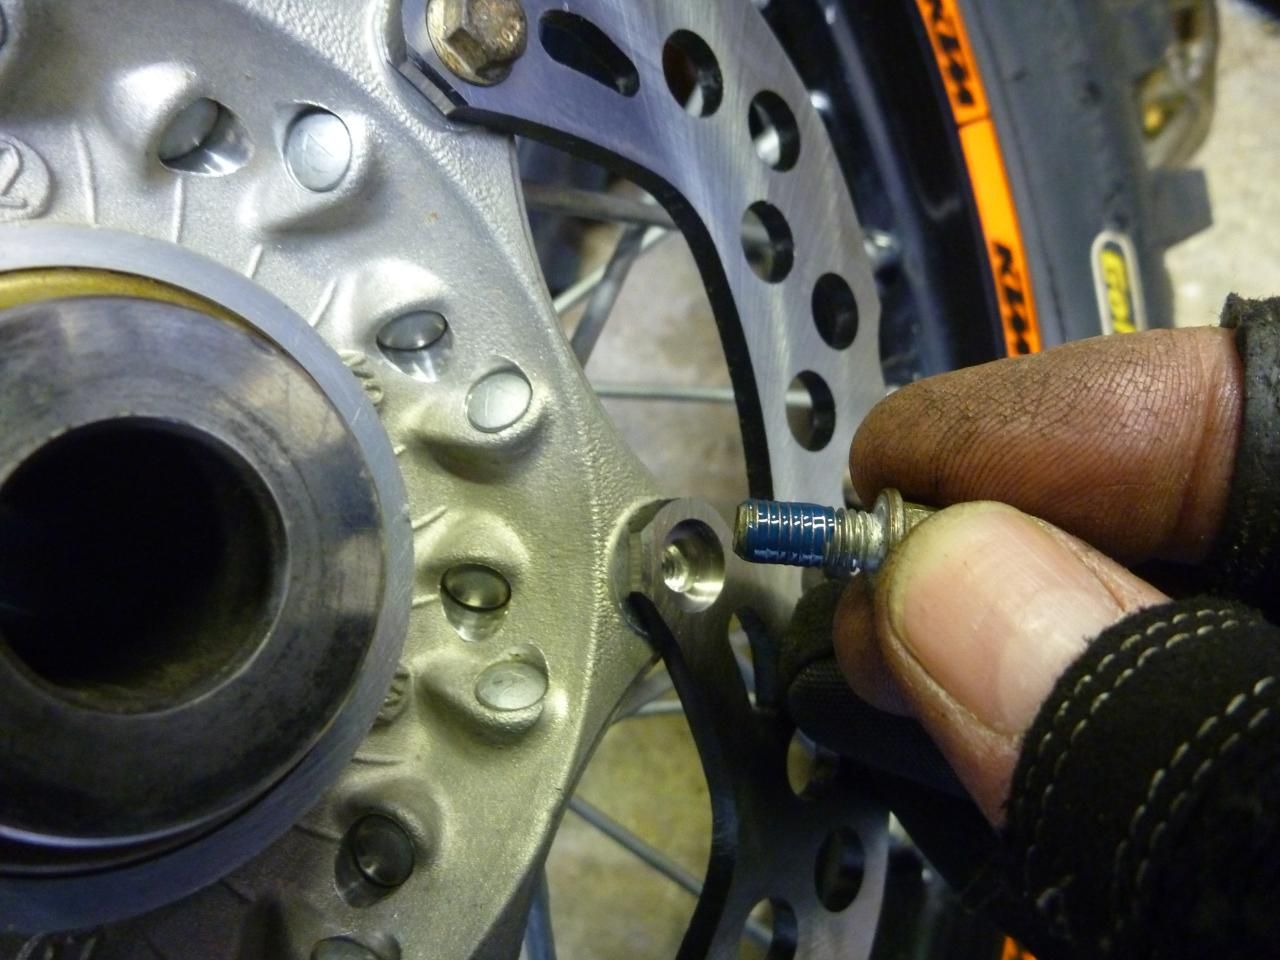
loctight is very important on discs. wheels are all clean and now have rimtape fitted
The practice day went well.
The bike struggled to start for some reason in the morning and I’m
not too sure why. I ended up having to kick it into life which is strange.
The putoline oil I had in it at the time is very thick when cold and the
hotter cam I fitted last year has made it a bit lumpy down below, so that
could be two reasons why. It was very cold in the morning as well so that
didn’t help. During the rest of the day it ran fine and made good
power, but I was starting to hear a funny whirring noise at one point
so I was thinking that the other cam follower was on the way out, as I’d
already replaced one before.
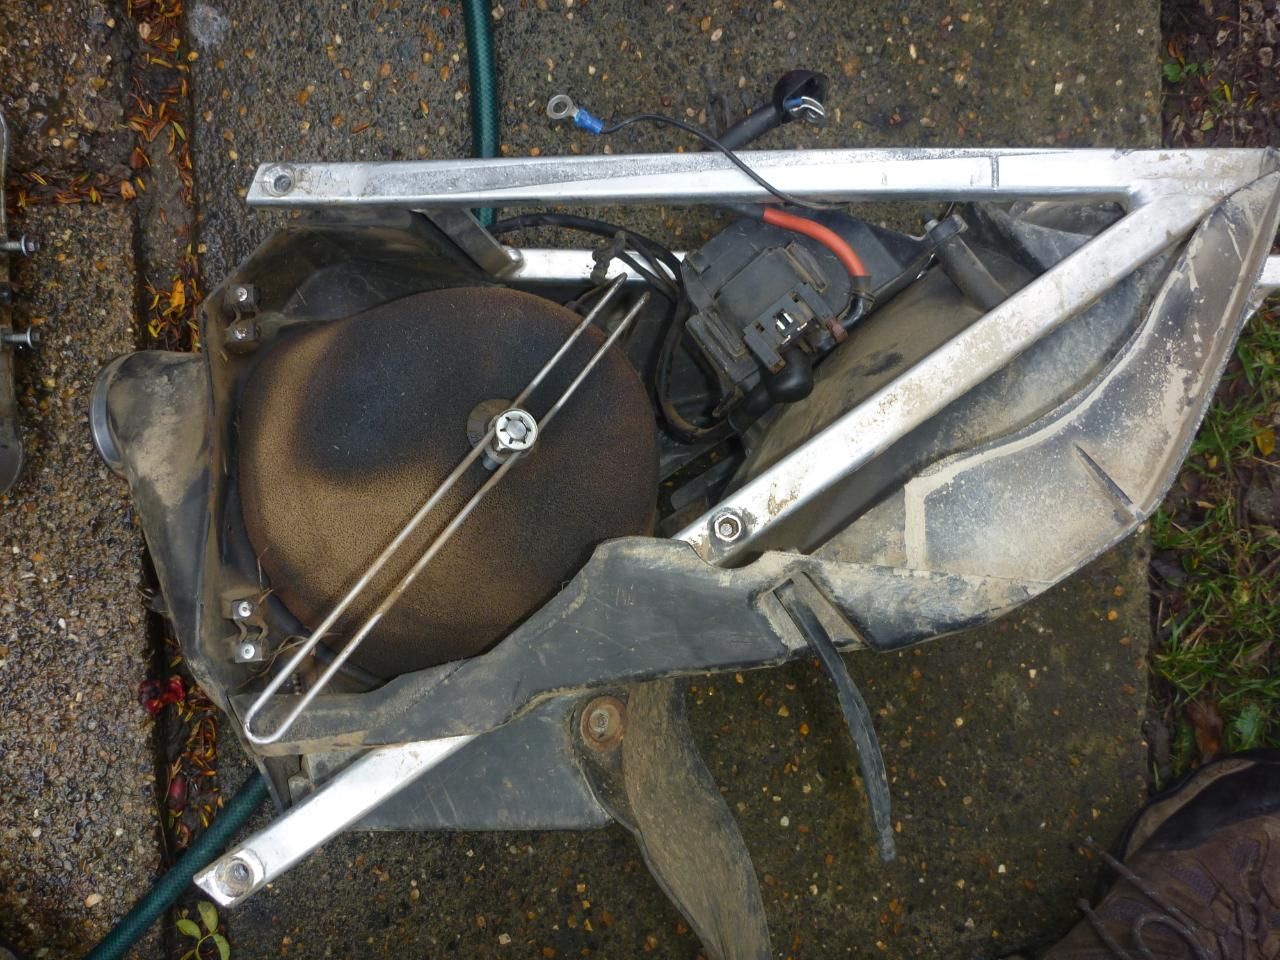
The test day also gave me a chance to try out my latest toy, a set of
Speedview goggles that has an electric motor that drives the rolloff system
via a remote switch on the bars. Sounds trick, and it is. Despite some
nay say’ers on the forums they worked a treat on the day and I’m
looking forward to using them this year. They have their own report page
and I’ll be updating the page as the year goes on. Well the practice
day was great but the mud and grass got in everywhere. It took two power
washes and two normal washes to get it sort of clean again.
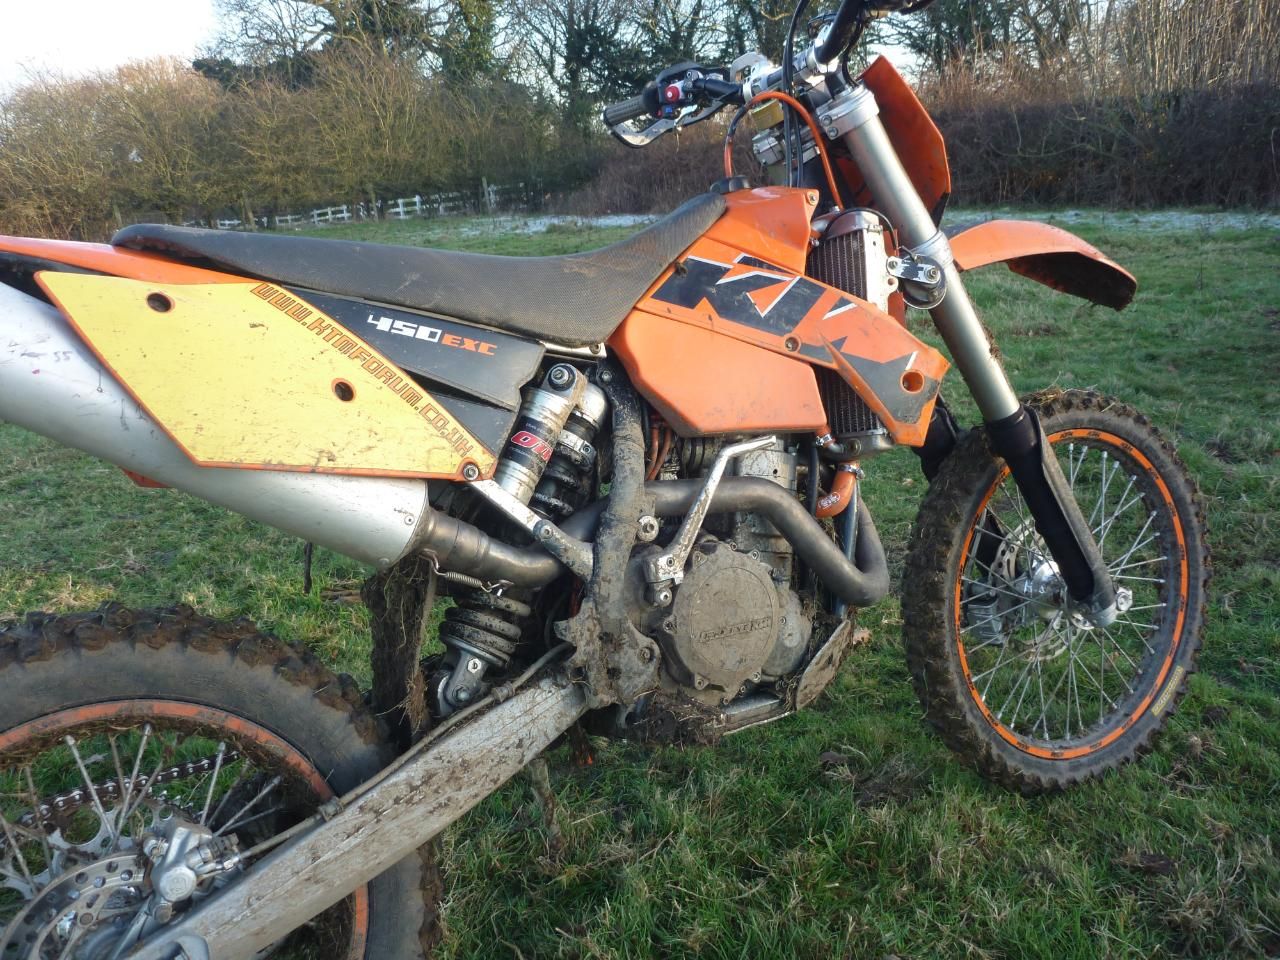
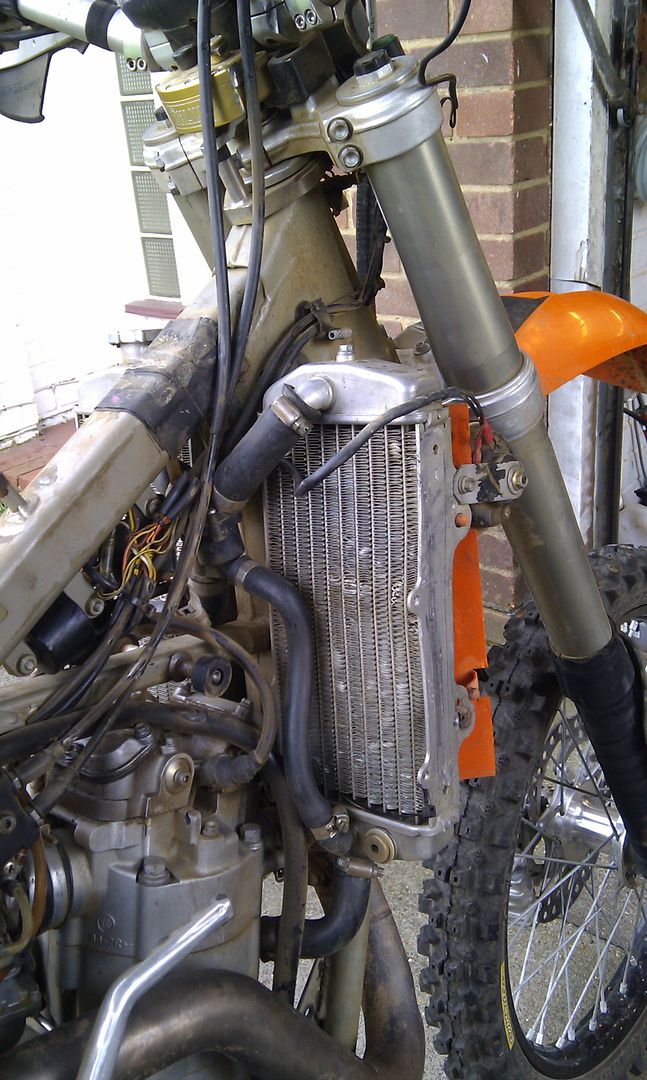
first shakedown run. just as well i was using the old bodywork as i ripped off a rad scoop!
First thing on Monday morning I was on the phone to the ktm centre to order parts but after a discussion I decided to pause for a bit. I pulled the tappet cover off to have a look and this removes the followers at the same time. Both rollers felt fine with no notchiness in them so I was back to square one. Well seeing as I had it apart this far it wasn’t much more work to replace the cam chain I wanted to do last year. The flywheel puller made short work of the rota and in no time at all the chain was split. The cover below the crank sprocket was off and the old chain slipped out. Comparing it with the new one you could see it had stretched a lot. There were only two clicks left on the tentioner with the old chain, but five clicks once the new chain was fitted. The valves didn’t need adjusting and I was glad to see that the garage elves had returned the feeler gauge I like to use for this job. I just wised they’d stop moving my tools about while I’m working on the bike. I’ll put a size 13mm spanner on the back of the bike and then go to pick it up only to fine it in the toolbox where I know I didn’t put it. Maybe I should rig up a high speed camera to try and catch them at it cos they are dam fast!
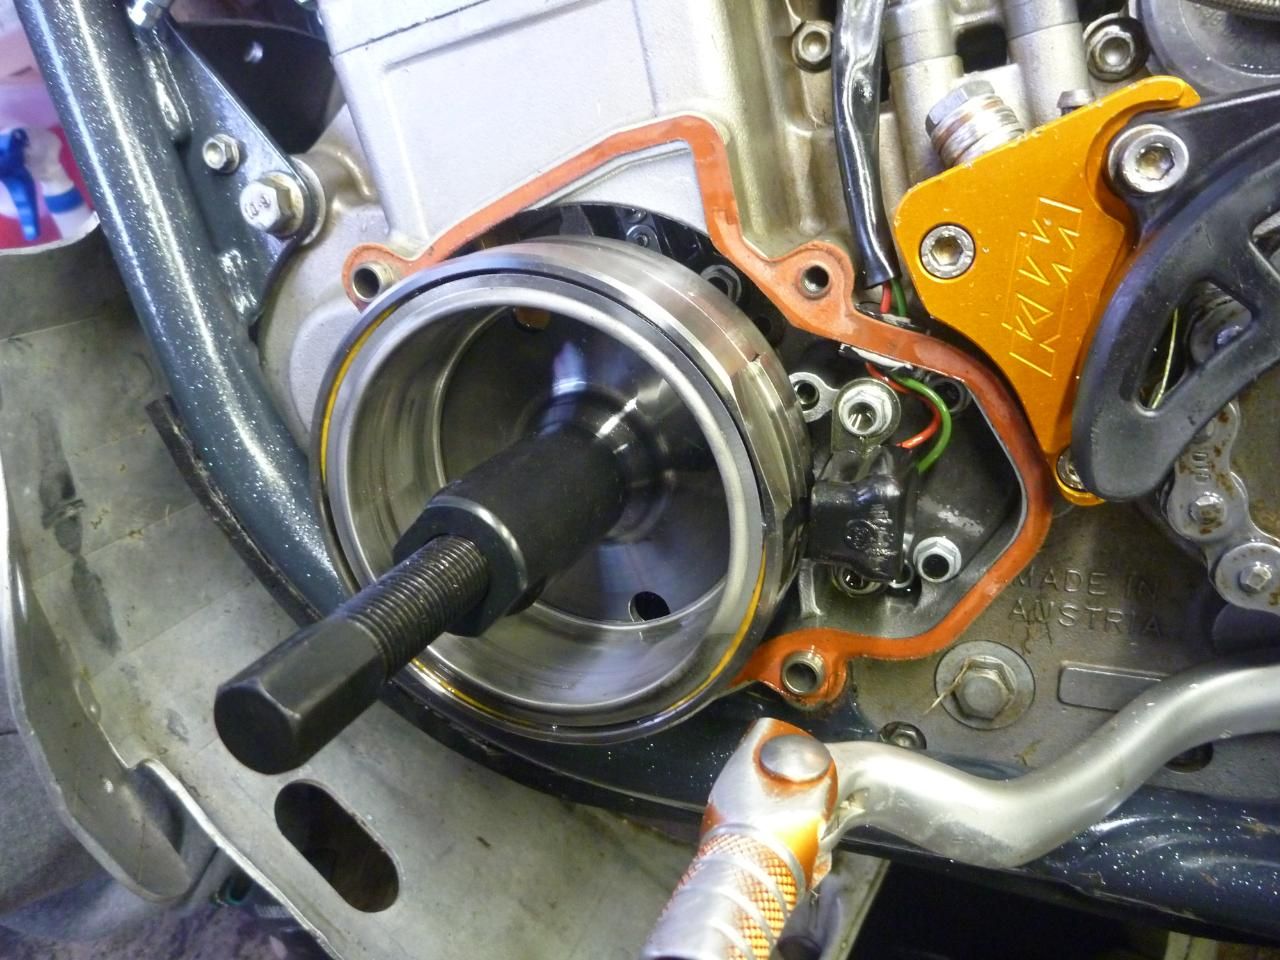
new puller onto the flywheel/crank
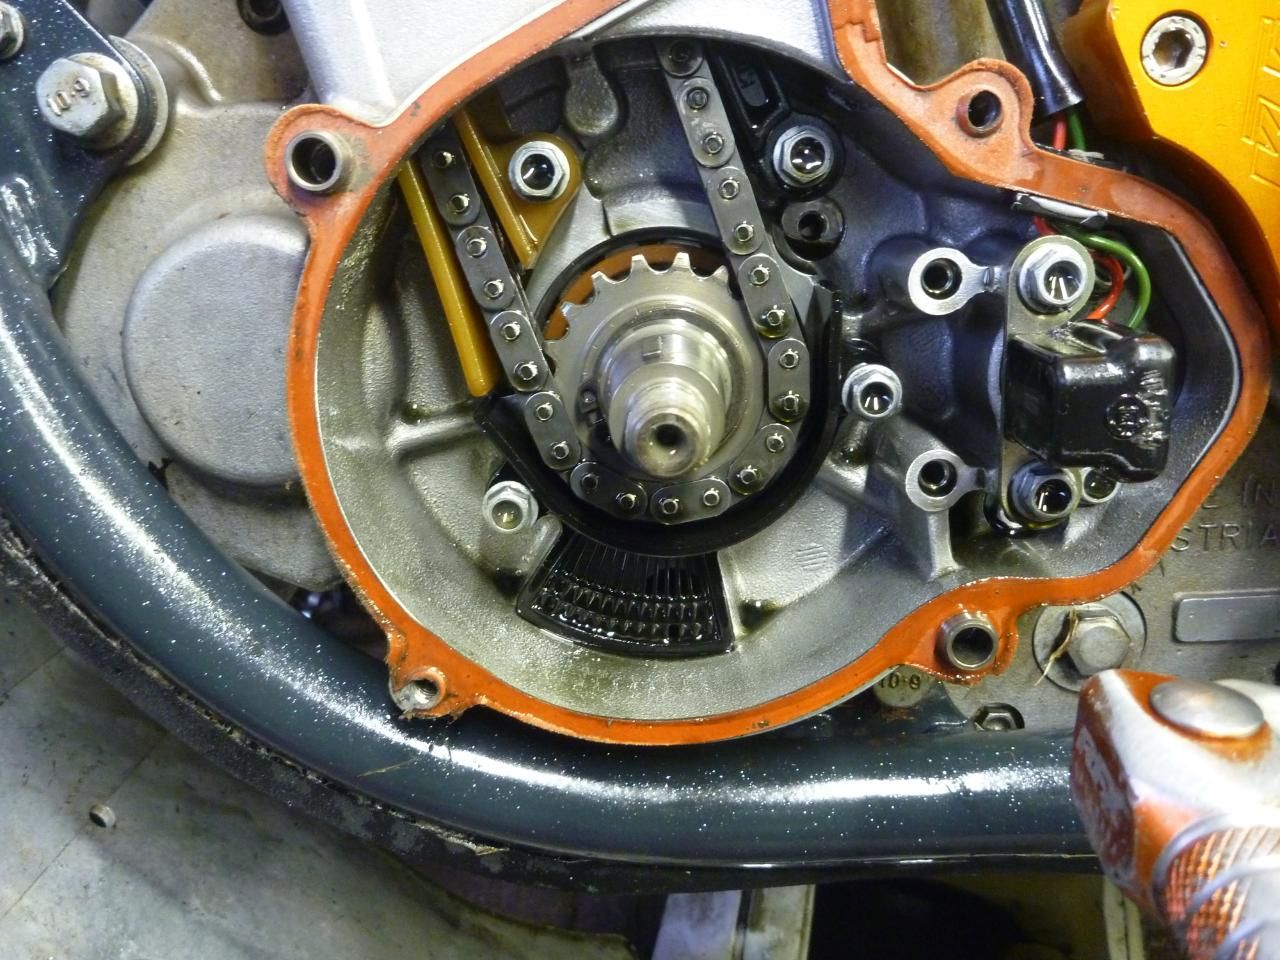
flywheel comes off real easy. now remove the small plastic mesh and
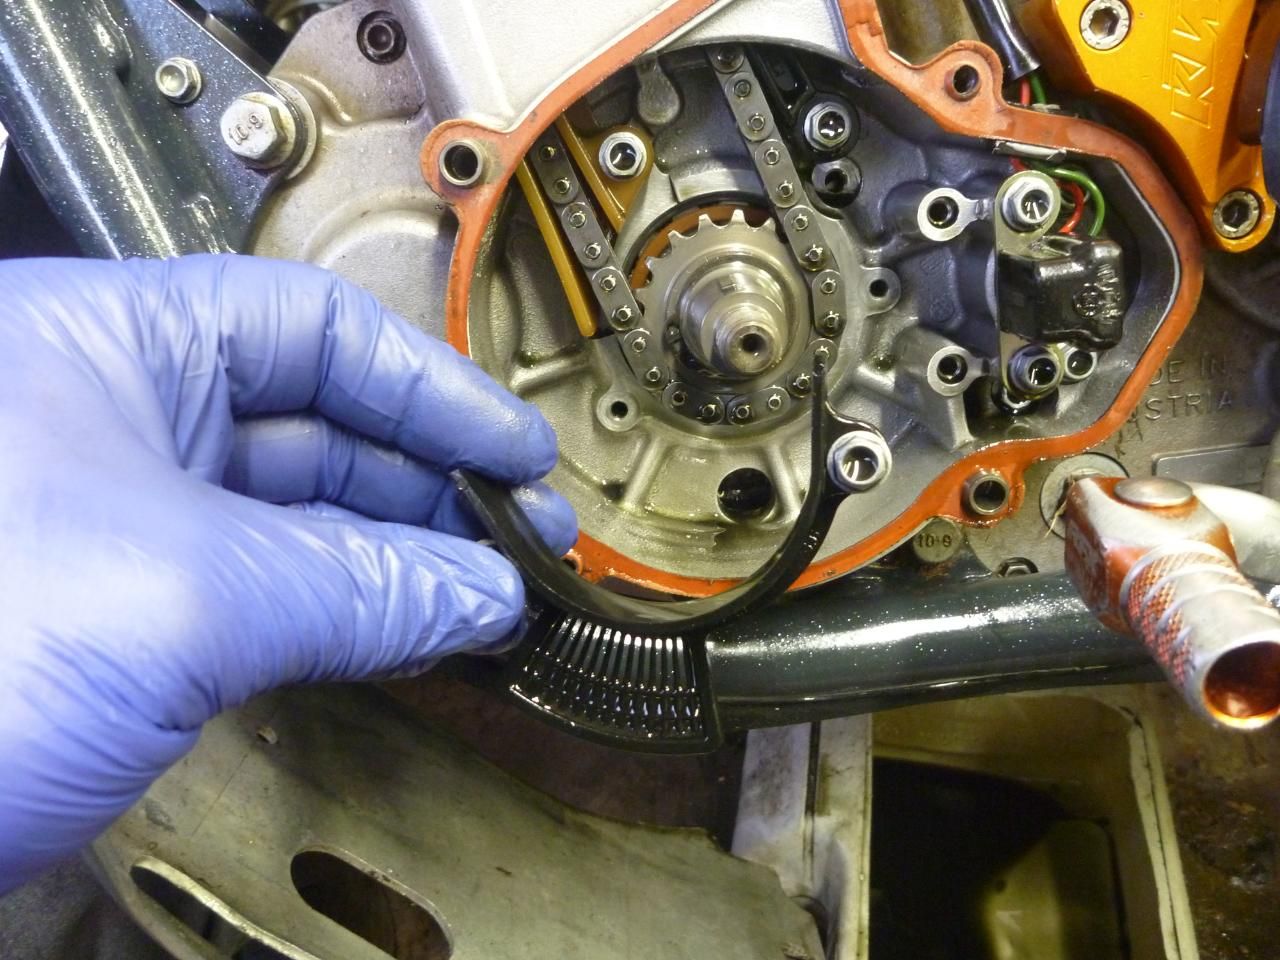
slip off the cam chain - once its been cut in half of course

you can use a chain splitter tool to split and/or rivet the chain
An oil change was next so I left the bike to drain overnight with the
filters taken out and old oil blown out the oil ways with an airline.
The oil I’m going to use now is Elf in 10w50 and it’s fully
synthetic at a very good price. So firing up the bike after all that the
engine sounded a little lumpy low down, but there were no nasty rattles
or anything, so I must have put it all back together ok. Mind you an rfs
engined ktm of that vintage does sound like a box of spanners being rattled
around when it ticks over. The newer ones always seem so much quieter
than mine.
new guards to repair flying stone damage
while i was in spending mood i got new covers too.
covers for both sides.
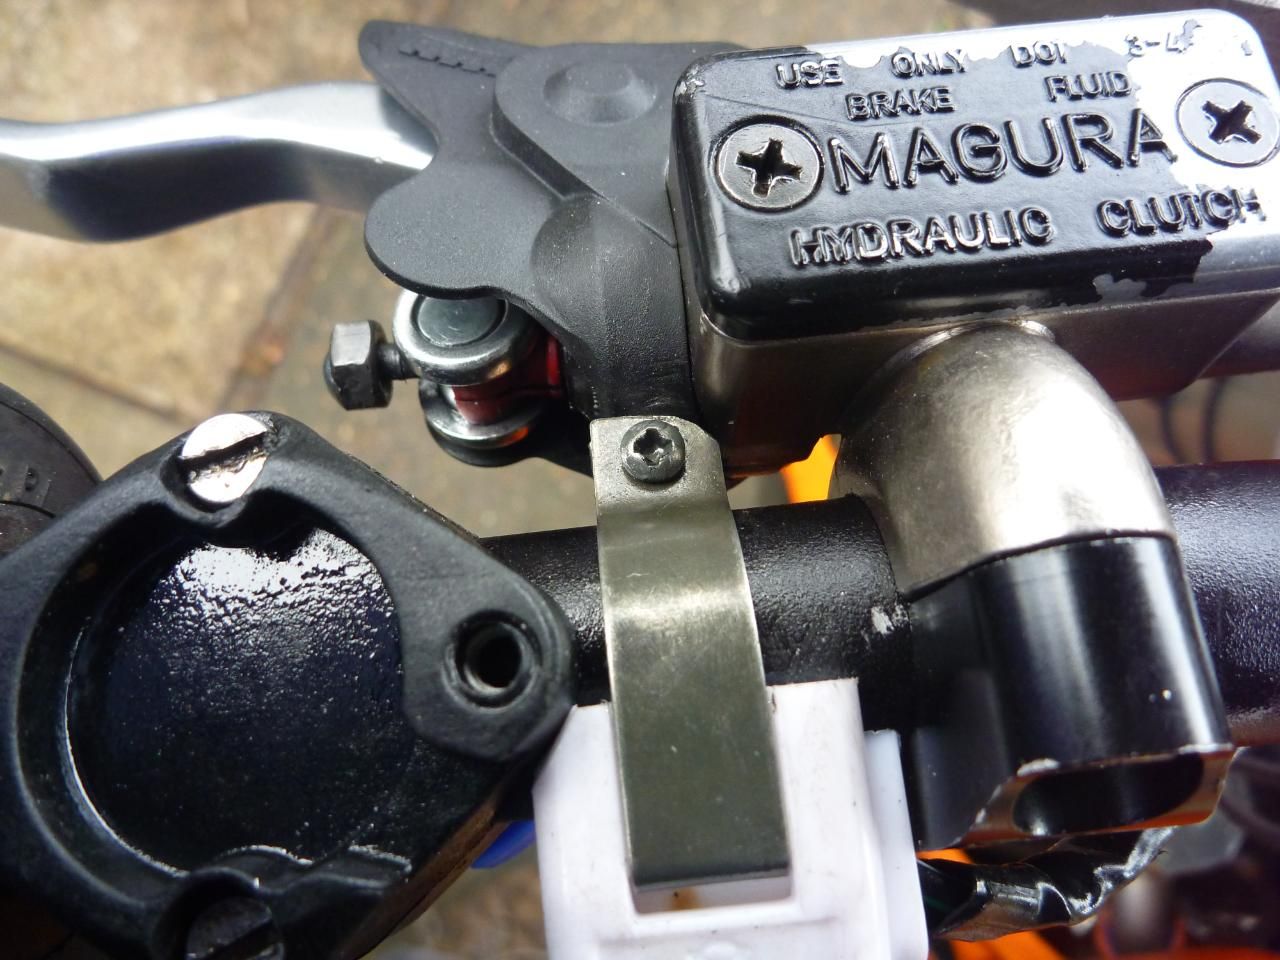
here you can see how i trimmed the goggle activation button to fit closer
All that needed doing now was the bodywork but things haven’t been
going exactly according to plan with delays and problems getting the pictures
to the designer. In the meantime I has some small jobs to get on with.
While I was in the mood for ordering I’d bought some bits on the
‘nice to have list’ too so now it was time to do some of the
little jobs. I took of both brake levers and treated them to a good cleanup
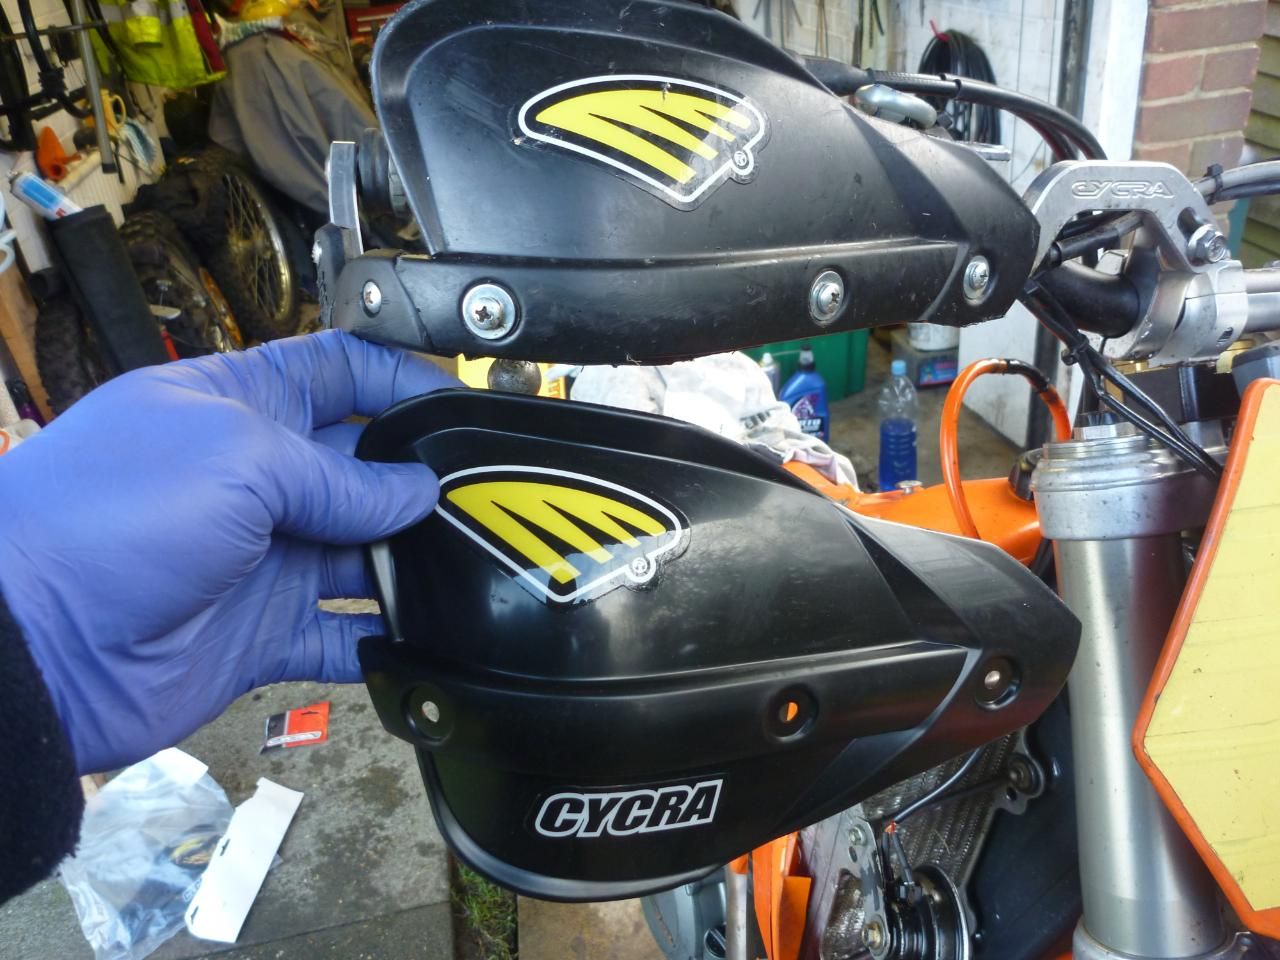
and fitted some new rubber covers to give the bike that new look. I also
fitted the new Cycra hand guard plastics that had been broken before.
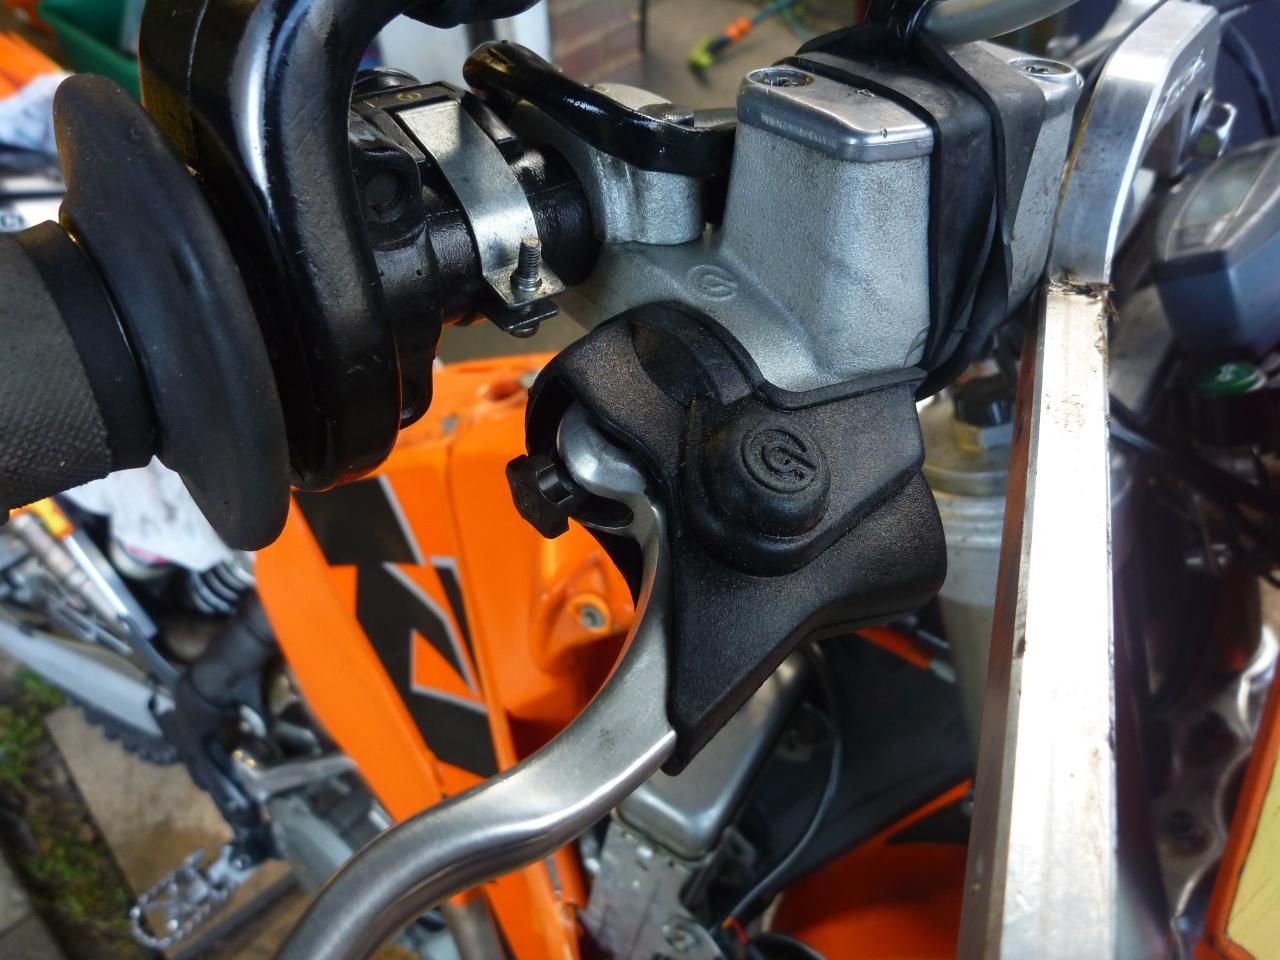
I also needed to try and get the remote switch for the speedview goggles
located a little better. To do this I trimmed the mounting bracket slightly
to help clear the brake master cylinder but it was still touching so I
chamfered the corner of the button housing on the LHS to allow it to fit
tighter to the KTM controls. This worked ok so now it can sit in an easy
to reach position close to my thumb.
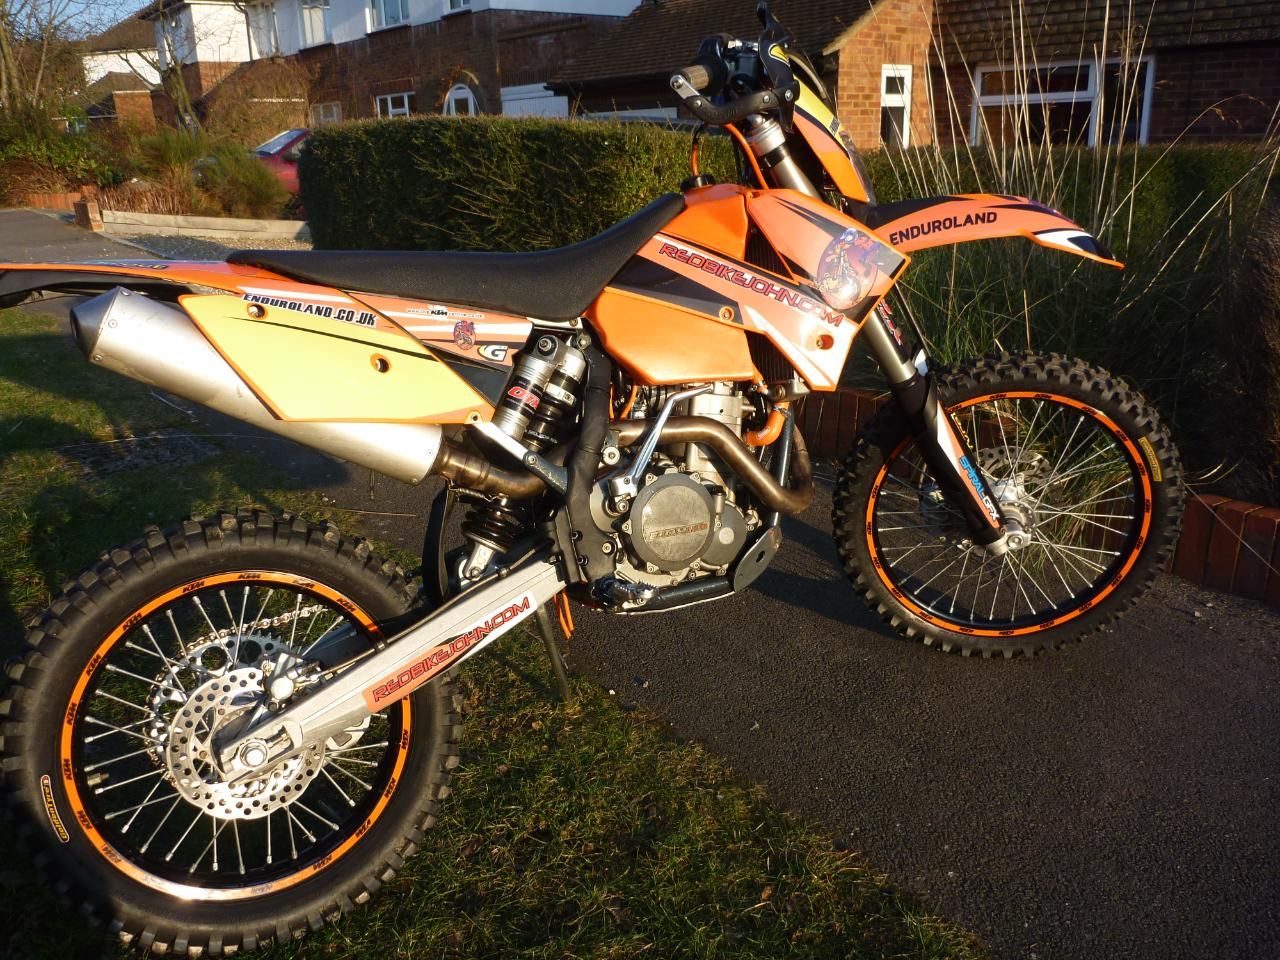
the finished article!
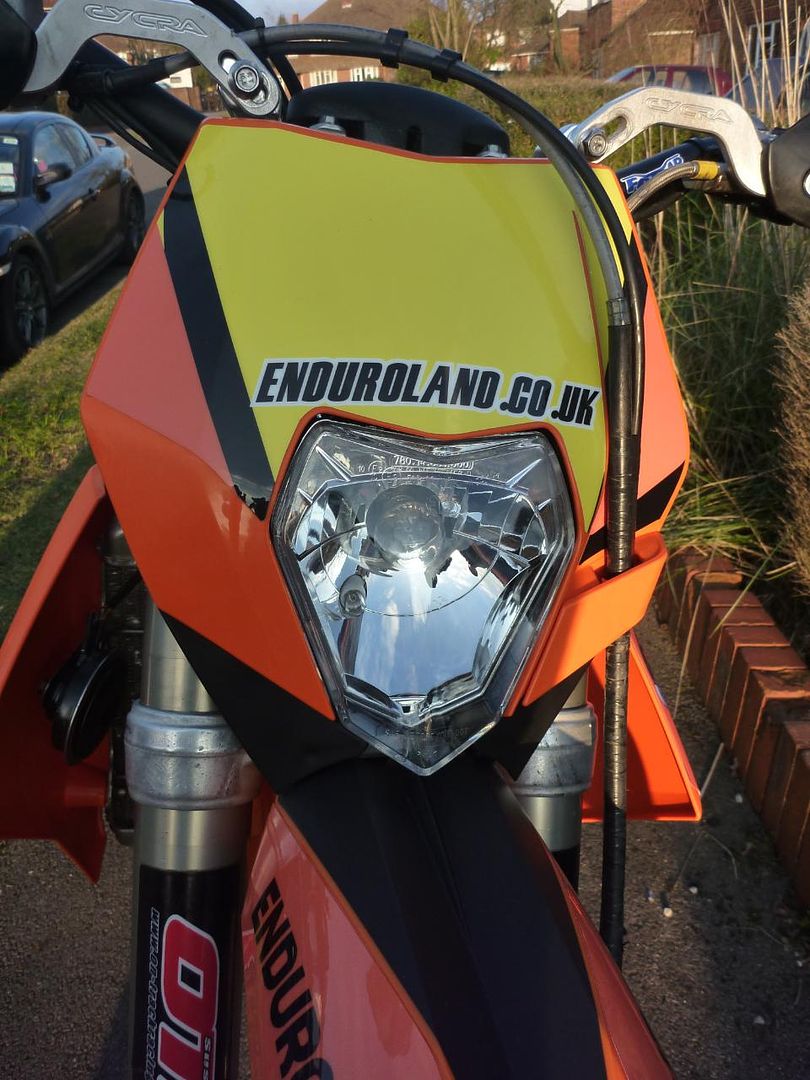
With only days to go before the first big race of the year ie ‘The Snowrun’ (hosted by the WTRA), I eventually managed to get my hands on the new set of custom graphics for the all new bodywork. As I may have already mentioned, I opted to go for a complete replacement front headlight off of the 2008 and newer ktm range. This fits the front mudguard from the same model line-up a lot better. Fitting the new graphics is a bit daunting at first as I’d forgotten how I did it last time. I found that peeling off a small section of backing paper, then cutting it off made it easier to line the whole lot up. Basically have about an inch or two of sticky bit and press this into place. Now check that the rest of the graphic is lining up correctly. If it isn’t then it’s a lot easier just lifting the small section. Do this by heating the stuck part with a hair drier and pealing it away. Then line up the non stick bit into place and press the sticky bit back down again, everything should line up now. Slowly peel back the backing paper and massage the graphic into place making sure there are no air pockets. A couple of times I thought it looked ok only to find a bubble once I took it into a different light. Squeezing the bubble out is next to impossible, so you can either heat it back up and re-do it or do the bodge job of pricking the bubble with a pin and then press down firmly to remove the air.
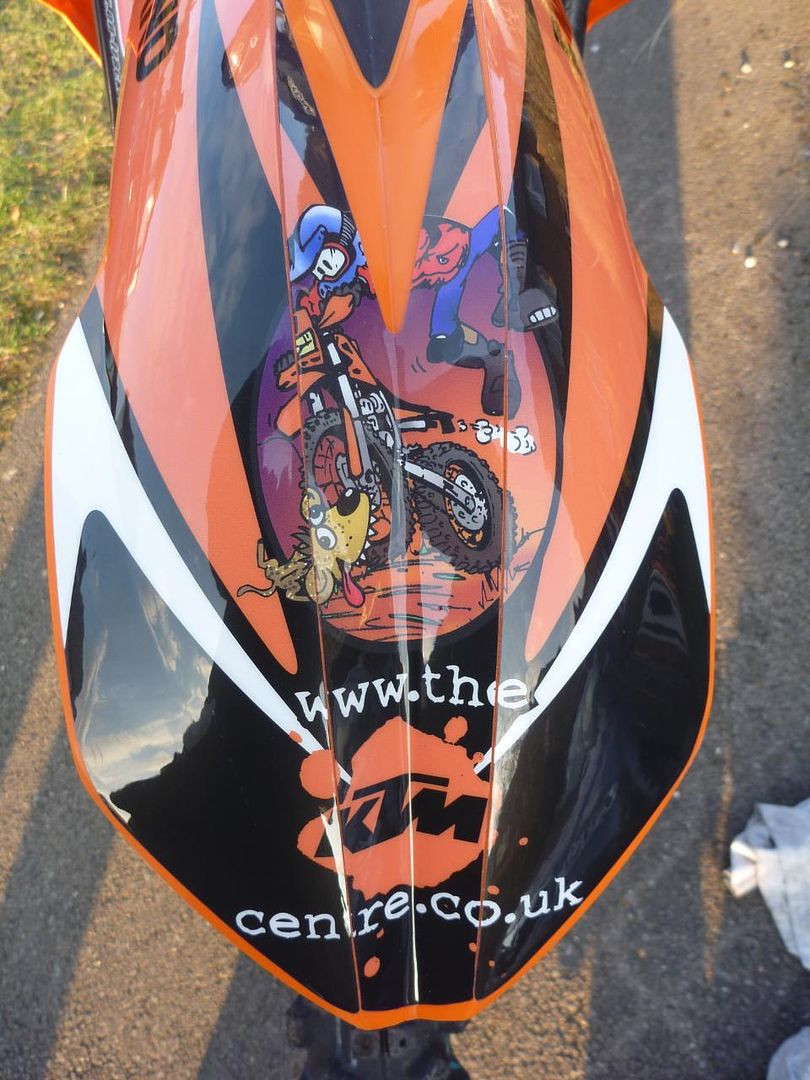
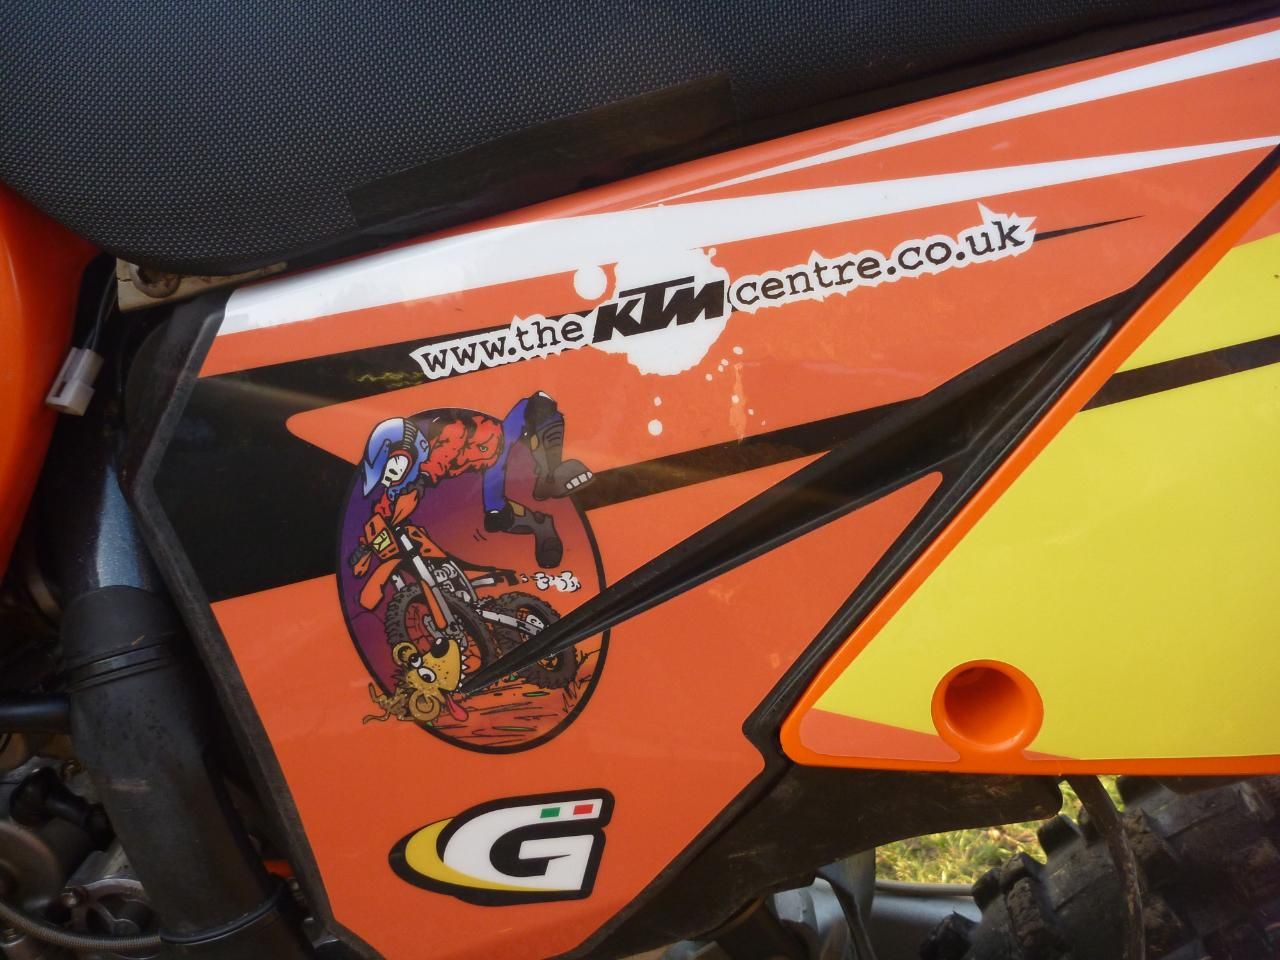
ok before anyone asks - no its not a picture of a bike riding over a
dog!
its a cartoon of a african wild dog attacking a dirtbiker!
I managed to get the new graphics all fitted on the Thursday night and
the next day I pulled the bottom off of the carb to give the jets a bit
of a clean out. You can do this in situ by loosening the carb rubbers
and rotating the whole thing so that all the four bottom cap screws are
accessible. Removes these and the bottom of the carb comes off and you
are free to remove all the jets for cleaning. I use a combination of a
gas nozzle cleaning tool, electrical cleaner and an airline. All back
together again, including the bodywork and it fired up just fine, once
I’d given it a couple of turns of the throttle to squirt some petrol
in that is. I must just be the cold I suppose as I never needed to pre=load
the engine with fuel to get it to fire in the past, just the choke and
a press of the button.
Car packed, fuel loaded, bike finally finished..... and then they cancelled
the race...due to snow!
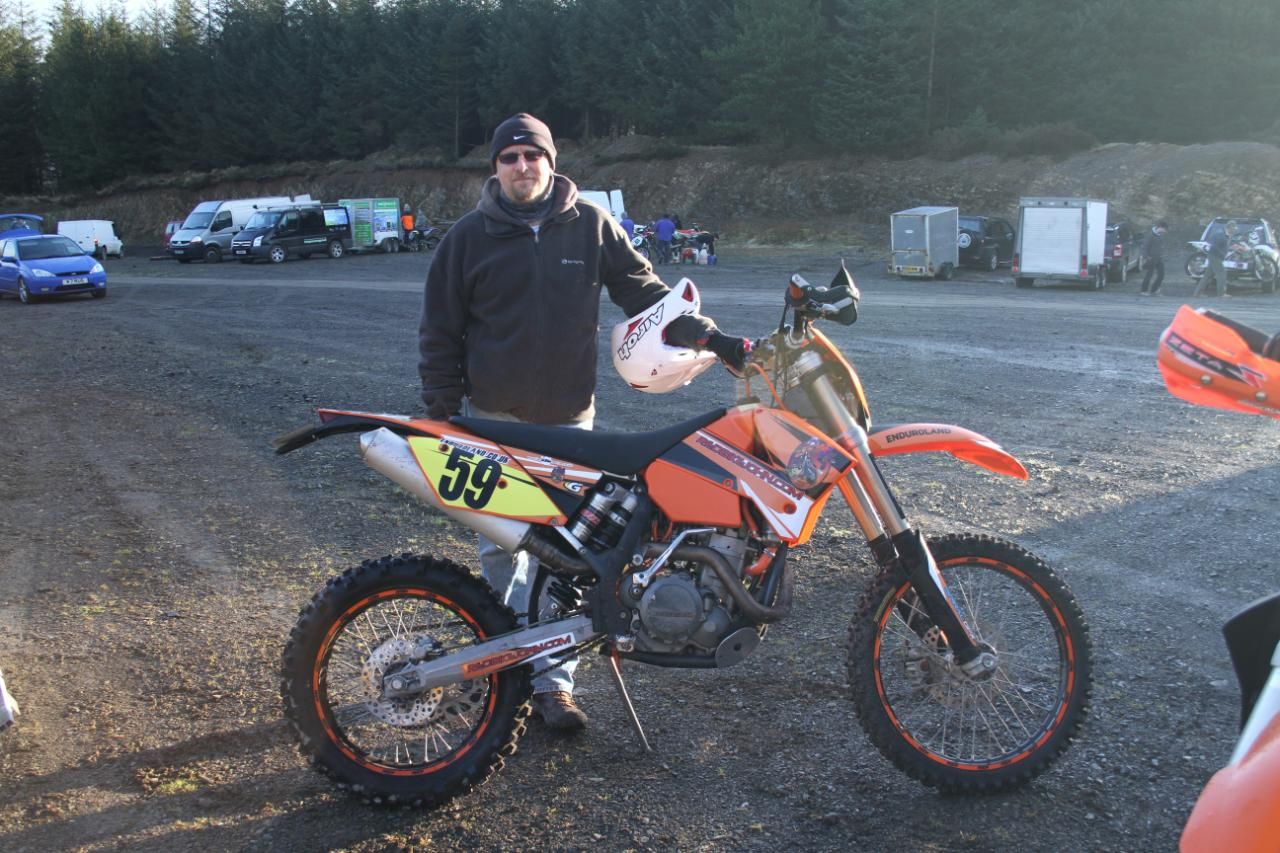
all ready to rock and roll
at the snowrun enduro. ... jump to report
!
If you enjoyed this report and would like to be notified of new reports or web site updates then join the mailing list. click HERE>> and send me an email.