.jpg)
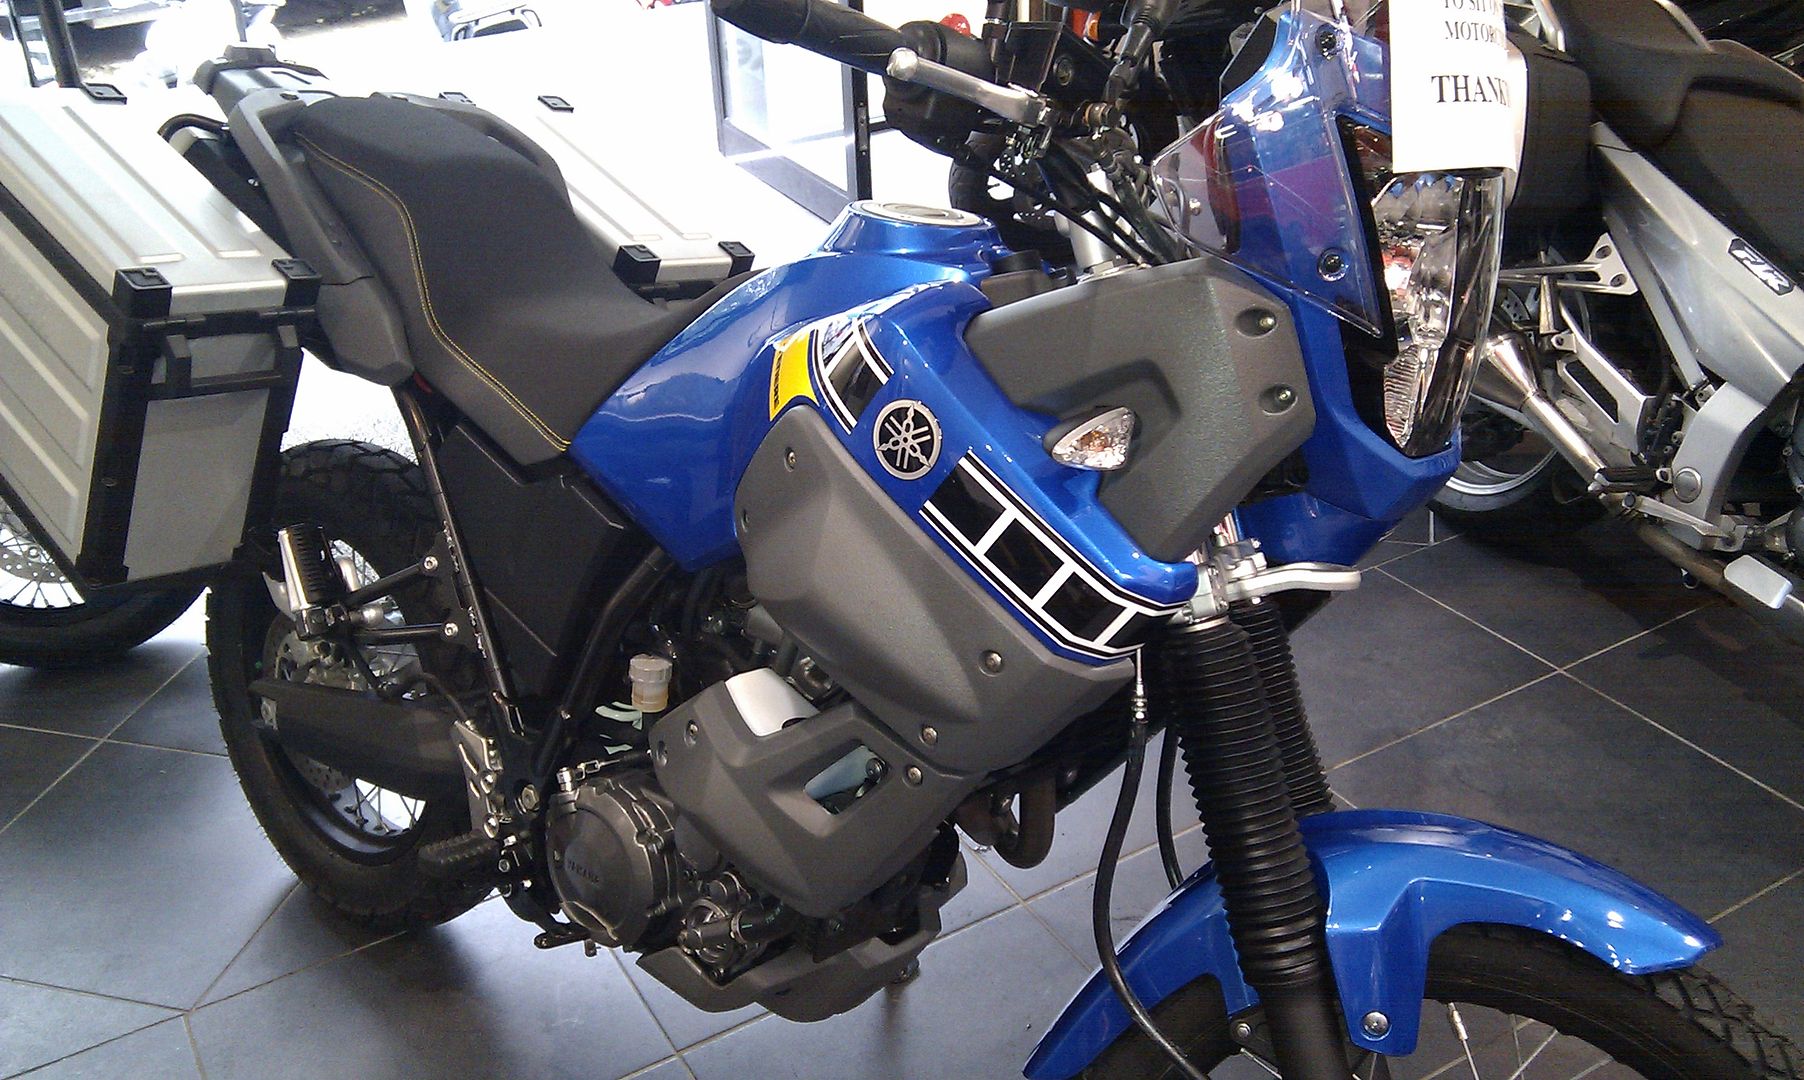
XT660Z Tenere
My Ownership Story (so far)
72 000 miles and still going strong
Making the decision: The decision to move to an ‘adventure type’ bike was a slow process. My old road riding group splintered and I was the only one left riding a sports bike on the road, a Ducati 916. A friend suggested we get dirt bikes and we both did, trail riding all over the UK. By the time the trail riding bubble burst due to NERC bill the 916 was not getting used much. The increasing use of static and hidden mobile speed cameras was spoiling any road bike ride and the fanatical sentences being handed down to bikers meant I was feeling stressed for several days after a spirited ride. I always stuck to B roads or smaller to keep away from other road users as much as possible but keeping within the speed limit on a sports bike just doesn’t feel right. Heaven forbid you are seen performing a wheelie!
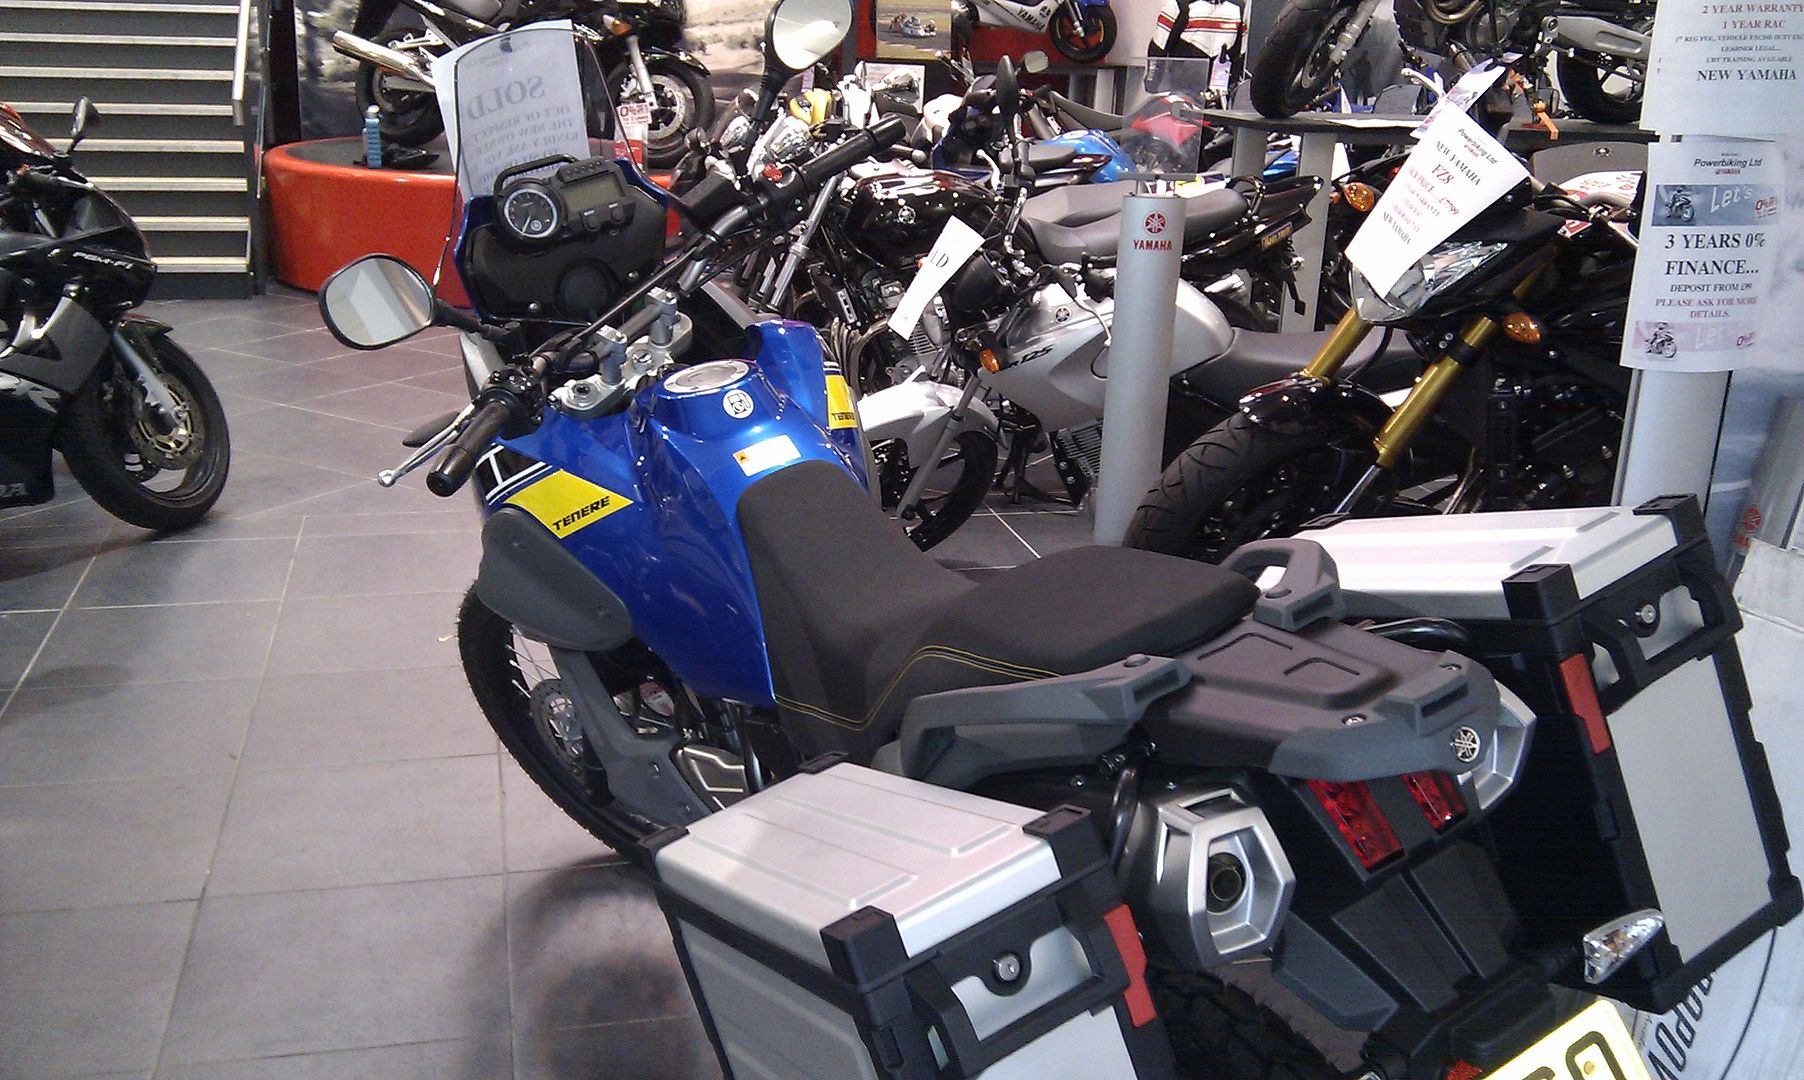
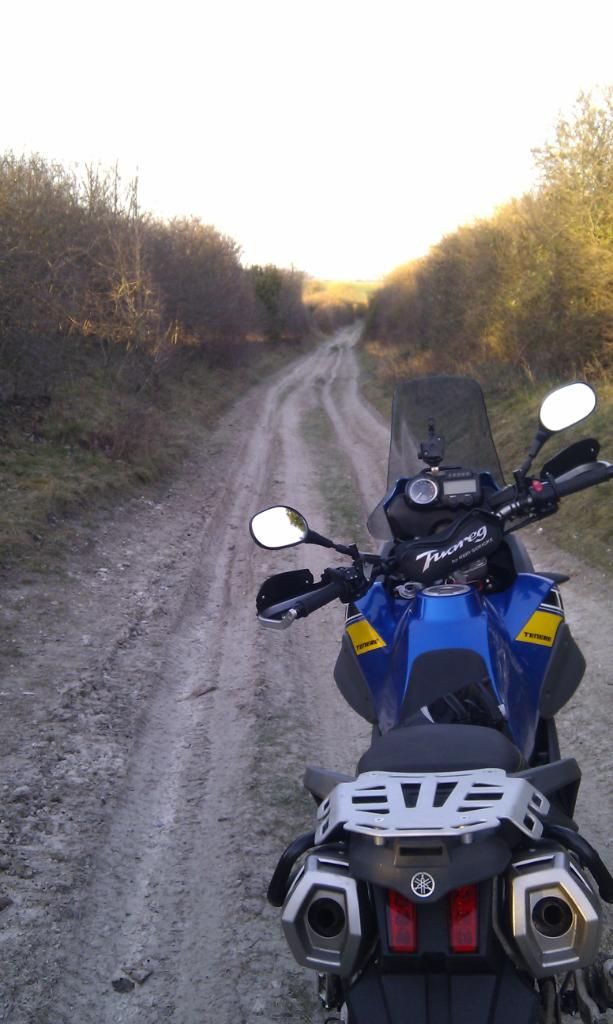
My new toy on the day i collected it!
Anyway the life of trail riding was totally stress free and that was what appealed to me so much, then the NERC nonsense changed all that, so we started racing enduro's. Racing over the last few years has been great but with the increase in adventure type bikes, books and TV programs I started to hanker after something like that too. A bike I could use to work, trial ride and maybe do some soft rallies sounded like the next big thing. Only one problem, there was no space in the garage for one and there was no money available. The 916 was sitting there under the cover all this time having not come out the garage for two years. I was feeling very guilty about it and I have to admit I’d pulled it out into the light several times to photograph it and put it on ebay but the look of it in the light was just too much and it was packed away again. In the autumn of 2010 I pulled it out again and it was starting to show signs of neglect and while it was hard to accept it I knew it should go to another person who could use it more.
In the meantime I had been looking at adventure style bikes for ages, I’d been window shopping for old tenere’s and transalp's on ebay for a while and even bid on a few, but the nice ones went too high and the bad once were too shocking, even just by looking at the pictures. As I got more serious the net was cast more into the newer and cleaner pond and now my heart said the KTM950 as I raced a 450EXC and knew they could put a good bike together. The KTM adventure bikes are really just big dirt bikes with fully adjustable suspension and proper off road wheels. There were two problems though. The first was that they were holding their price well against something like the new XT660Z and secondly was the fuel economy – or lack of. I just couldn’t have a bike to use to work and back if the fuel usage was going to be more or less the same as my Mazda 6!
Another option was a BMW 800GS but once again the price of a second hand one was more than the price of a new Tenere. Ok they had the fuel economy thing sorted but the under seat tank just didn’t feel like a good idea to me and also there is no way of fitting a bigger tank if you should choose to. The new Transalp’s were getting to the point of giving up on the dirt altogether and really didn’t fit the bill image wise or hardware wise. So that left the XT660Z Tenere. I liked the look of them from the very first time I saw one at the NEC show. My then girl friend (now wife) took one look and went “uck” but I always thought it looked the part and slightly odd looking, apart from the crowd, a bit like me then!
The more I looked into it, a big single cylinder bike made more sense. The time when I’d need more oomph i.e. two up would be quite limited throughout the year, so it made sense to compromise on the two up riding than to have a fuel inefficient bike most of the time.
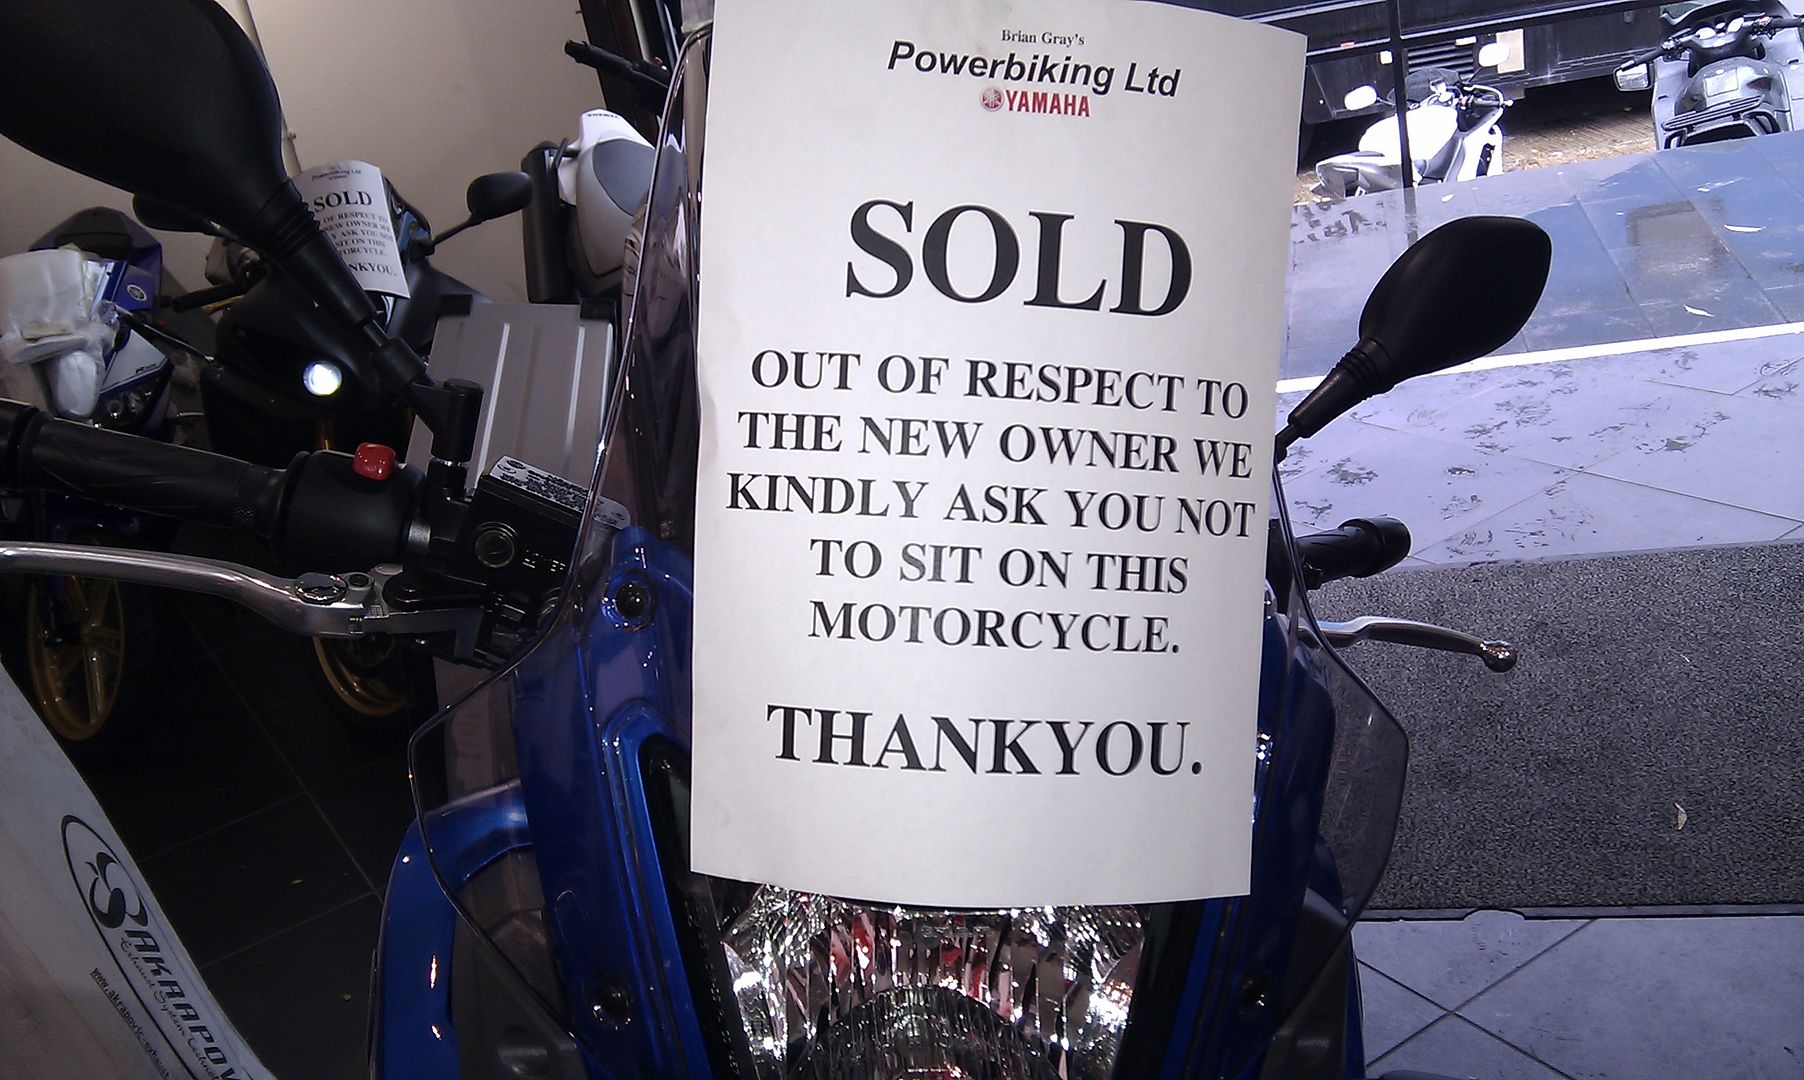
The 916 was sold to a chap on the KTM forum and after a bit of phoning around to find a ‘best price’ I went to Brian Gray ‘Powerbiking’ in High Wycombe to see what they could do for me. The deal was struck at £5400 with panniers for a new (but 2009 spec) bike. Two years warranty and three year 0% finance. This compared very favorably to the BM’s that were selling for over a grand to 1.5k more for a S/H bike and the KTM’s for this price were again S/H of 2005 vintage!

my old ducati had to go to make room and to pay for the new bike
yes i do regret it....... especially miss the stand up wheelies!
I’d done my homework so I knew what I was buying beforehand but the salesman still let me have a ride on his own personal bike to be sure I was ok with it. What I knew about the bike before I bought it.
• They had reliable engines
• Were not bad off road
• Very good fuel economy
• A bit slow
• A bit heavy
• A fair amount on vibrations form big single engine
• They were obviously built to a budget though so there were some cheap parts used and they could suffer on the ‘finish’ side of things like rusty spokes.
The early days: picking the bike up in the pouring rain was a disappointment. I’d not had a ‘new’ bike since 1991 and this one would never look the same again as it was ridden off into some pretty crap weather, and it pissed down with rain every time I went out for the next two weeks. I’m not kidding, I did not have one dry ride in the first few weeks!
the first trail ride later in the year
In the run up to xmas the new bike meant the xmas list was going to be littered with XT parts and the family were very pleased at this as they sometimes claim it’s hard to find the ideal present for me. A forced layoff in October (three weeks holiday in the sun – yea life is hard) meant that by the time I got back on the bike the winter has set in with a vengeance and the 4.45am rides into work became unbelievably painful on the hands, so barkbusters were first on the list followed by heated grips. Another item on the list was an engine guard form adventure spec, as I heard the Yamaha one wasn’t up to much quality wise. The touratech catalogue had a good thumbing through and a power socket ,as well as a kick stand plate or ‘camel toe’ got on the list too. The XT660.com shop had some nice xt T-shirt so these made it into my stocking as well.
-
So after several weeks of ownership I had come to the following conclusions.
-
Yes it was a bit heavy. It didn’t feel like it to ride, but maneuvering it in the driveway over uneven surfaces it was pretty shocking to feel just how heavy a ‘big bike’ felt compared to my 450EXC (which isn’t exactly regarded as a lightweight bike in the dirt bike world).
-
It was a little over geared for my liking as it would not pull very well under 3k rpm in any gear other than first, so that was the most irritating thing to get used to.
-
The fuel gage indicated reserve very soon and I could only get 18 liters in when filling it up.
-
There were a few vibes but nothing too serious.
-
The buffering from the wind on the motorway was a little annoying.
-
The main beam was total pants on the small back roads but the dipped beam was actually fairly good.
-
The standard Michelin Siracs were better than I thought they’d be in the wet and cold.
-
The engine felt a little strangled but again this was something I knew about before and a few mod's could apparently sort this out.
Now if you read all the above you might start to get the impression that I wasn’t too enamored with the bike, but nothing could be further from the truth. I loved being on a bike that wasn’t begging me to thrash it all the time, like a sports bike, or pull wheelie's like on the street fighter. I was plodding around looking at the scenery, well what I could see through the rain anyway and generally just being on a bike was a great feeling. Being on a sort of ‘utility bike’ as opposed to an elite sports bike meant I did not feel guilty about using it up and down the motorway and going to the shops in the rain.
A visit to the NEC show and I picked up a slightly taller screen (40mm) from Sidmarks for £40 and a set of heated grips on offer from George White. The screen and grips were fitted straight away but as the wind was still hitting my hands and freezing them, the commute into work stopped for a while. -4 degrease was just too much on the hands and it’s no good having warm palms if your fingers still feel like they are being chewed off by a yeti! The taller screen did appear to make a little improvement but I also invested in a small HG bag that sits on the bars and deflects the wind coming up the tunnel by the tank away from your chest. For £10 this is a great little thing to have and is also handy for keeping odds and sods in. After xmas I was in full fit out mode as father xmas had managed to come through with the adventure spec engine guard as well as the barkbuster hand guards, power socket and camel toe.
Evaluation of aftermarket products fitted by Jan 2011...
1. Barkbuster Hand guards: Well made and ready to fit straight away, but there are a few issues worth mentioning. They do not use the original handle bar weights. The OE weights are pretty substantial and the BB ones supplied are a lot lighter. This means that the vibes getting through to the hands do increase a fair amount, quite noticeable on the first ride I took. The second problem is the fact that they tend to stick out a little. This increases the width of the bike’s bars and for commuting this isn’t great, on the dirt this could actually be an advantage if it went over. More on this later as I try to limit the vibes2. Power Socket from Touratech: Fits straight on with no issues. This is an auxiliary plug though so normal ‘in car’ plugs don’t fit.
3. Camel Toe Touratech: Does its job well enough on the dirt but also makes the stand slightly longer on the tar so sometimes you need to watch how you park, as the bike can be a little upright.
4. Engine Guard: GIT from Adventure Spec. Great bit of kit. Well made and simple to fit but the instruction are wrong having obviously been made for an earlier type of guard.
5. Taller screen Skidmarks: Ok fit and well made. Not a great revelation in airflow but slightly better.
6. Roxter Grips from George White: good at first, but stopped working come early spring so not very good at all really.
So now the commuting could continue as the hand guards and heated grips made things a lot more bearable on the early morning run into Wembley. I was still getting a little cold on the body despite several layers so I brought the small plastic foam ‘chest plate’ into use again. I’d cut out a chest sized piece from a plastic packing sheet and this was great for keeping the cold air off the front part of my body. This, coupled with some long john’s, a winter buff, and I was able to commute with some form of comfort.
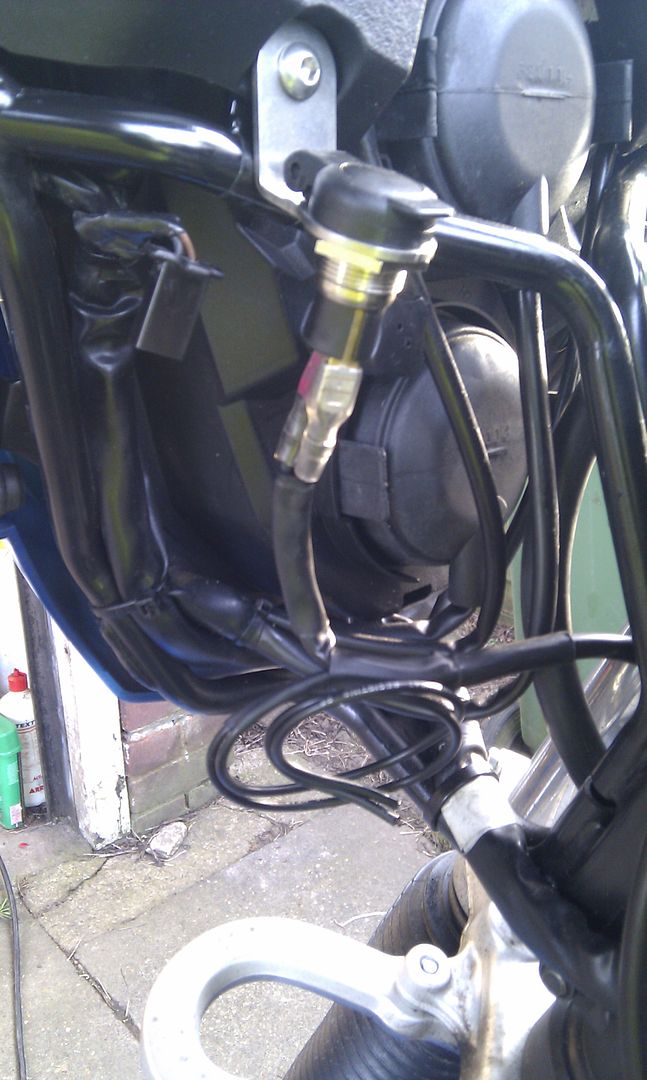
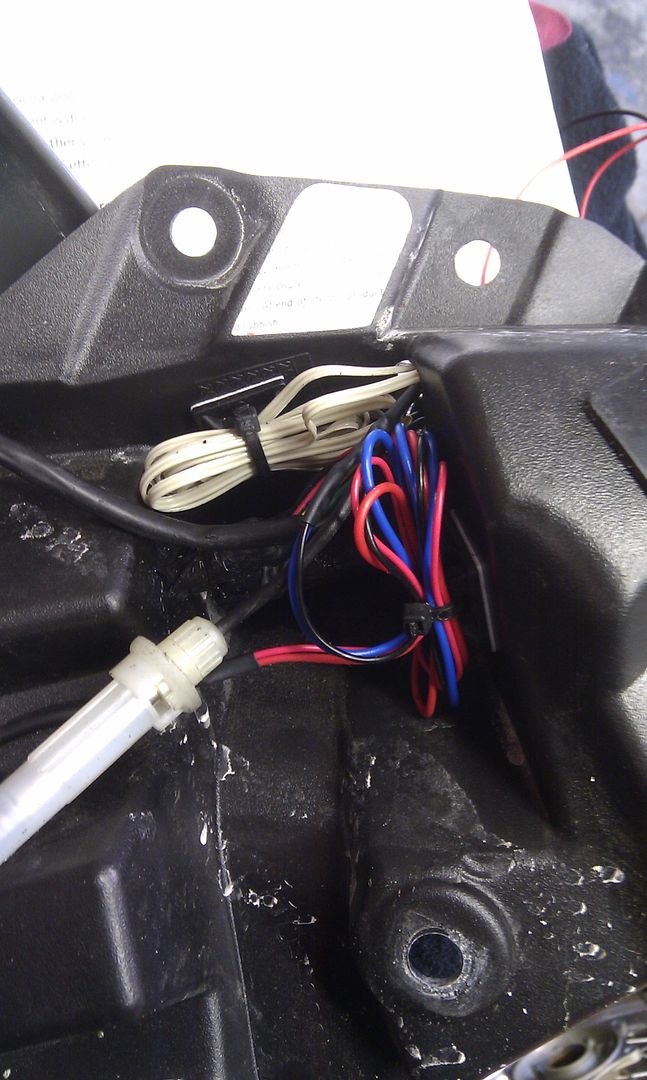
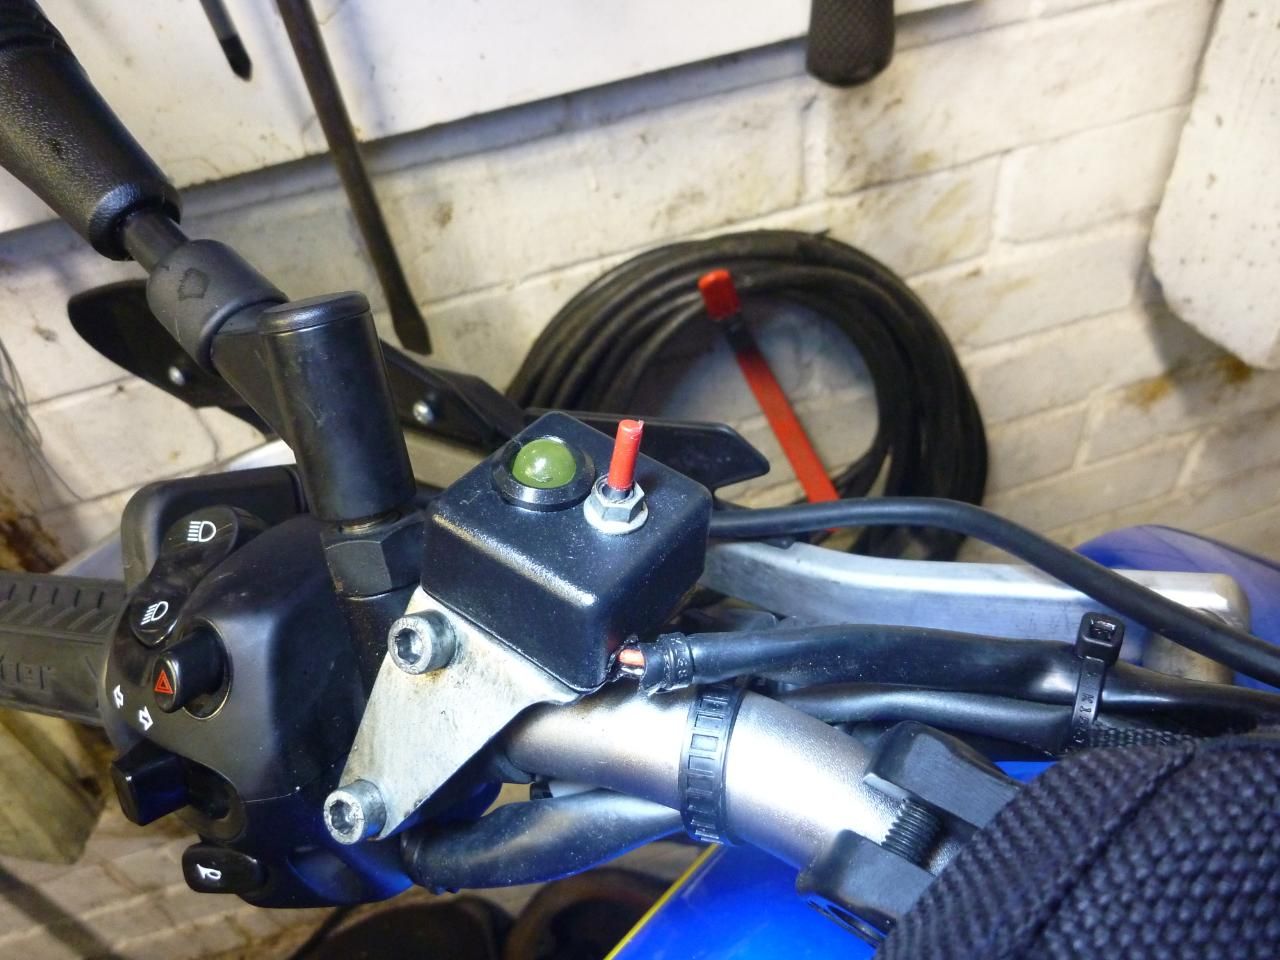
The lack of a switched fused auxiliary power supply is not great on an adventure bike though. I’d temporarily wired the heated grips straight onto the battery and this meant I had to remember to switch them off when I got to work. This worked fine of a while but of course the inevitable happened and one day I forgot. Despite the built in low power protection it still drained the battery so that all I got was a click when coming out at 10pm one night. Seeing as I needed to install the power socket and some auxiliary lights I was going to need a switched & fused power supply.
Fitting the fuse box and switched supply.....
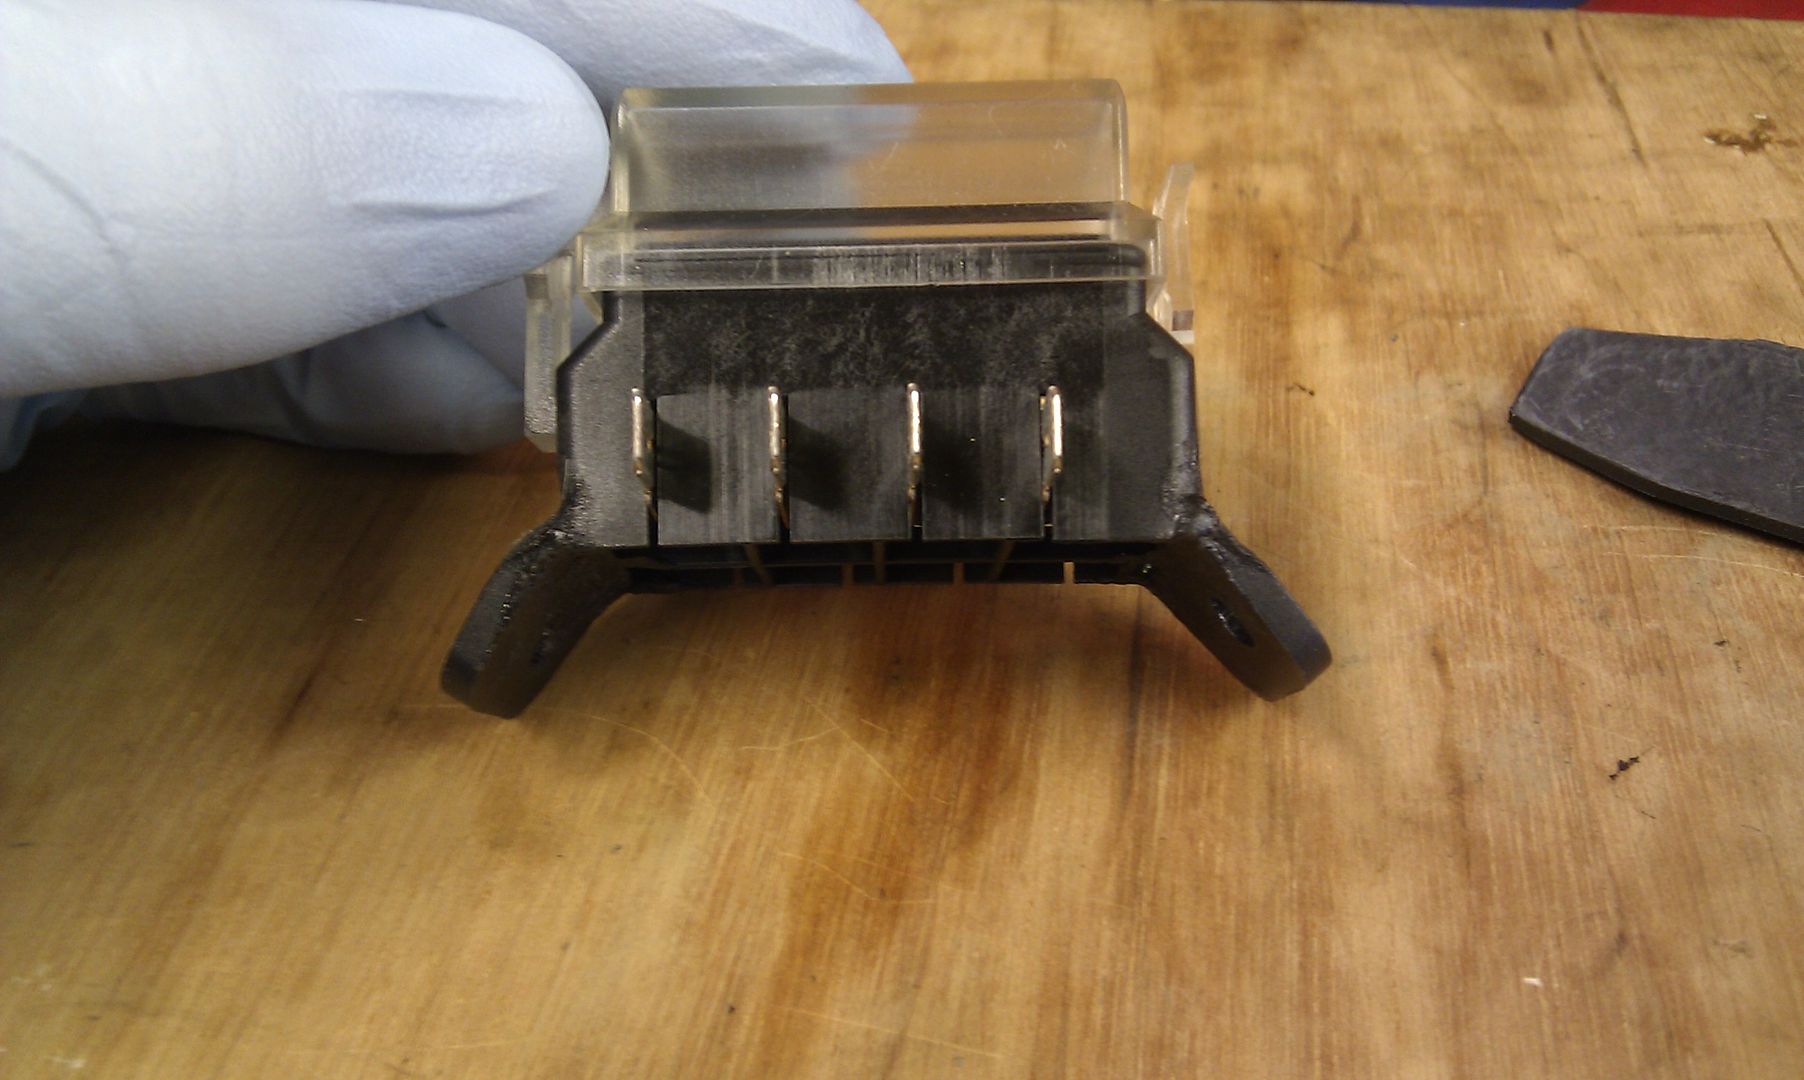
tabs bent using some heat so they'd fit flush to the plastic under the seat
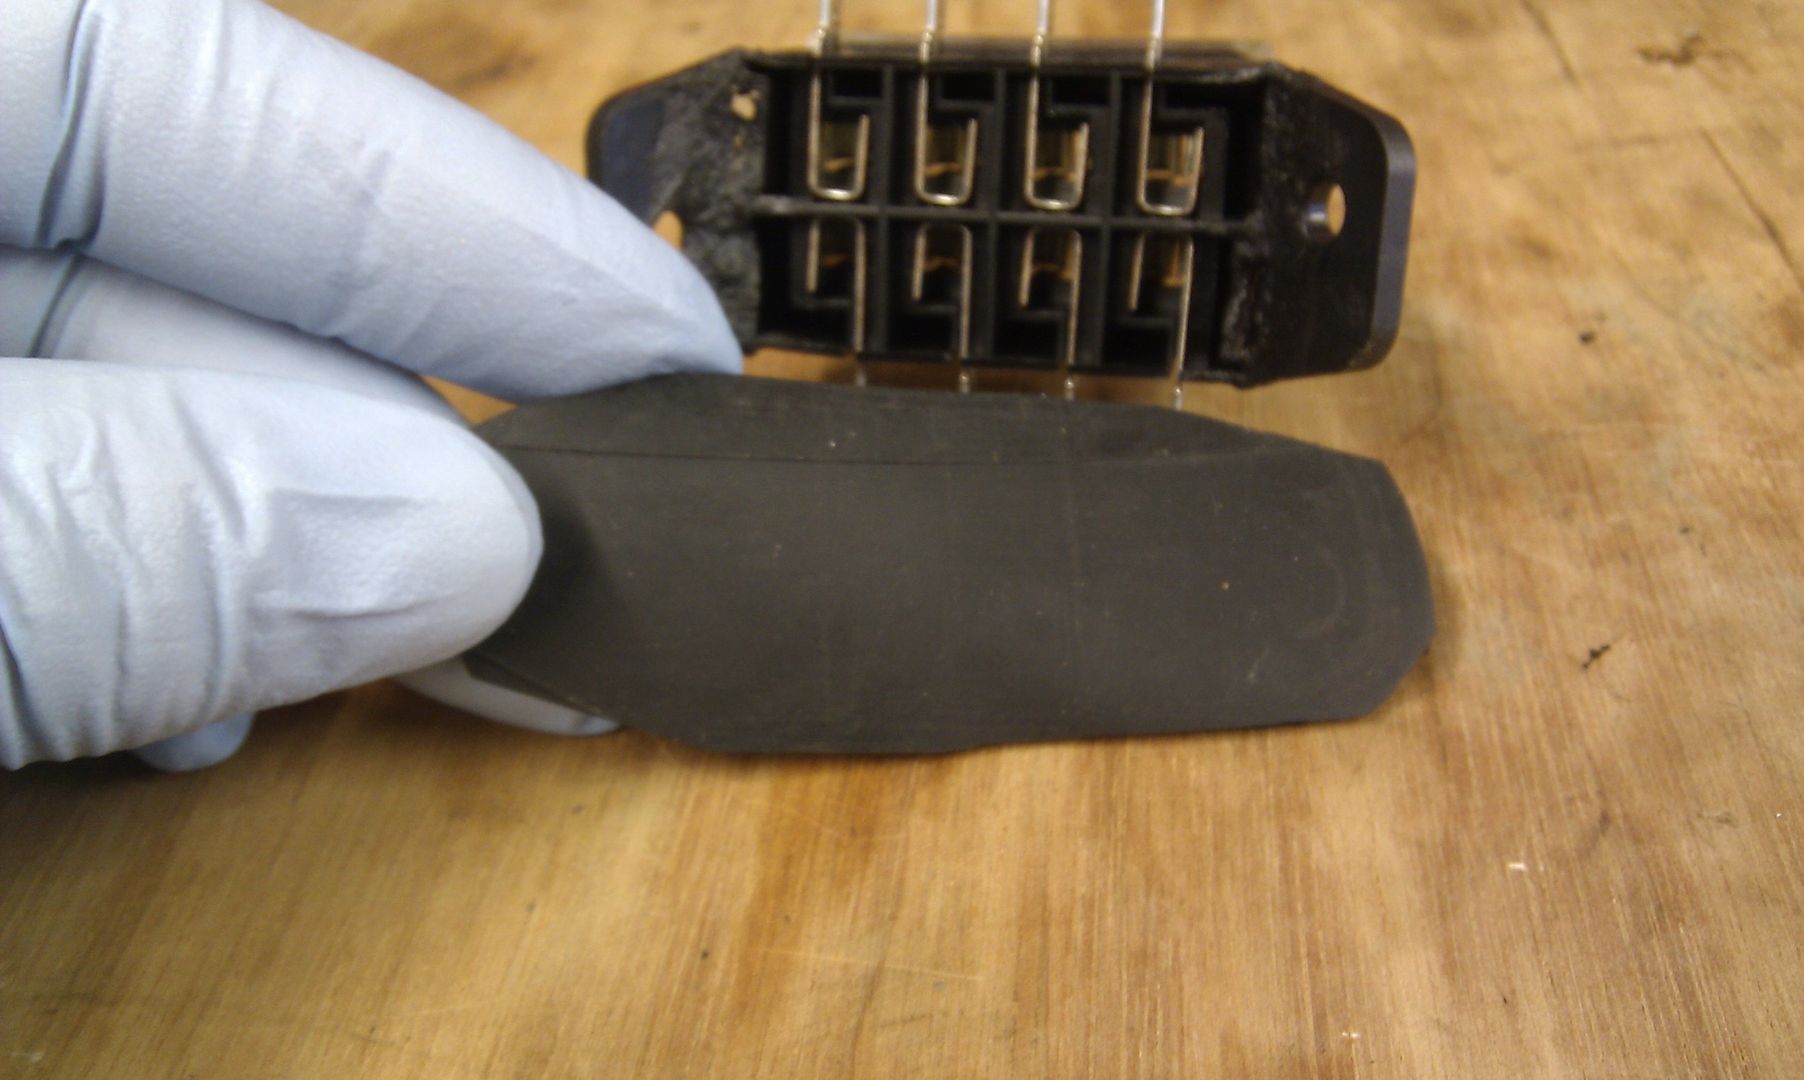
i cut a piece of rubber out to waterproof the bottom and siliconed it in place
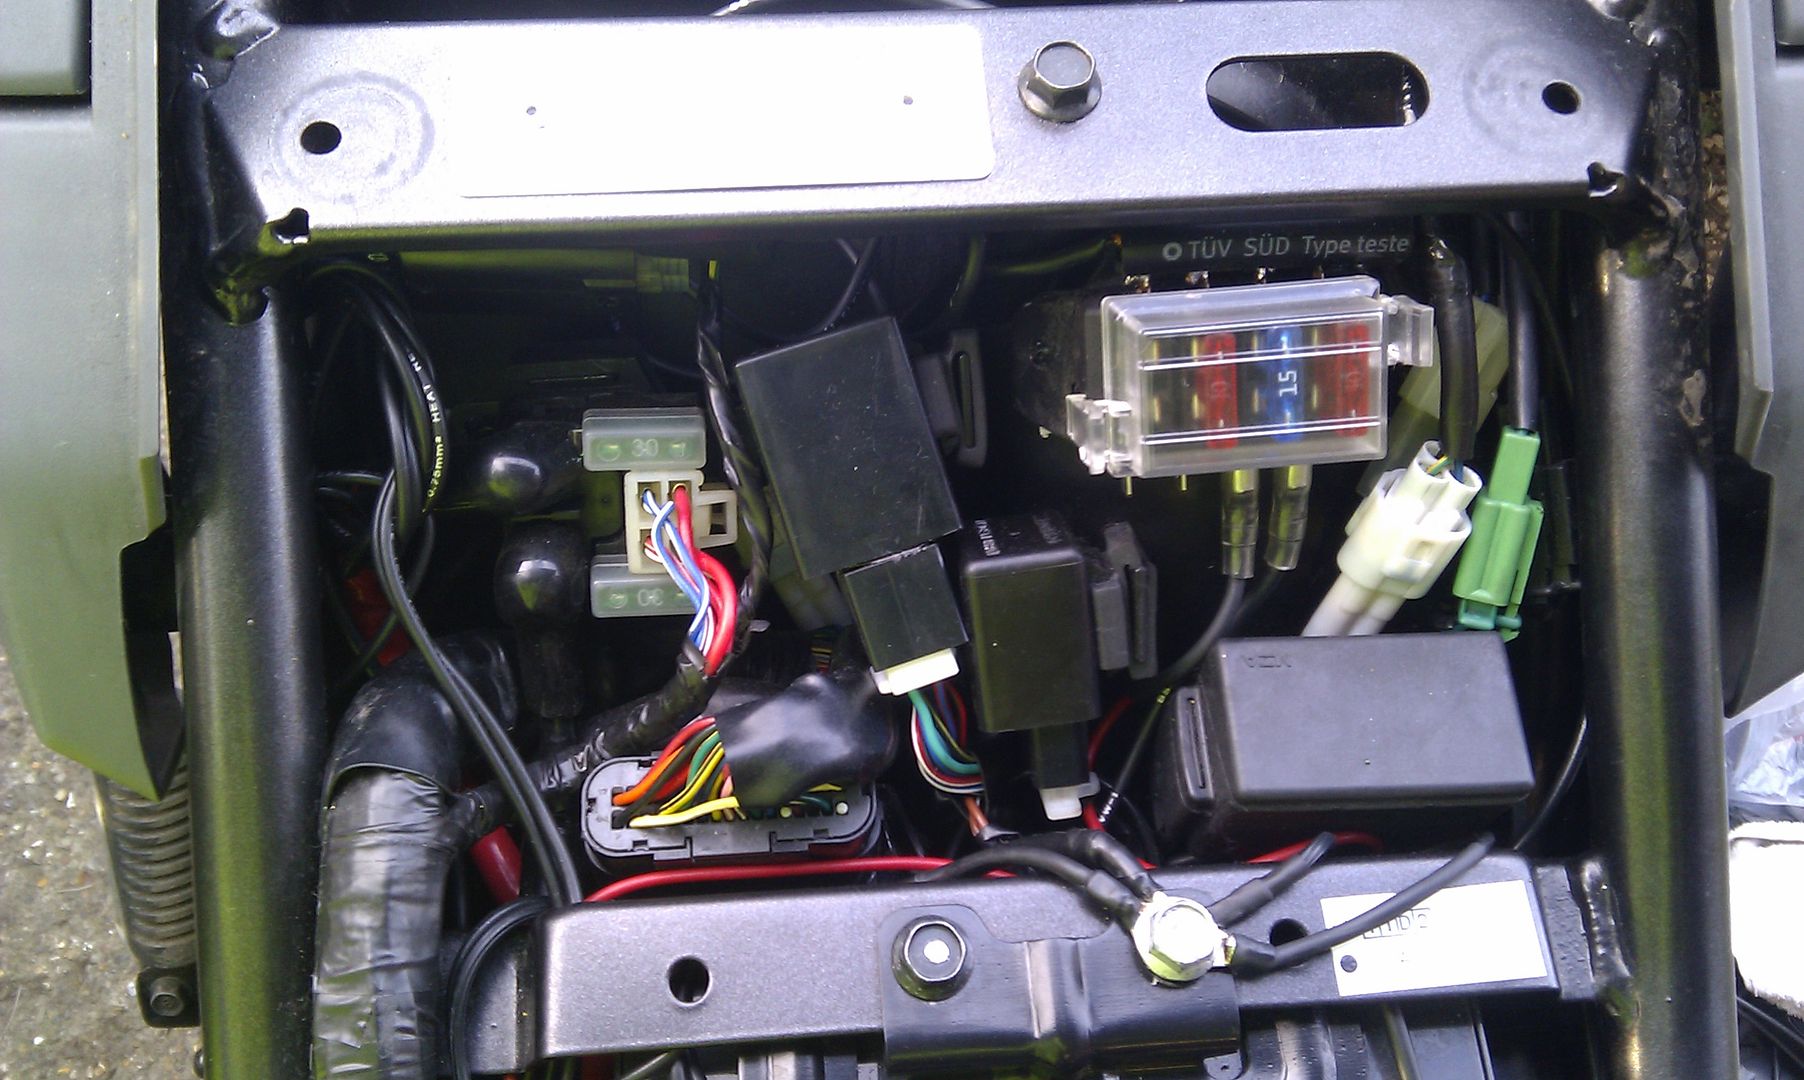
fuse box in place. earths taken to the frame bolt in centre of pic.
the relay is hiding under the LHS frame rail in the left top part of the picture
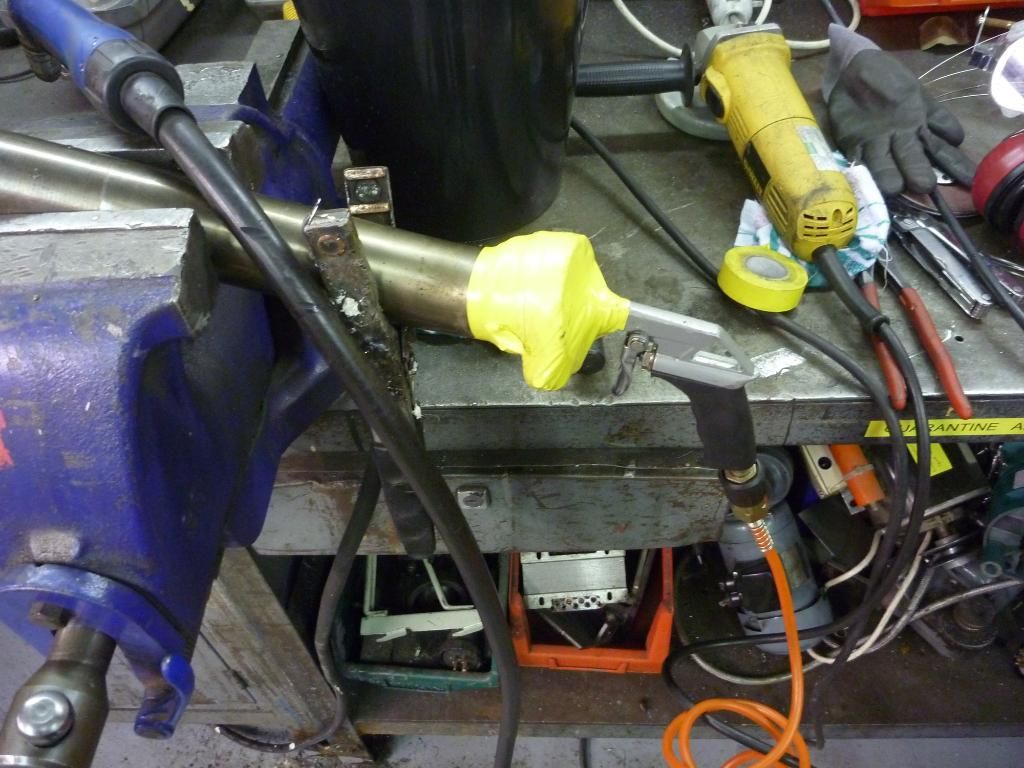
A bit of searching the net and the expensive options were kicked into touch, to be replaced by a cheap £5 job from Halfords. The next step was to find a place to put it. Space under the seat is a bit of a premium entity and there are limited options. I eventually opted to fit it amidships on the near side. Fitting it here would mean the mounting tags would have to be bent or moulded to fit, so a little heat was applied and eventually the tags were bent down enough to form around the rounded profile of the wheel arch. Next step was to link out all one side of the fuse box so I didn’t end up with too many wires. I just soldered in some copper wire. I got some spade connectors with clear slip on shrouds from maplin and all the wire connections to the slip on spades were soldered. I also used heat shrink on all connections. For the neutral I bought back wires to one bolt, just behind the battery. I fitted a slightly longer bolt to accommodate all the terminals with one also going back to the battery to ensure 100% earthing at all time and not relying on the frame. The next step was to make it all switchable so a relay was used that picked its switching power signal up from the rear lights and I fitted it under the frame on the far side of the bike, opposite to the fuse box. Next I had to run some wires up front to power the grips, aux socket and spotlights.
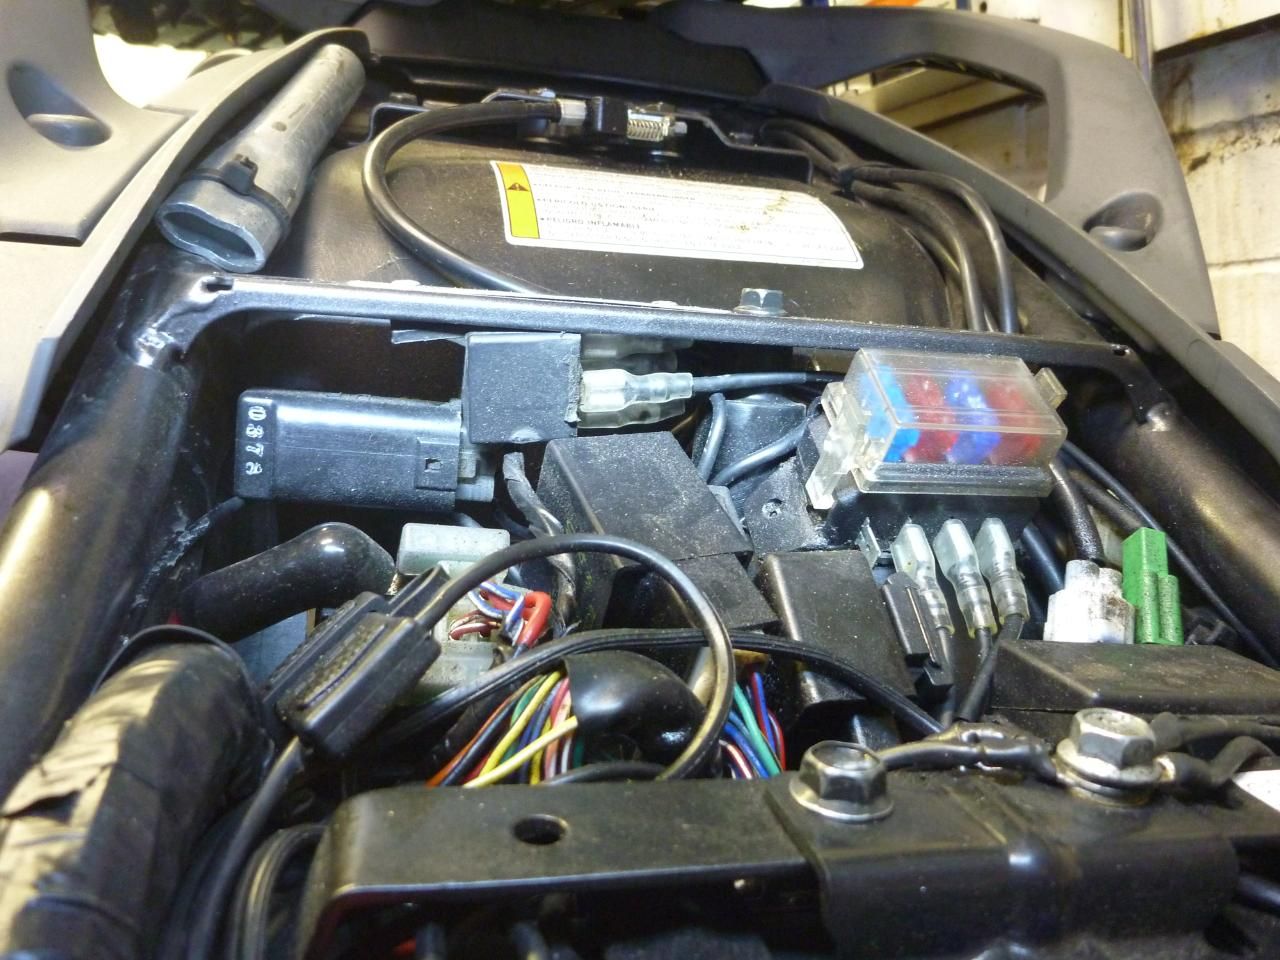
from this angle you can see the relay sitting just below the flat frame section.
Tank Off:
This subject is a little bit of a bugbear with me. My last few bikes have been European and both were race bikes so they have been designed for a purpose, with very few bits that are surplus to requirements. The Japanese on the other hand like to make their bikes with lots of ‘bits’ on and use every conceivable size bolt/screw they can think of to do it.
Take my 916 for instance. Within 30 sec I could have hand the whole bike stripped down baring the front nose cone. Everything was quick release and the tank came off with one hex screw. The KTM is the same. Seat, tank and rad panels come off with four size 8 bolts (6mm but 8mm head size). The same can definitely not be said for the Tenere.
-
First off is the seat, easy job as it’s via a key.
-
Back of tank, remove two large bolts and a bracket.
-
Remove both side crash protection panels
-
Remove both incredible long and heavy bolts that are under these cover above. These hold the front of the tank on and support the crash panels.
-
Take off both upper panels that hold the indicators, don’t lose the rubber washers.
-
Tank off? Nope not yet, there are two little hidden plastic covers attached to the bottom of the tank by three small bolts.
-
Now you can disconnect the fuel pipes and lift tank clear.
By now there are bits and pieces all over the workshop and many little washers and spacers, all via’ing for the chance to be the first piece of bodywork to get lost!
Lighting:
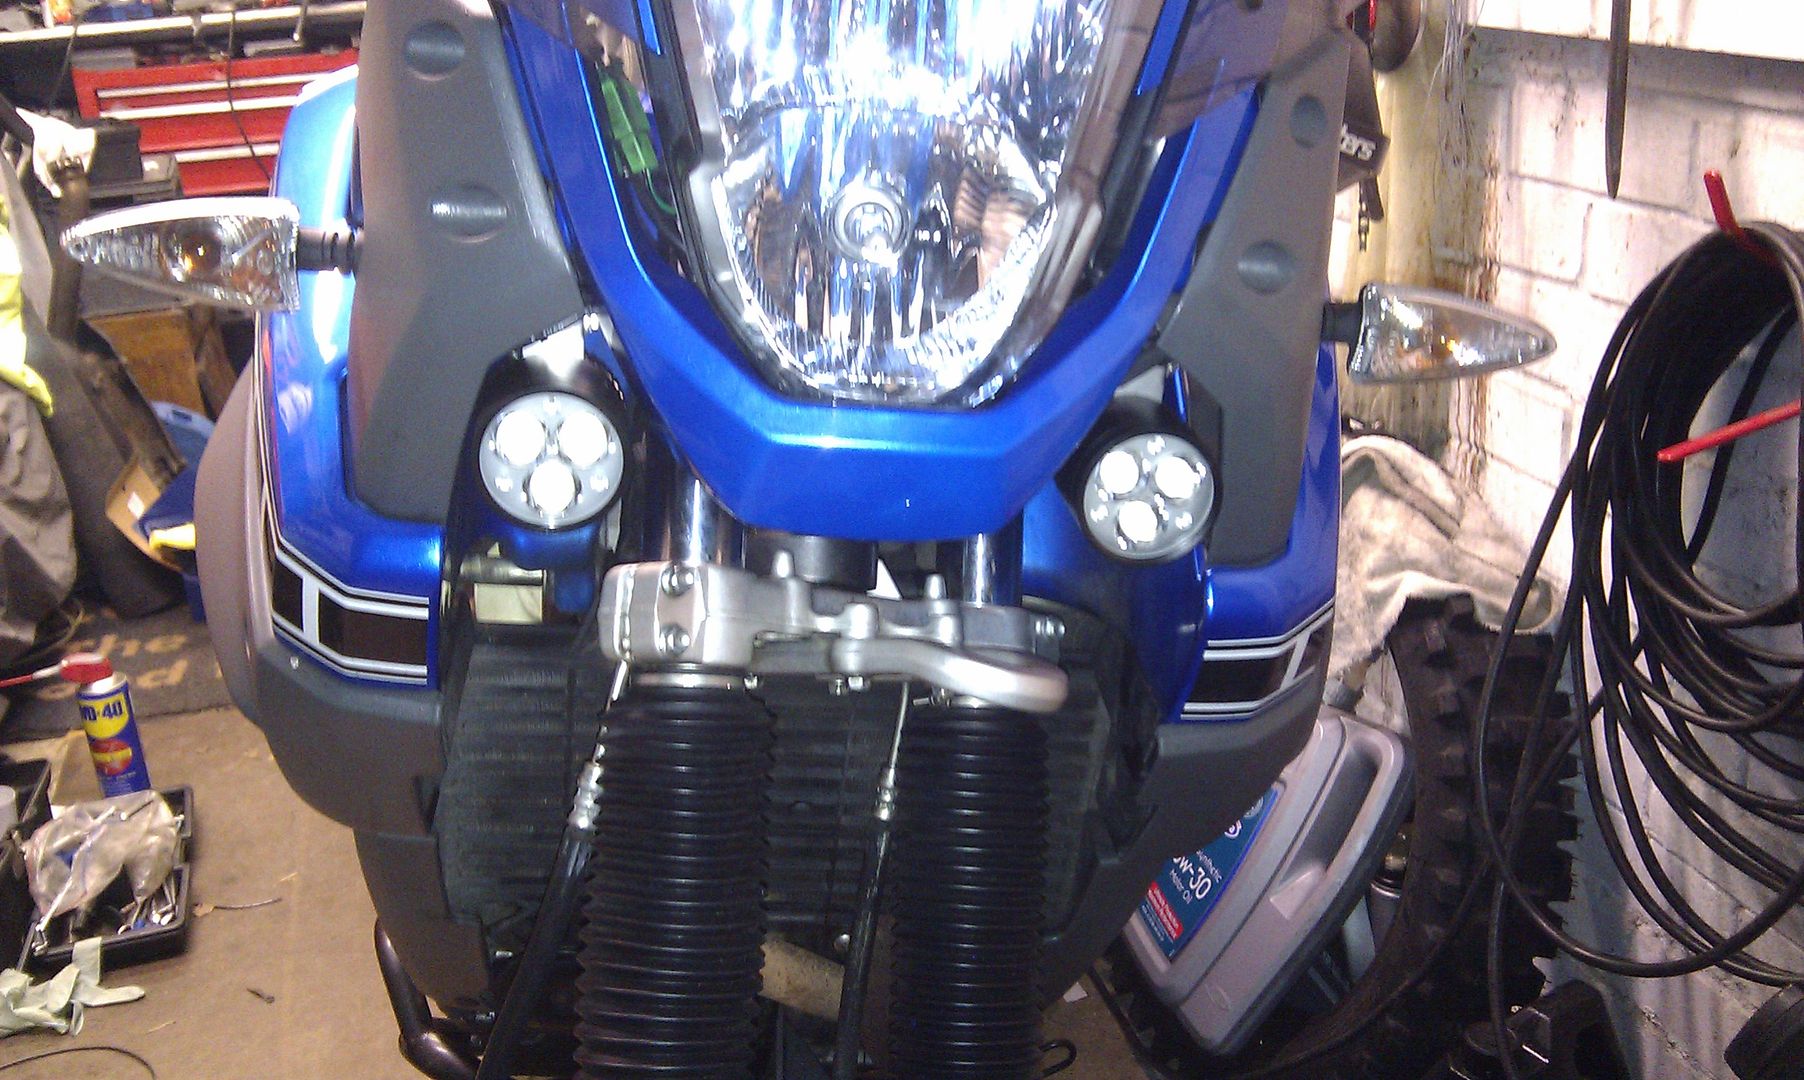
Like I said earlier the dip beam is very good but the main bean is more than just bad, it’s pretty useless as it throws the light too far forward while leaving the road in front of the bike in a black shadow. My first attempt to fix this was to upgrade the bulbs to extra bright blue tinted bulbs off of ebay and I must say they are a great buy for the price. The glass is tinted a light blue colour so it casts a much cooler type of light and definitely does make the bike stand out in traffic more, as well as lighting the road a lot better. But the problem of the main beam reflector was still an issue so another solution was sought.
I found the solution in some 1500 Lumen 20W LED auxiliary lights from Hong Kong. There are several types on the internet so if you do buy make sure they are what you think they are. At £30 each these are great value for money and they arrived within days of ordering.
bracket made for the job
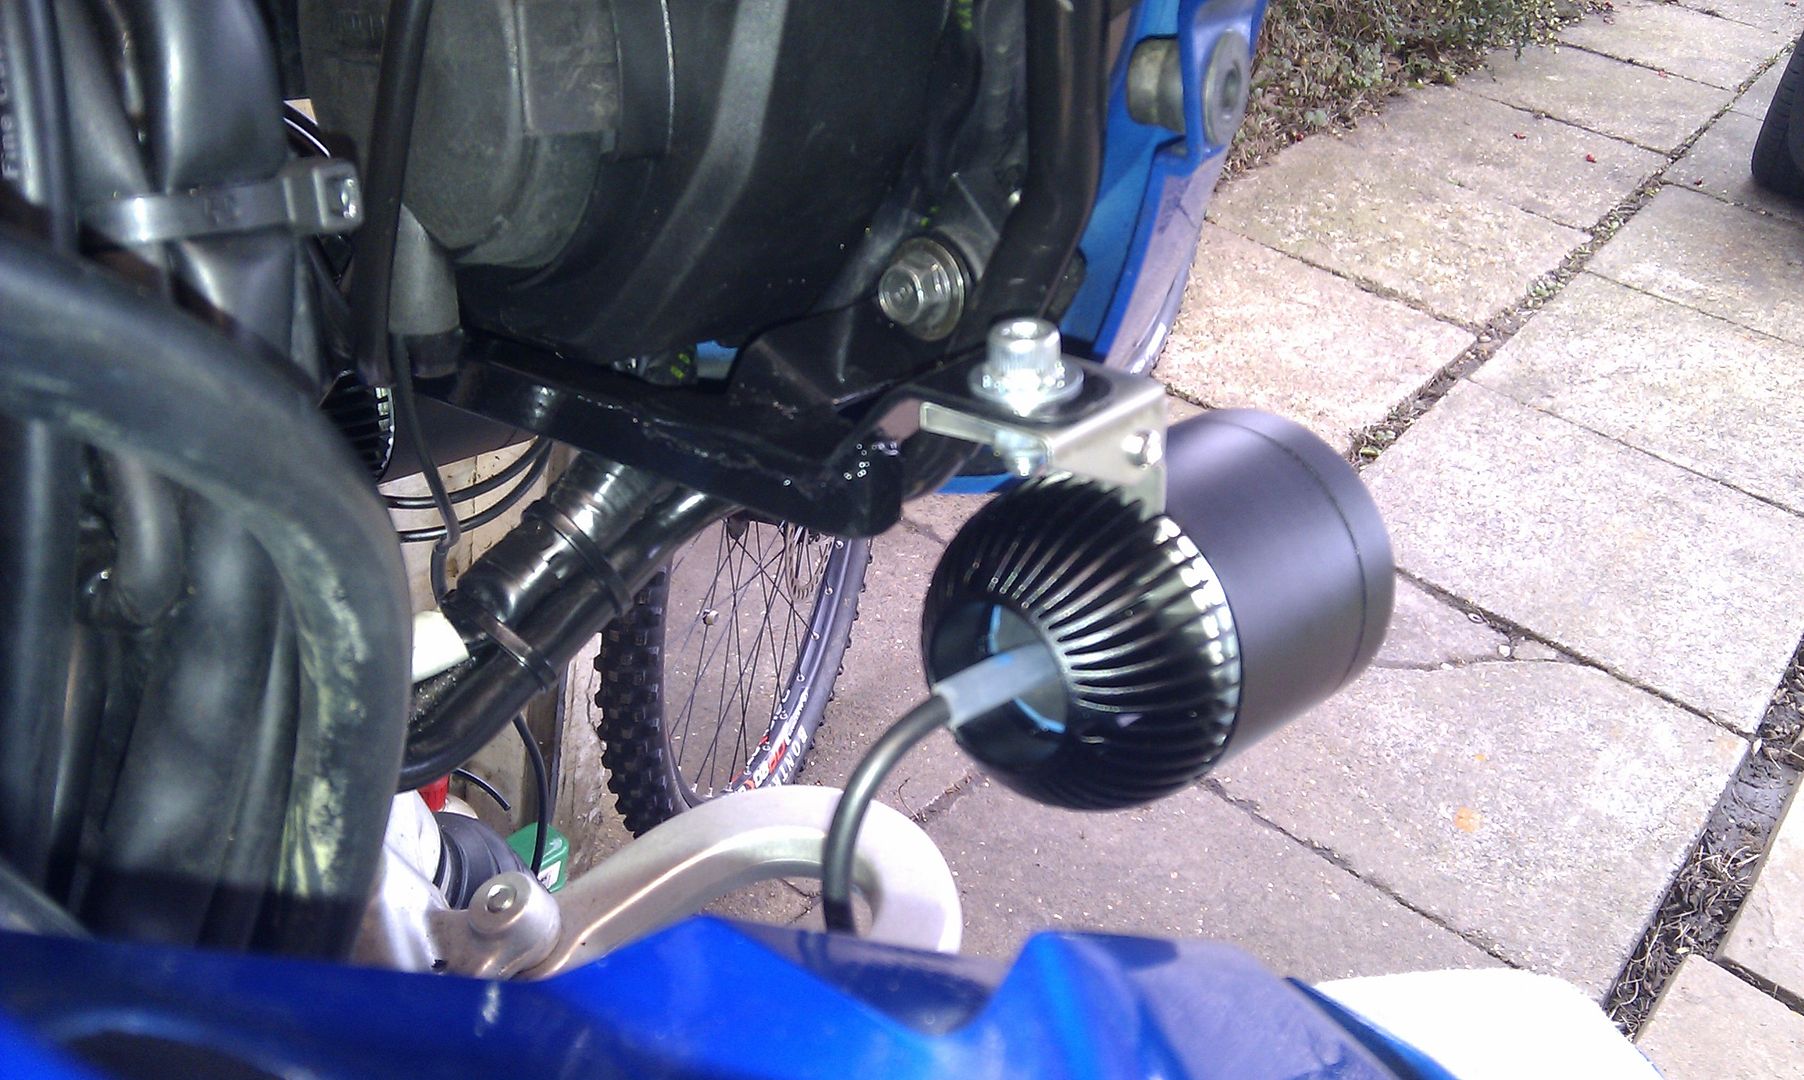
here you can see where it fits.
job done - powerful lights ready to shine
To fit them I made up a little bracket out of some mild steel bought at B&Q. Cut, shaped, welded and painted all in a day and they are the perfect mounting for the lights. I must say that these little things kick out some serious light. The first time I used them on the back road into work I was amazed just how well they worked. As they are more of a flood type of light they tend to light up everything so you can see far ahead but the whole road and sides are also bathed in bright cool light. During this time I also upgraded the main beam to a 100w bulb (ebay again) so now I don’t have any problems riding at night!
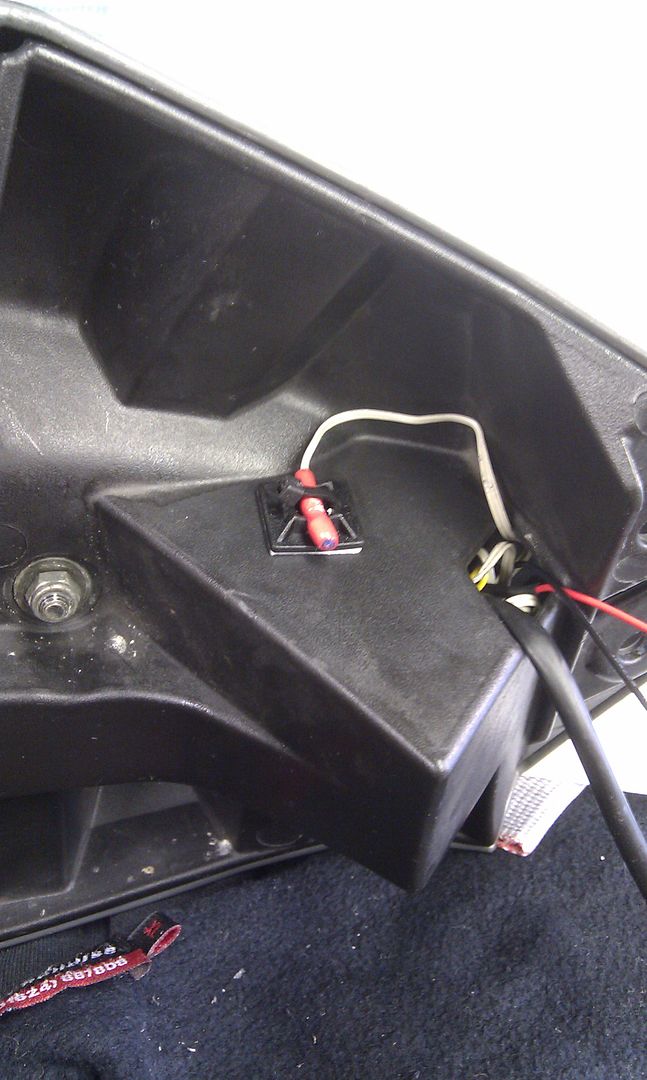
auxiliary power socket
Fitting the lead for the satnav was easy enough as there is a power source just in a convenient spot behind the main dash. It is actually for the diagnostic tool at the dealer but using some thin connectors you can connect up no problem. I bought a car lead to power the garmin off of Amazon for less than a tenner, which is a dam site cheaper than the one advertised in the touratech catalogue.
So now the bike was pretty well sorted for how I liked it. But I do want to modify the barkbuster's somewhat. They just stick out too far for worry free filtering in London traffic. I want to angle them in but I’ll need to use a template first to make sure I can get them to fit properly with the fairing.
Getting the engine to breath:
I already said the engine felt slightly strangled, so how do you go about freeing it up? Well again xt660.com came to the rescue and using hints and tips from there I did the following.
• Exhaust : decat and de-restrict
• Airbox: removed snorkel
• Fueling: made a fuel mod according to xt660.com guru ‘Kev’.
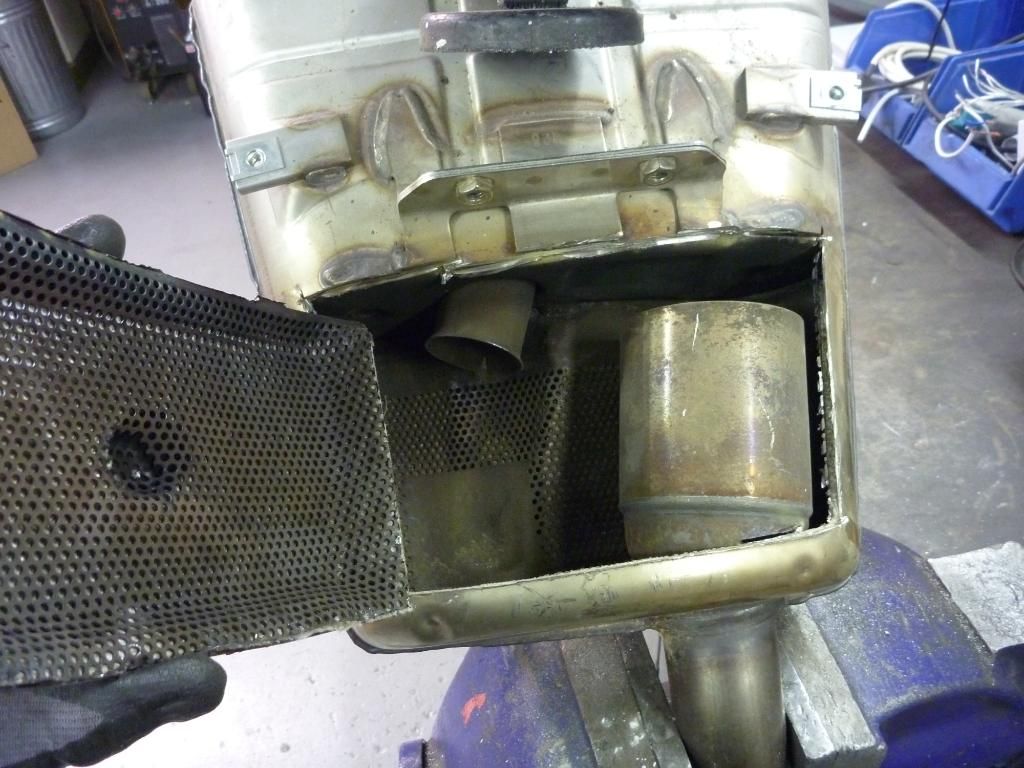
The exhaust is an obvious one to tackle as it has a catalytic converter built into it. Having seen the layout on the forum I performed my own surgery on it and took out the cat. Next I used a 20mm holesaw cutter (welded to a long metal rod) to open up the first chamber which would allow gasses to escape direct into the outlet pipe. This allows the engine to breathe a lot easier, but the de-restriction does raise the noise somewhat. Nothing like a race system but it is a bit louder. I’d say about the same as my 450 EXC or maybe a little less. Not an issue on the road, in fact it helps in traffic, but the 4.45 am starts are probably not favored by my neighbors!
i made the cut from the top so the welds are not visible from below when its on the bike...
the round canister like thing is the 'cat' - it has to go bye bye
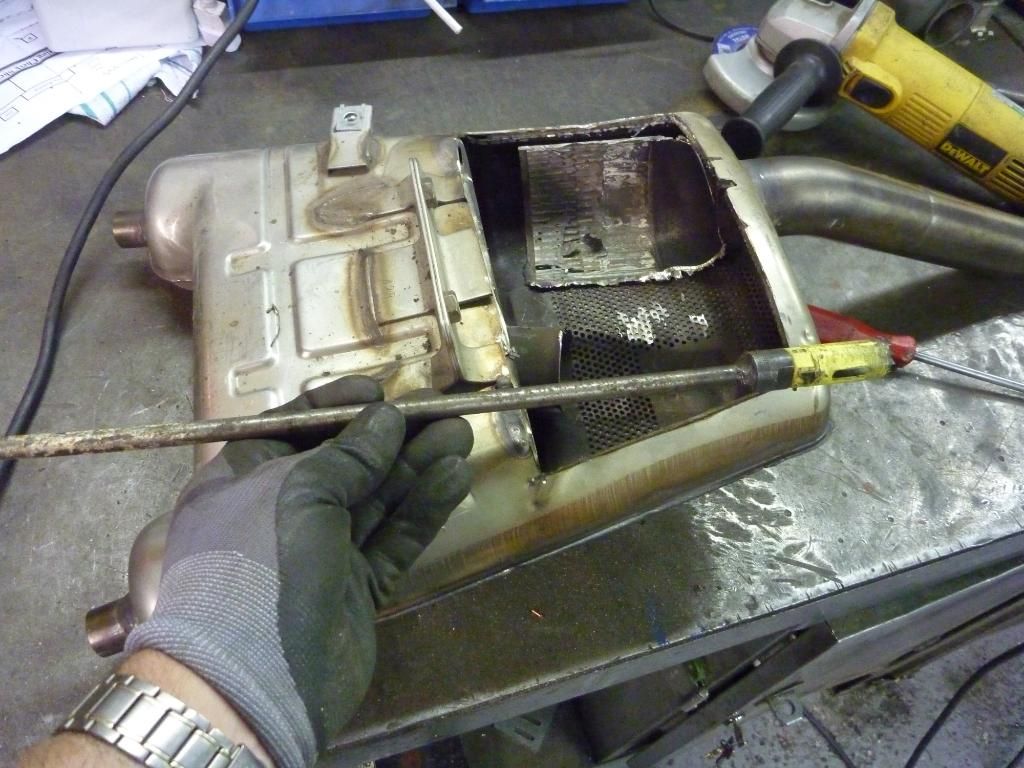
now for the next phase...... a holesaw welded to a rod will soon free up the exhaust gas exit
and cause a little extra decibels, not too bad, but noticeable
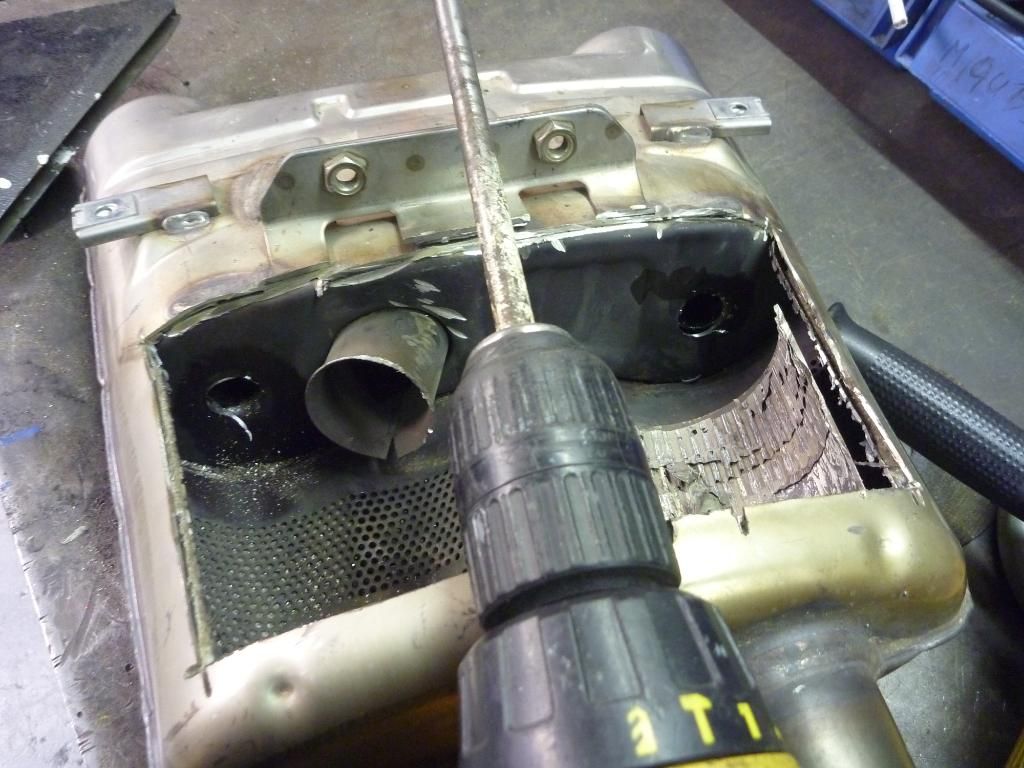
you can see the new holes. drilled from down the end of the final exit pipe
pressure testing the exhaust after welding the cover plate back on.
Freeing up the exhaust does reduce the heat baking your behind and helps the engine breath out better but to get real results you need to add a free flow air filter and a ‘fuel mod’. So the next step was to open up the airbox and that is done by removing the snorkel that restricts the intake flow. This can be prised out carefully for use again later, but there is a further problem. The top cover no longer sits flush with the filter if you remove the snorkel. There are kits already on the market to fix this (DNA) but you can use a section of waste pipe rubber gasket cut down to do the same job!
Once the snorkel was out I needed a performance air filter. I was put off by the cost of the DNA/K&N filters so I started to look at foam filters. I couldn’t find any pictures of them or any reviews on the xt660 site so again I was a little slow in making a decision. But in the end I bought the Pipercross foam one from Bike Torque racing, partly because it is a lot cheaper than the others, but also because I can use the same cleaning/oiling products as I do on my enduro bike, due to the fact that its foam. Was it worth it? Well it’s not a light switch moment to instant mass power increase, but it definitely has made the bike pull a little smoother lower down in the rev range and has added to the other mod's to make the engine more flexible below 3k. Cruising on the motorway I also felt that it picked up quicker when the throttle was tweaked to overtake a car. So it’s well worth the £28 it cost, as it’ll have paid for itself within a few services.
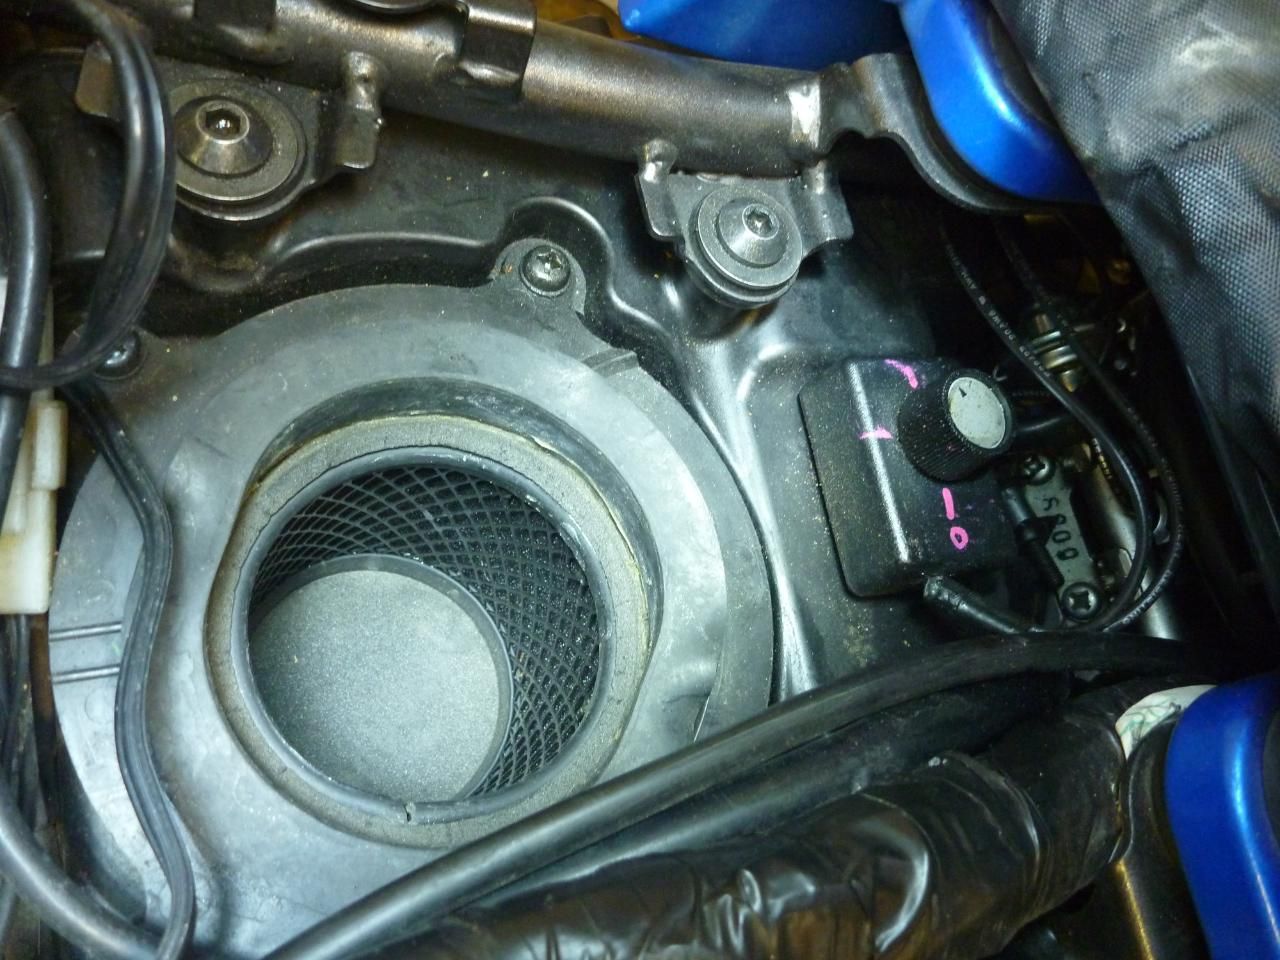
Here you can see the fuel mod and the much wider opening to the airfilter. the original has a snorkel that arcs up and over into the recess where the mode is now sitting. You can just make out the bit of waste pipe rubber gasket that is used to seal the new filter to the airbox.
waste pipe rubber gasket......cheap at your local B&Q
At the same time as the snorkel removal you should fit a ‘fuel mod’. This is simply a 3k adjustable potentiometer wired into the temperature sensor circuit to fool the engine management into thinking it is colder that it is, and it enriches the fueling to suit. Again join xt660.com to get the full specs or you can buy a readymade one from the site. All this work (not that it is that much) will allow the engine to pull lower down in the rev range and whereas before anything below 3k was met with a shudder it’ll now pull ok from 2k in third. Remember the engine is in a very conservative state of tune, so it’s never going to set the world on fire performance wise.
A surprising side effect to all of this, is the fact that it has improved the fuel economy. While running the engine in I was getting up to 60mpg but after a while it was dropping into the 50’s, with one week being as low as 52 mpg. Since the mod's it has returned a consistent 60 mpg, with the odd longer trip pushing it up to 62 mpg, even though three quarters of it was two up.
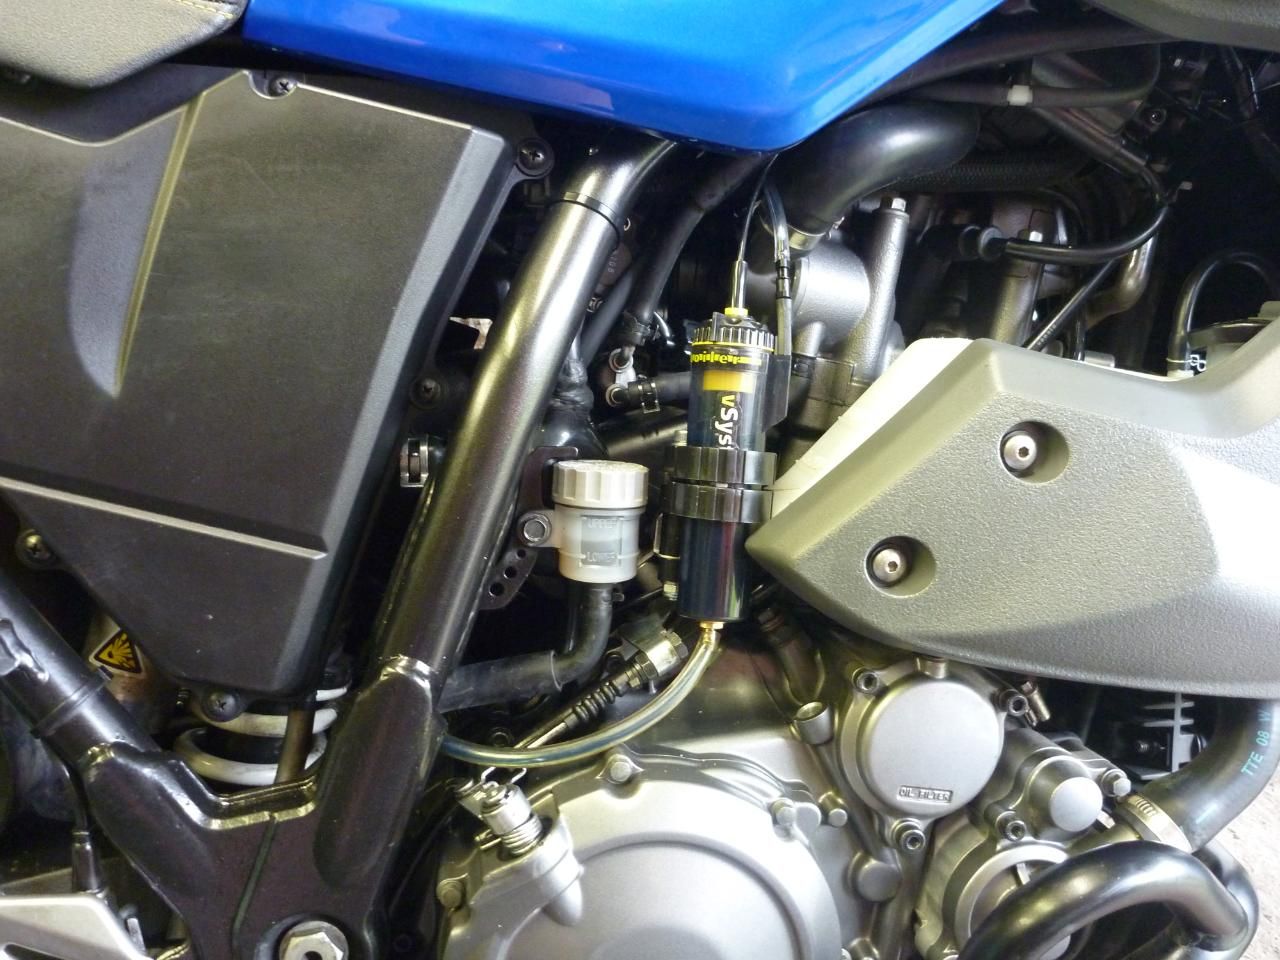
Scott Oiler
I've never had one of these before but seeing as the touring and adventure crown rate them i thought i'd give it a go. Fitting was easy enough and i put a little thought into it as i didn't want to cable tie it on to the frame or use cable ties on the swingarm. I found a convenient spot on the right side of the engine and i made a small little flat bar bracket up so i could mount it with a screw and nut. Next i looked for a good way to run the oil feed to the rear sprocket. Before i did that though i ran the original pipe inside a airline pipe for extra protection. I then routed it round the engine, down to the swingarm where i very conveniently found that the swingarm is hollow and has cutouts - just right for running the pipe inside the arm. At the rear i drilled and tapped the swingarm and fixed one of the supplied bracket to the arm. the feed pipe was then attached via a jubilee clamp. There is a wire inside the last section so you can position the outlet in the correct position.
This is where the vacuum pipe has to be cut and the T-piece inserted.
This is the activation part of the scott oiler. it only feeds oils while the engine is pruning.
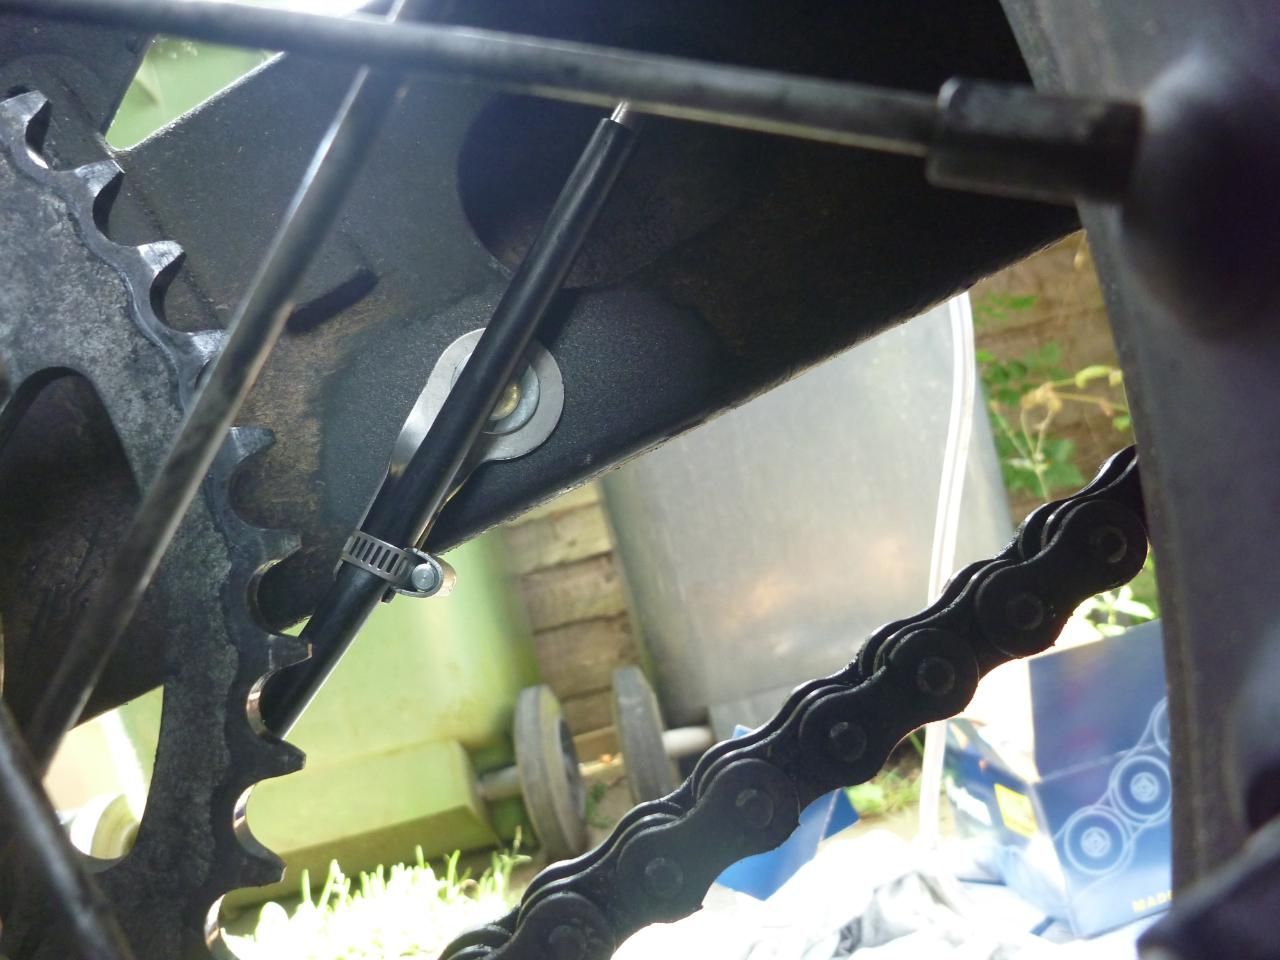
Bracket mounted to swingarm by drilling and tapping the arm.
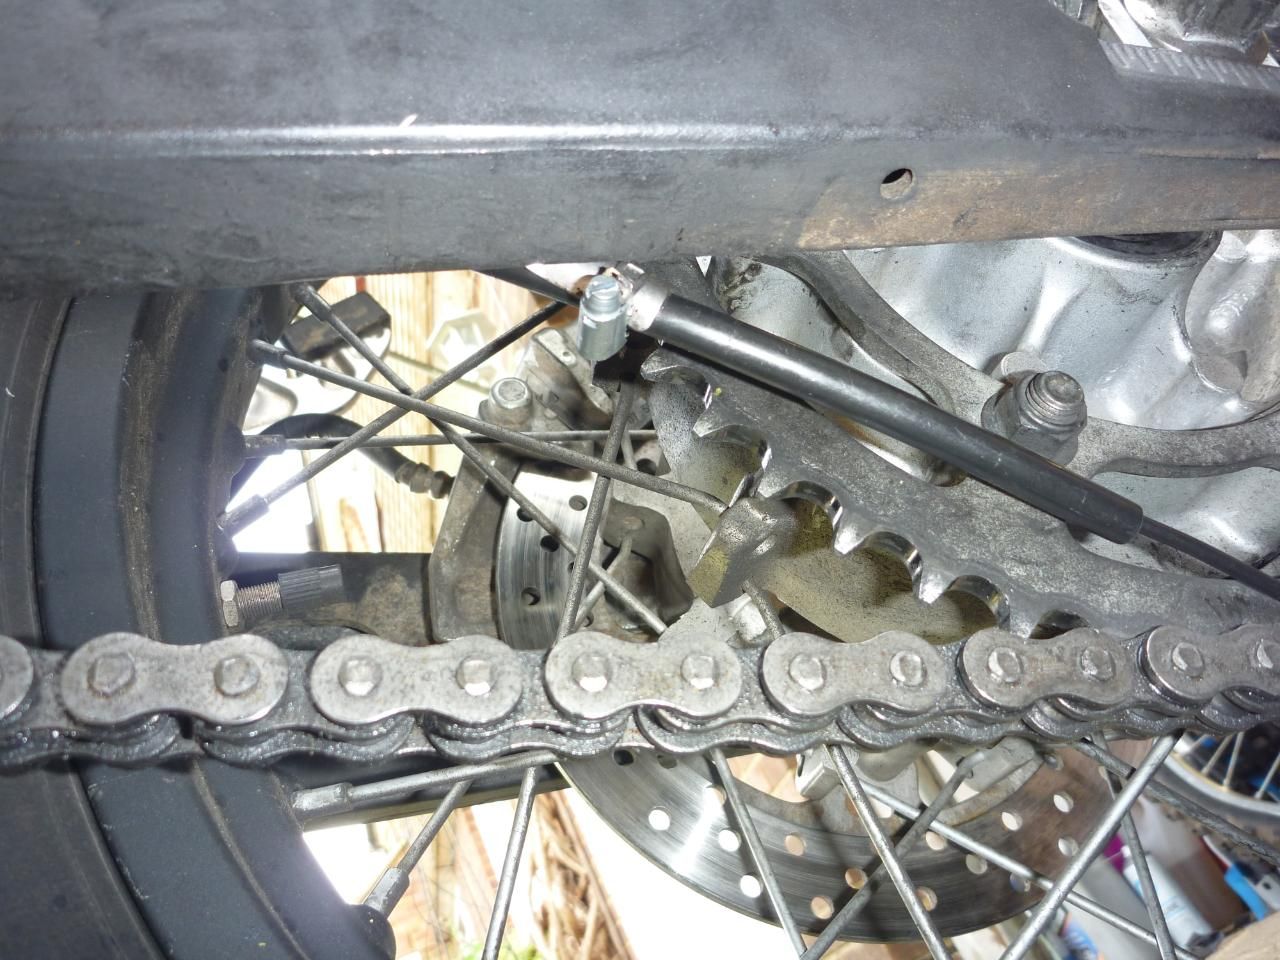
the feed pipe from the outside
finally finished - looks good and easy to get to if i need to adjust the feed or re-fill the oil
What's it like to ride?
Well I love it. Yes I can be a little critical of its design in some areas but all Japanese bikes are built like that and I accepted all its weak points before I bought it. It’ll pull 80mph in and out of work all day long and still return good mpg, even two up. Like I said before the gearing is a little tall so you pretty much always have to be in first when stopping or slowing down to a near standstill. Ok I know this is good practice, but I’ve been spoilt by my 450 exc which will pull any gear at any time and wheelie in forth! Some owners fit a smaller front sprocket which is an instant fix but also throws out the speedo reading, so a speedo healer is needed to bring it back in line. I’ve not tried this (the healer) so can’t comment on how it works, but the one tooth less on the front is a common fix for over geared engines, and it is a cheap way to try it out. Altering the rear sprocket would entail lengthening the chain and is a lot fiddlier. A bit tall? Well for some it might be, but there are easy methods of lowering it by changing the rear shock’s ‘dog bone arms’ so if you really want one, all is not lost. For me I like the extra height as it helps the ground clearance when riding off road – ah off road!
Personally I find the seat very comfy, but not everyone feels that way as there have been a lot of complaints about it on the forums. Most people opt for the sheepskin fix. The wife complained about the comfort of the pillion perch so I’ll have to get something for her before we hit the road again. The grab handles at the back are convenient for the rider while maneuvering the bike at standstill, but my wife reports that they are too far under the legs to be of any use when trying to brace herself on the back. I need to buy some pillion pal ‘love handles’ or get a top box.
Well i've solved the 'uncomfy seat' problem for my wife. I bought a Airhawk blow up seat pad and that works well enough to get my wife back into the seat. I also bought some Oxford Pillion Pal handles and they also work quite well so Nicky is a lot happier on the back now.
Wind Blast
Another issue widely discussed on the net is the wind blast and there are many ‘fixes’ out there but with the taller screen and Hein Gericke bag on the bars I’m happy with it. I have notice one thing through and that is the position of your legs can make a big difference. If you sit splay legged then the air streaming around the front hits your legs and rockets up into your body. Sit with them tucked in with your toes on the pegs and I was amazed at the difference. This is more noticeable if you are wearing jeans as the airflow is disrupted more by big heavy pants with armour in.
I notice that the new screen was rubbing on the front bit of bodywork surrounding the headlight. unfortunately I felt it too long and it made a mark. i did however find a solution to the problem. The holes for the screen screws are quite large and i found that some small plastic top hat like spacer/washers left over from my GSXR days fitted perfectly. These lift the screen slightly away from the bodywork and solve the problem.
Buy the way if you are using a peaked helmet like an Aria Tour X (I was given one) you might find that the wind blast rattles your brains a bit. I cured this by forming a piece of sturdy wire into the same shape as the peak and glued it to the underside (front) of the peak. This stiffens it up enough to stop the wind from flexing it, as it is this flexing that causes the most awful vibration.
wire mod to stop the peak vibrating my head like mad.
What's it like to ride off road?
Better than I thought it would be in fact. I traveled down to the Salisbury Plain area for a weekend’s camping and trail riding with the guys from the Adventure Bike Mag forum. The ride down there was a little nerve racking as I was alone and riding the byways, which had a lot of deep ruts. I had visions of getting stuck under the bike and all the camping gear and not being able to get out, but everything worked out fine. The panniers did catch on some of the ruts and at one point the bike remained upright on its own when I got off to open a gate. However once it was unloaded the next day, it really shone on the trails. Its ease at handling the slippery mud and clay (I had Swiss army tyres fitted) was clear to all there, so much so that several of them have either bought a Tenere or are in the process of getting one! Full ride report of the weekend can be found on my website. Once the speeds crept up in the dry the basic non-adjustable suspension found its limits on the bumpy stuff, but never go out of control.
Fuel tank tells lies!
Ok one of the first things I noted when I got the bike was the fuel gauge is overly pessimistic. It’ll cry wolf very early and start flashing the ‘empty going onto reserve’ last bar when you’ve used about 18 litters of the 23 litre tank. This will be after roughly 180 odd miles but once you’ve freed up the engine it rises to round about 215 miles. I routinely rode it for 50 miles on ‘reserve’ but could still only get 20 to 21 litres of fuel in, so I really started to doubt the size of the tank. Recently I lashed on a one litre can to the back and continued to use it until it ran dry. I chickened out with 315 miles on the clock as I was just about to head into London again. The tank took 23 litters till full so it definitely is a 23 litre tank. Incidentally there are some guys on the net that have drilled the filler tube on the tank (its plastic) to allow faster/more filling. I’ve not tried this yet and would not advocate it if it was going to be left standing (due to expansion of the petrol in the tank when it gets hot) but it might be worth while trying it if you fill up just before heading off on a trip.
Minor criticisms?
-
The indicators don’t have a weather seal on the lenses so they fill with crap after a while.
-
Standard exhaust weights an absolute ton, (but does look nice). MTC do a very reasonably priced single can.
-
Engine breathing needs to be corrected.
-
Headlight main beam.
-
I would have loved to have adjustable suspension but then the price would have to be higher. Mind you at the full retail price it should actually come with full clickers front and rear!
-
Some proper machined Talon like hubs would have been nice, instead of the big cast jobbies the bike comes with.
-
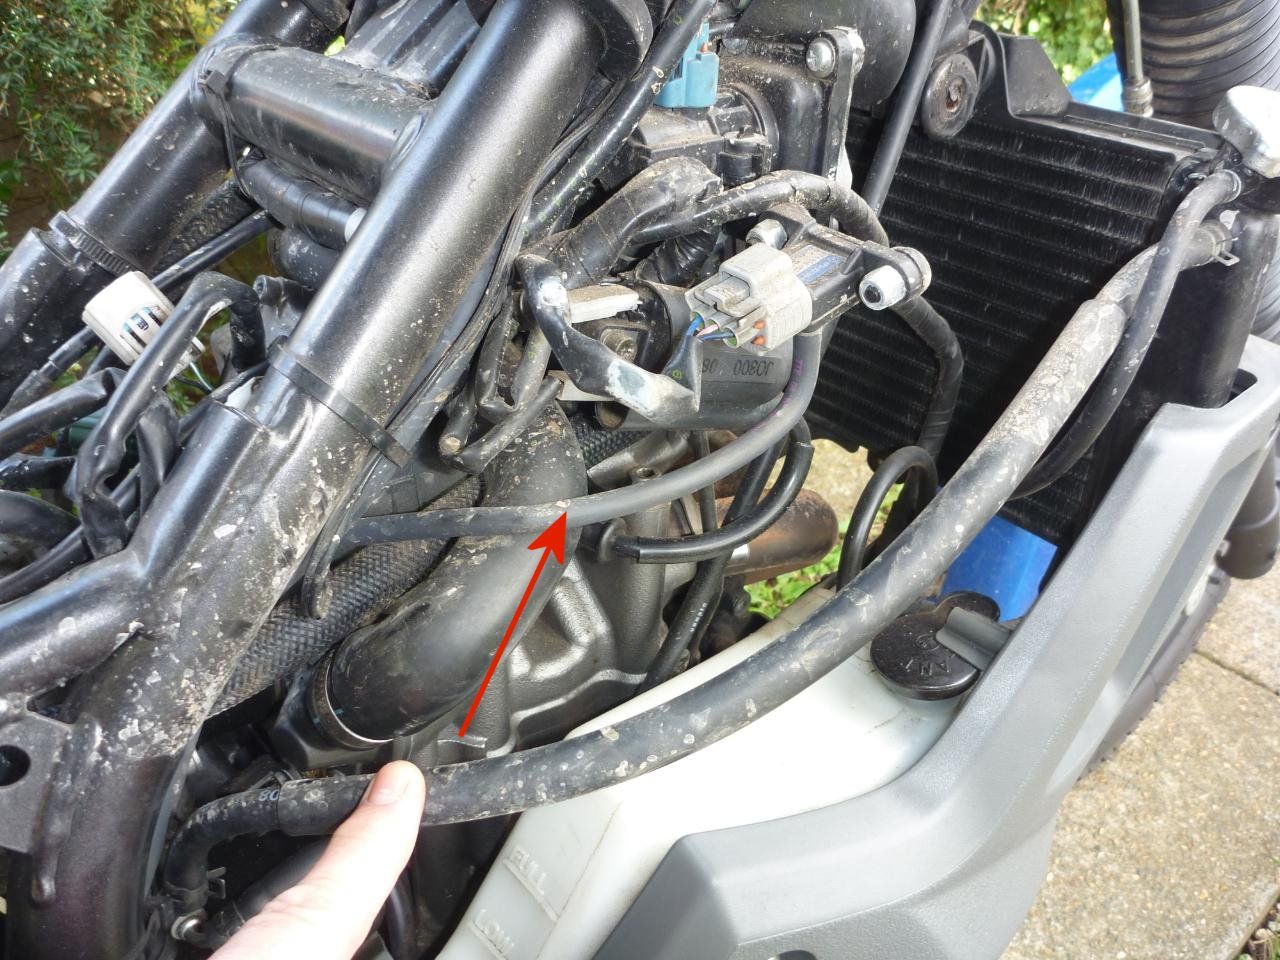
I’m not keen on the pops and bangs from the exhaust so I blocked the air injection system off. A M10 cap screw fits into the pipe perfectly.
-
While I might complain about the weight, if you check the weight of the other adventure bikes it comes out pretty favorable compared to them, so not much of a criticism really.
Known faults:
-
Some early models suffered from regulator/rectifier problems where the plug was not pushed in properly. I took mine apart and used electrical contact grease on the points then once closed I sealed it with sealer and self amalgamating tape.
-
Head race bearing can go off due to lack of grease (like all Japanese Bikes).
-
Swingarm/shock bearing as well. Re-grease at home.
-
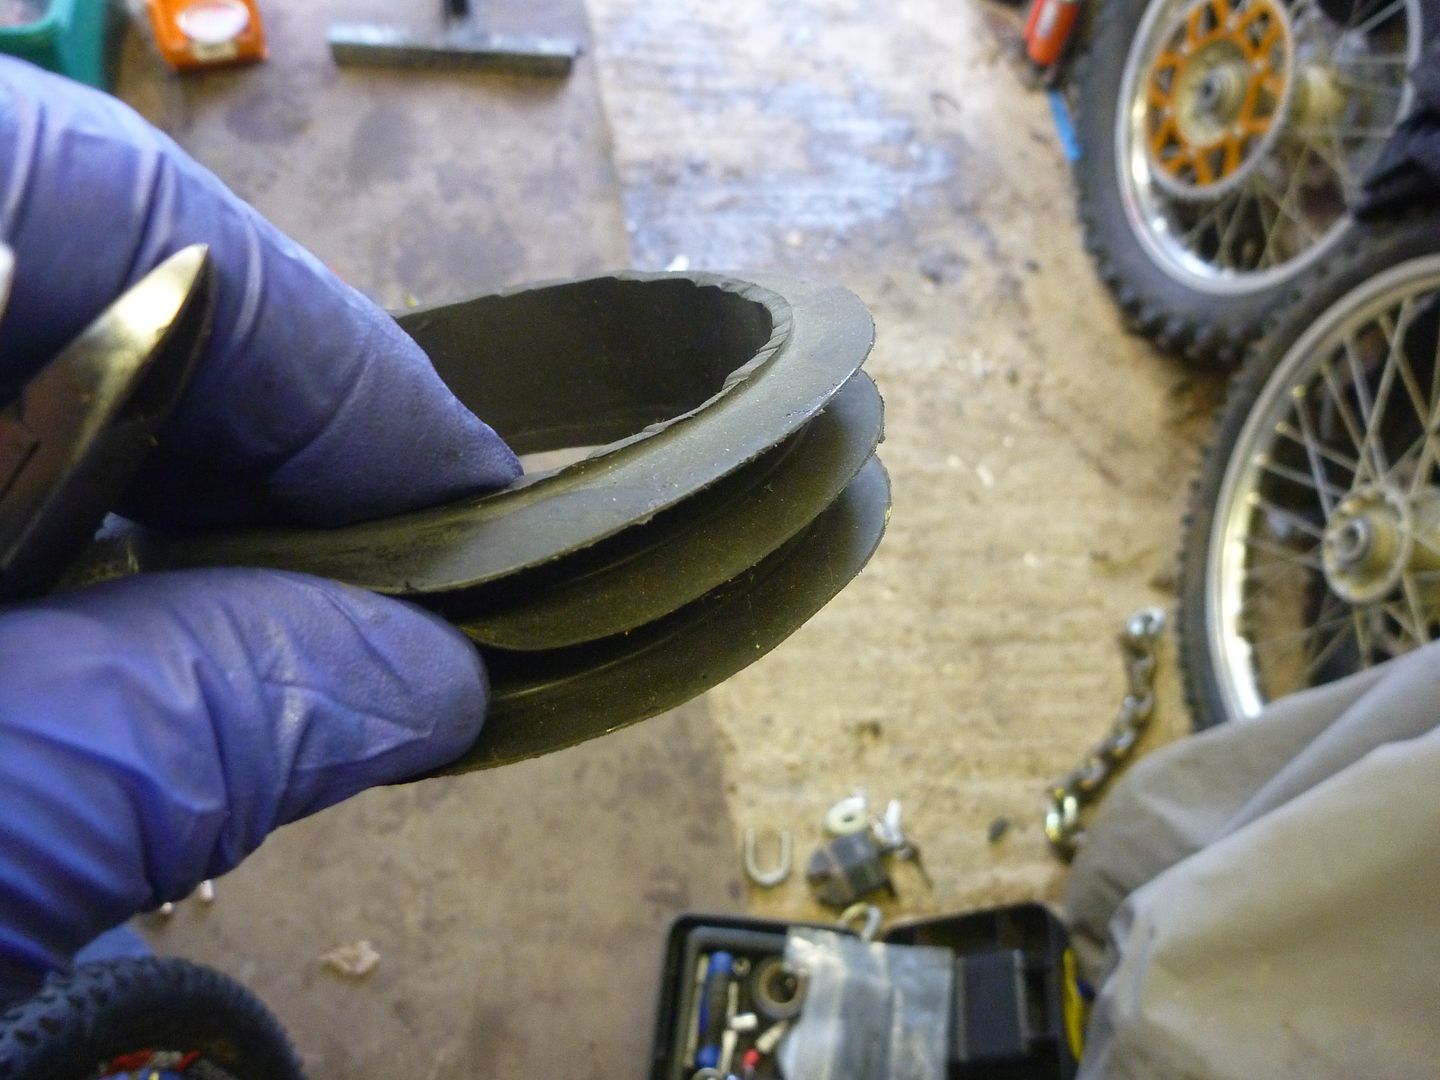
Cush drive rubbers go off after a while as well and the common fix is to cut some squares out of an old inner tube and use those to pack out the rubbers. See xt660.com for pictures and details.
Up until the new 650 BMW was re-launched, the XT660Z was in a class of its own, but even the BMW does not have the ground clearance and touring capability of the Tenere. What other new, single pot, ‘Adventure Bike’ is out there - that can tour and hack the byways as well as the Tenere?
The Mod's Continue!
Temperature Warning LED
So i was looking for a temperature gauge or meter to warn me of ice when coming home to the 'sticks' from London. often the temperature can drop by three of four degrees once you get to Bucks and i wanted a heads up if there was ice about. I searched high and low to no avail. I posted on the ABR forum too and after many suggestion someone came up with a part solution. An LED low temperature warning light. I also got a LED charging light as well so i could keep an eye on the battery level when i have many accessories working.
I opted to fit them into the RHS fairing/indicator console so i used a drill to open the hole for the large LED first (temperature) and a soldering iron to burn a hole for the battery LED. I prefer to use a soldering iron when making holes in plastic and perspex as there is no chance of it breaking or shattering.
the wiring to the LED's. i took power from the front sidelight as these use almost no power, milliamps only
I originally fitted the temp probe here
what it looks like from the riders seat. the small LED remains on if the voltage is correct. if the power dips it turns orange and flashes. Large LED is the low temperature light. This remains off until it gets to 3 degrees and then turns orange too. if it gets colder it flashes and then goes red to warn you of ice.
Once all the wiring was done i fitted the temperature probe to the outside of the pod so i could get a fresh signal from the air. Only this did not work too well as it was getting the wind blast and the wind chill was setting the warning LED off when it was needed. after a week or so i moved the probe into the pod and its been as good as gold since.
Rear Hugger:
I picked up a rear hugger form the NEC show. Made by skidmarks it looks good and is easy to fit. However the primary reason for me buying it was to keep the rear end of the bike clean from road spray and i'm sad to say it hasn't been to successful. Well i think its a bit better but not as good as i hoped it would be. I (rightly or wrongly) expected the rear to stay crap free on the ride back from work on wet roads but nope it full of muck. I supposed I'm expecting too much. It would work better if it sealed around the swingarm I think as it has a gap all around the edge. i might just remove it and fit some sticky spongy foam to seal it.
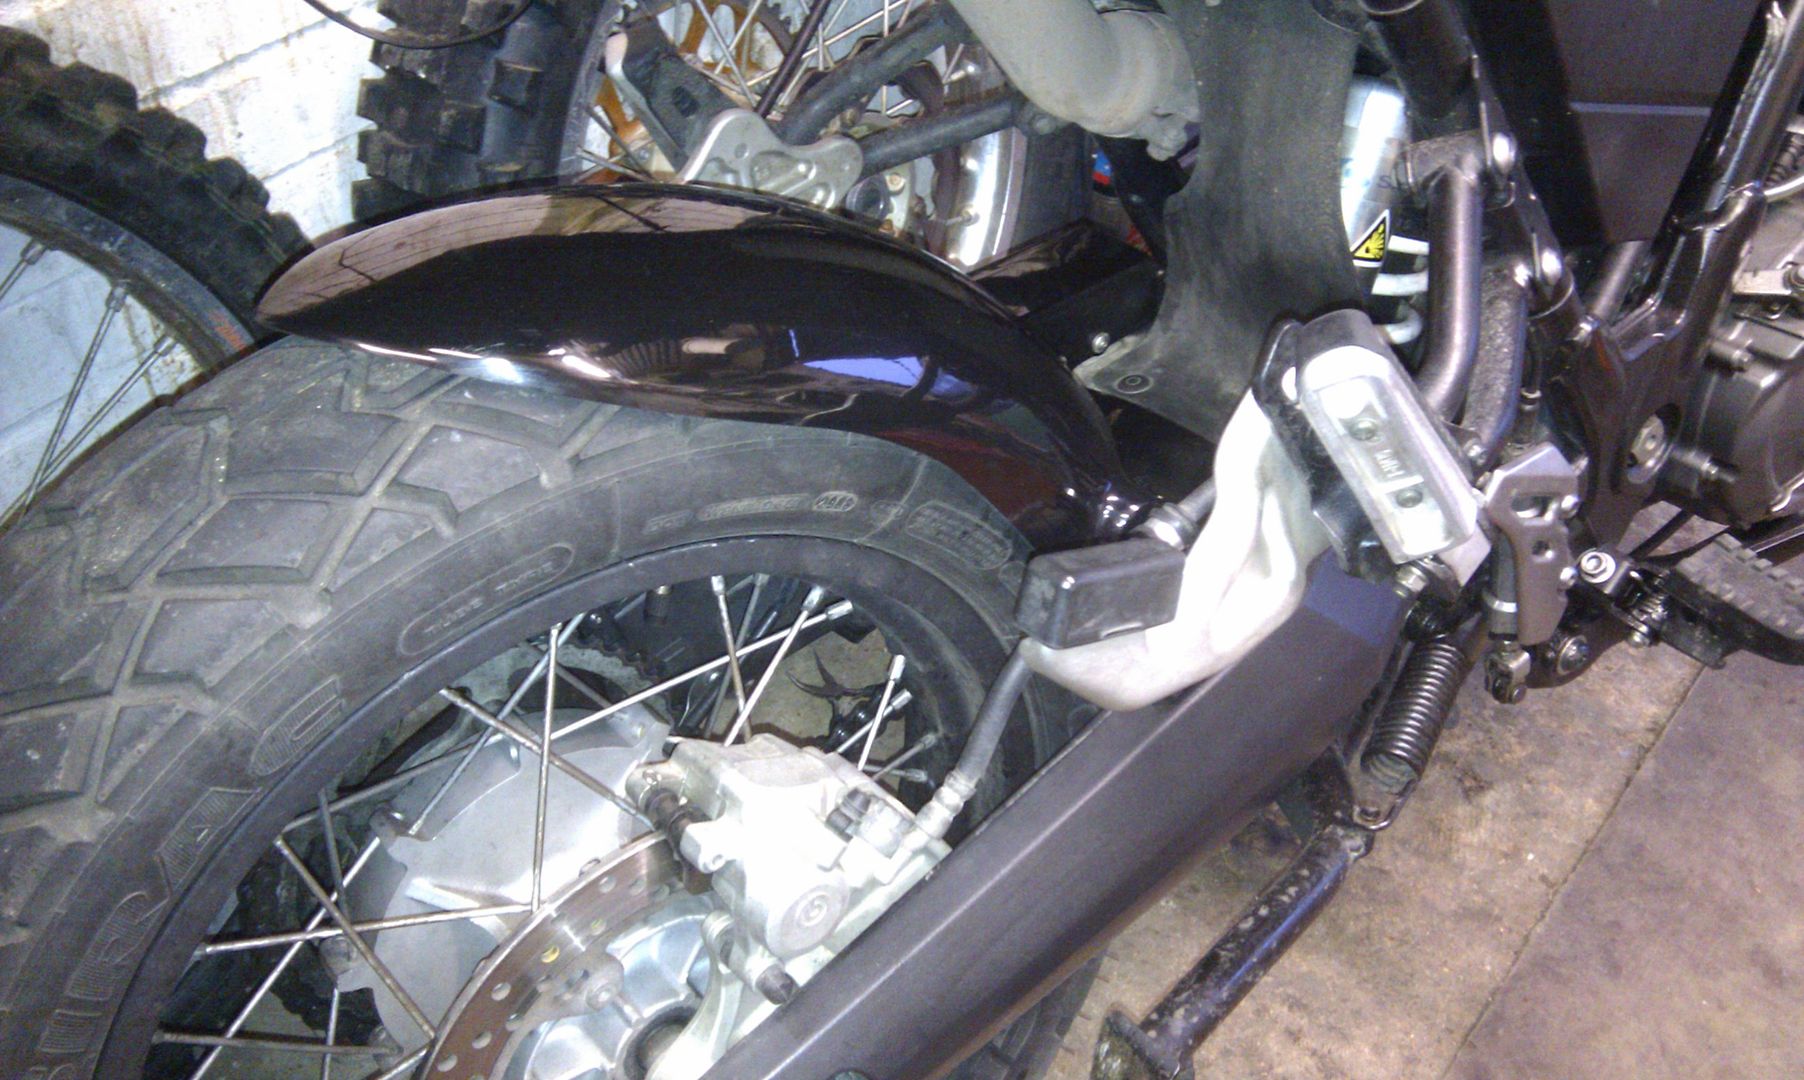
Looks nice, doesn't work that well though. I'll take it off when going off road in the summer.
Heated Grips
Remember that i said earlier that they stopped working pretty early on in their life? Well i could have taken them back but i just never got my butt into gear to do that and when the cold weather hit I knocked something up from bits i had laying about the garage. A little box, and old switch and a 24v LED from a crane at work - voila! Fixed! The controller was shot when i took it apart. Not surprising really as the top part is only sealed by the little stick on cover/sticker. below that the switched are open to water ingress. Totaly not fit for purpose. the top should have a rubber cap covering the whole lid. Anyway they work now. By the way i got these Roxter ones as they were a copy of the Oxford ones and i've heard many Oxford grips have controller problems too so i reckon they get water in just like these.
homemade but it works, and it was free!
GPS
Another homemade part is the little clamp for the GPS bracket. i took a round piece of aluminium and drilled the centre out. i then cut it in half and drilled one side while tapping a thread into the other. One gps bracket with a knob on ready to take the Ram Mount for the Garmin Map 60csx. I then needed to get some power to the unit. The bespoke Garmin lead from some like Touratech is silly money so i looked through Amazon and found a cheap car lead. I cut the car plug end off and used small flat blade crimps to connect it up to the diagnostic plug that is located just behind the plastic dash cover on the left hand side. I use a little plastic cap to keep the rain out of the connections when not in use.
Homemade GPS bracket
If you enjoyed this report and would like to be notified of new reports or web site updates then join the mailing list. To sign up to the list just click HERE>> and send me an email.